04.12
VAL.120.--.M.4L
2
OPERATION AND MAINTENANCE
BETRIEBS- UND WARTUNGSANLEITUNG
UTILISATION ET ENTRETIEN
USO E MANUTENZIONE
-
-
-
-
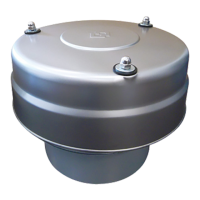
VCP
Series R03
INSTALLAZIONE DELLA VAL-
VOLA AL SILO TRAMITE ANEL-
LO SOTTOVALVOLA
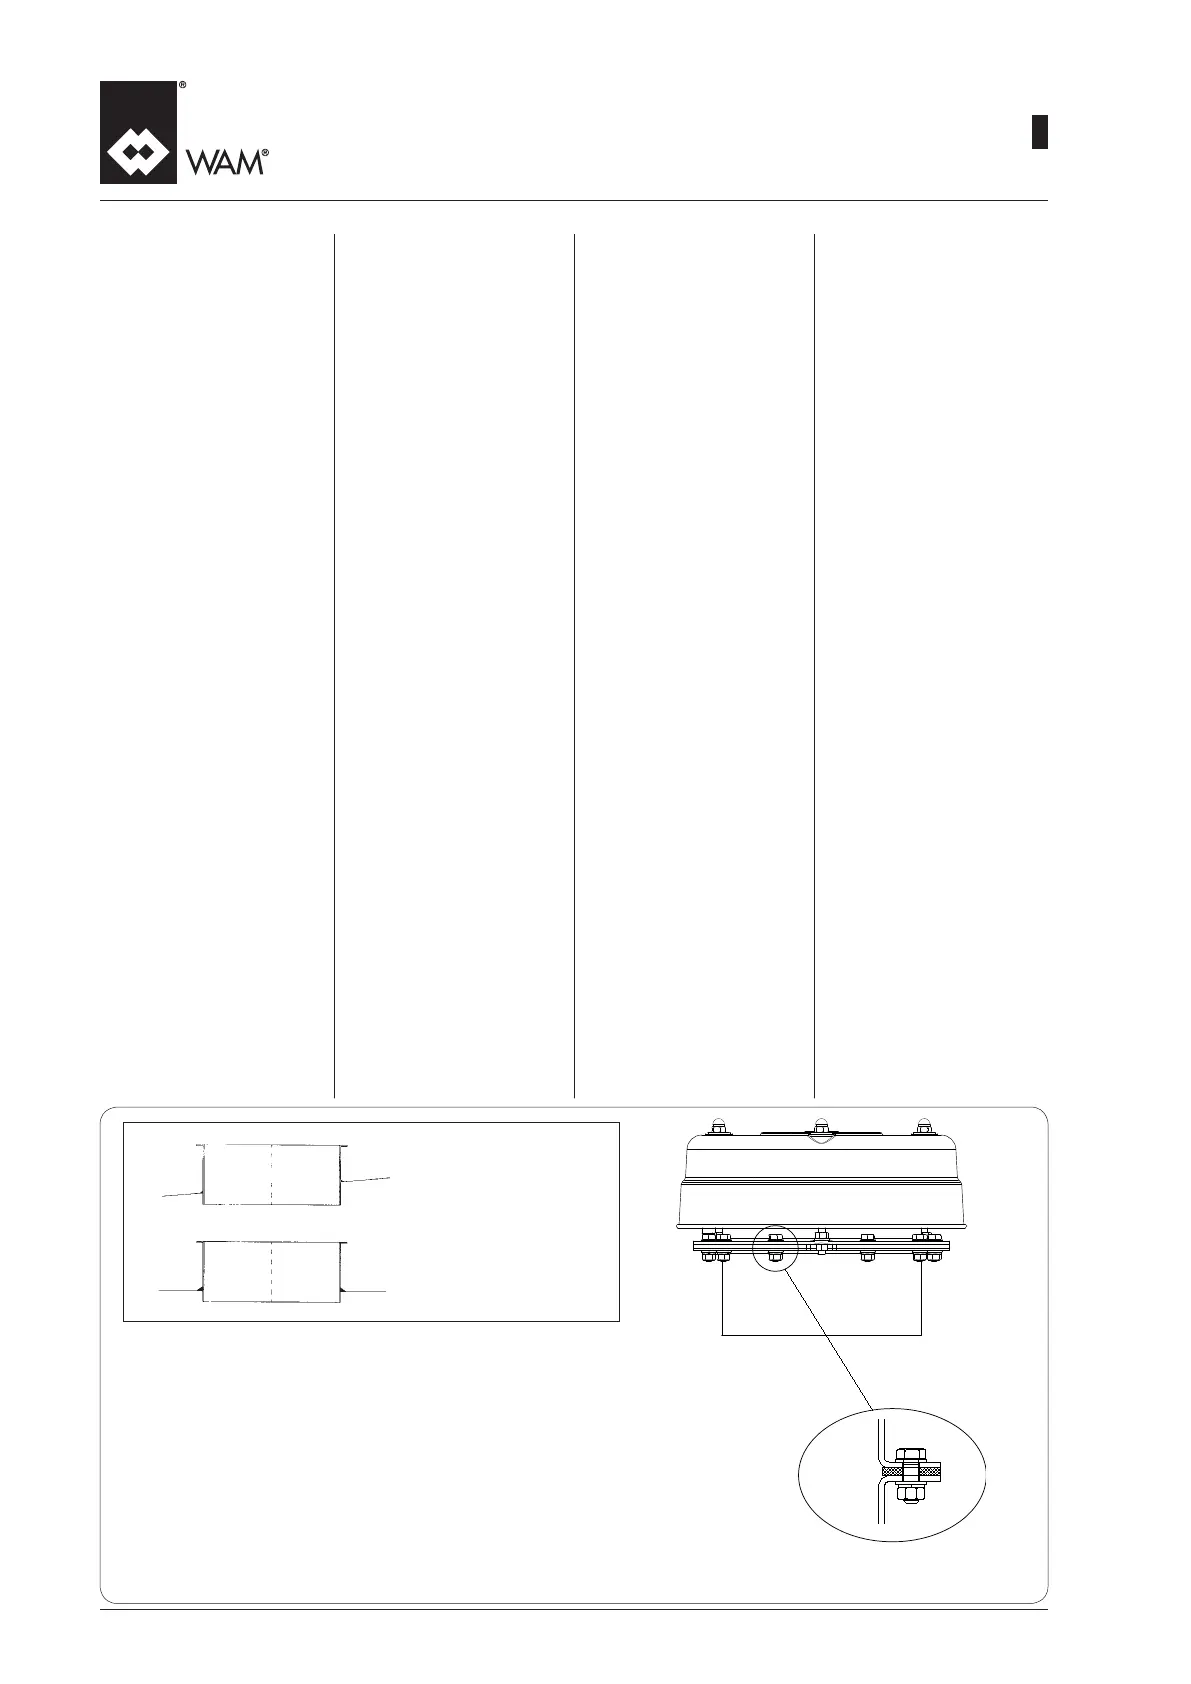
1. Toglierel’imballo.
2. Verificarela coppia di ser-
raggio dei dadi ciechi posti
sul coperchio della valvola a
19÷24Nm
3. Utilizzare l’anello sottovalvola
per tracciare il foro da praticare
sulla sommità del silo.
4. Unavoltaeseguitalaforatura
saldare al silo l’anello sotto-
valvola in modo perfettamente
orizzontale.
N.B.: Le procedure di taglio e di
saldatura devono essere effet-
tuate da personale qualificato,
secondo la nota della pagina
precedente
5. Interporretralaangiadell’a-
nellosottovalvolaelaangia
della valvola stessa la guar-
nizione in elastomero fornita
nella confezione della VCP.
6. Fissare il corpo della valvola
sull’anello sottovalvola tramite
i bulloni forniti e serrare i dadi
adunacoppiadi36÷46Nm.
COLLEGAMENTI ELETTRICI
L’installatore dovrà provvedere a
interfacciare la macchina e tutte
le parti di dell’impianto su cui è
installata la VCP con i necessari
comandi di avviamento / arresto,
arresto di emergenza, reset dopo
un arresto di emergenza, microin-
terruttori per i portelli di ispezione;
rispettando le normative vigenti
(CEIEN60204-1,UNIEN1037,
UNIEN1088,UNIEN953)
22
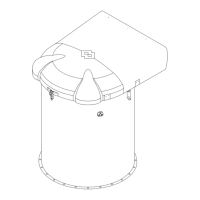
Fig. 1/A Silo with inclined roof
Silo mit schrägem Dach
Silo avec toit incliné
Silo con coperchio inclinato
Fig. 1/B Silowithatroof
Silo mit achem Dach
Silo avec toit horizontal
Silo con coperchio orizzontale
Fig. 1
INSTALLATION DE LA SOU-
PAPE AU SILO PAR UN AN-
NEAU SOUS LA SOUPAPE.
1.
Enlever l’emballage.
2. Vérierquelecoupledeser-
rage des écrous borgnes sur
le couvercle de la soupape est
comprisentre19et24Nm.
3. Utiliser l’anneau sous la sou-
pape pour tracer le trou à
percer sur le sommet du silo.
4. Unefois que le perçage est
réalisé, souder l’anneau sous
la soupape de manière parfai-
tement horizontale.
N.B.: Les opérations de découpe
et de soudure doivent être effec-
tuéespar du personnel qualié,
comme indiqué dans la note
précédente.
5. Interposer entre la bride de
l’anneau sous la soupape et
la bride de la soupape le joint
en élastomère fourni dans
l’emballage de la VCP.
6. Fixer le corps de la soupape
sur l’anneau au moyen des
boulons fournis et serrer les
écrous à un couple de serrage
de36à46Nm.
EINBAU DES VENTILS AUF DEM
SILO MITTELS EINSCHWEISS-
STUTZENS UNTER DEM VENTIL
INSTALLATION OF THE VALVE
ON THE SILO USING RING UN-
DER THE VALVE.
1.
Unpack the valve.
2.Checkthetighteningtorqueof
the cap nuts present on the
valve cover to make sure it is
19÷24Nm.
3. Use the ring under the valve to
trace the hole to be drilled at
the top of the silo.
4. Afterthehole is drilled, weld
the ring under the valve in
such a way that it is perfectly
horizontal.
N.B.: The cutting and welding
operations must be carried out by
qualiedpersonsaccordingtothe
note given earlier.
5. Place the elastomer gasket
supplied inside the VCP pack-
agebetweentheangeofthe
bottom ring and the flange
valve.
6. Fix the valve housing on the
ring under the valve by means
of the bolts supplied and tight-
en the nuts by applying a
torqueof36÷46Nm.
1. DasVentilauspacken.
2. DasAnzugsmomentder Hut-
muttern auf dem Deckel des
Ventils prüfen. Es muss19-24
Nm ausmachen.
3. Den Einschweißstutzen benut-
zen, um das Loch zu markieren,
das oben auf dem Silo zu vorzu-
sehen ist.
4. WenndasLochgebohrtworden
ist, den Einschweißstutzen per-
fekt horizontal aufschweißen.
N.B.: Schneiden und Schweißen
sindArbeiten,dienurvonqualizier-
tem Personal ausgeführt werden
dürfen, so wie bereits im vorherigen
Abschnitt erwähnt.
5. Zwischen den Flansch der Ein-
schweißzarge und den Flansch
des Ventils selbst die Elasto-
merdichtung legen, die in der
Packung des VCP mitgeliefert
wird.
6. Das Ventilgehäuse auf der Ein-
schweißzarge mit den gelieferten
Schraubbolzen befestigen und
die Muttern mit einem Anzugs-
momentvon36-46Nmanziehen.
RACCORDEMENTS ELEC-
TRIQUES
L’installateur devra relier la ma-
chine et toutes les parties de l’ins-
tallation sur lesquelles est instal-
lée la VCP avec les commandes
de mise en marche/arrêt, arrêt
d’urgence, remise à zéro après
un arrêt d’urgence, micro-contacts
pour les portillons d’inspection,
dans le respect des normes en
vigueur(CEIEN60204-1,UNIEN
1037,UNIEN1088,UNIEN953).
ELEKTRISCHE ANSCHLÜSSE
Der Installateur muss dafür sor-
gen, die Maschine und alle Teile
der Anlage, in der die VCP in-
stalliert ist, mit den notwendigen
Bedienelementen für Start/Stopp,
für Not-Halt, zur Rückstellung
nach einem Not-Halt, und den
Mikroschaltern für die Inspekti-
onsklappen zu verbinden, wobei
die geltenden Normen zu beach-
tensind(CEIEN60204-1,UNIEN
1037,UNIEN1088,UNIEN953).
ELECTRICAL CONNECTIONS
The installer must interface the
machine and all parts of the plant
on which the VCP is to be installed
with the necessary commando for
start-up/stop, emergency stop, re-
set after emergency, micro switch-
es for the inspection hatches, in
compliance with the standards in
force(CEIEN60204-1,UNIEN
1037,UNIEN1088,UNIEN953)
 Loading...