1.
2.
3.
1.
2.
3.
4.
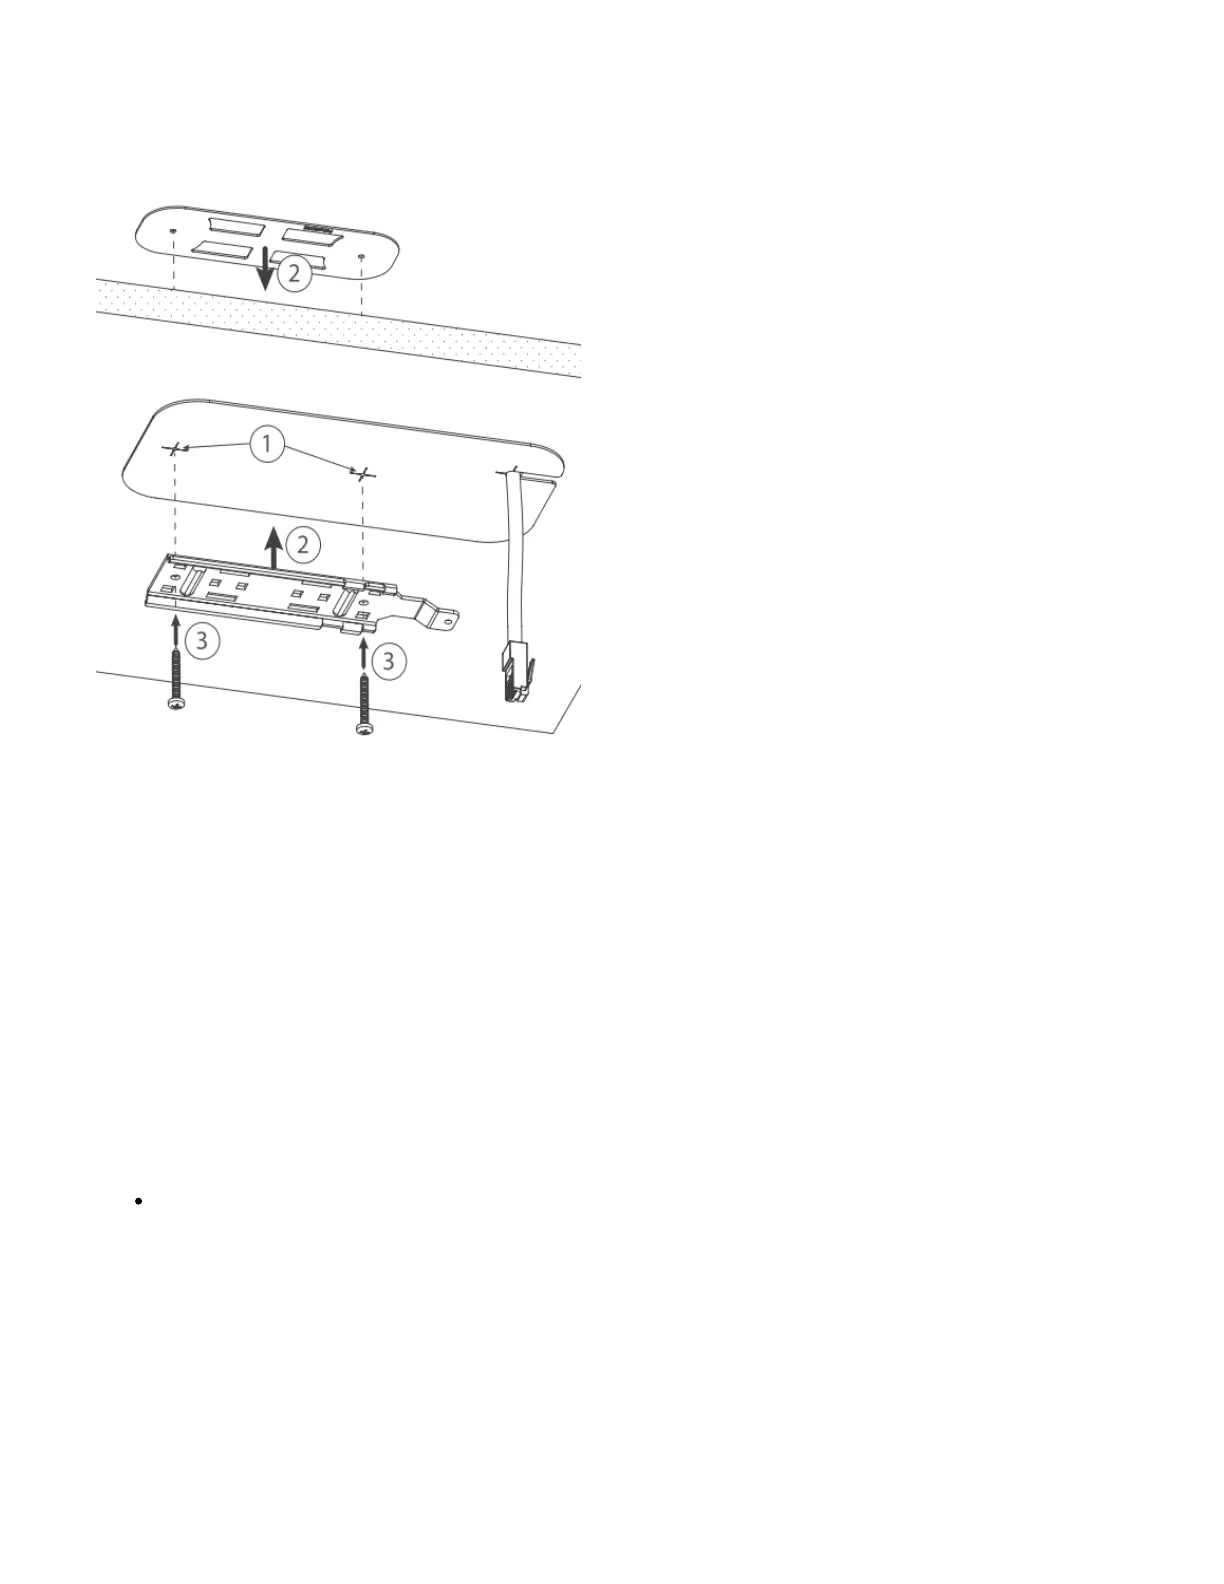
Mounting on the ceiling:
A Special bracket is included in the package to mount on the drop ceiling. As it consists of two parts, to be attached on both sides of the ceiling tile.
Use the template to mark spots for holes.
Place both mounting brackets on the spot.
Secure them together using screws.
Continue assembling in the same manner if mounting on the wall.
Extend your Ethernet cable through the opening and connect to the Ethernet port.
Mount the device on the steel bracket.
Secure it in place with the screw.
Close bottom latch.
Bottom Lid
The bottom lid is secured in place with the captive screw.