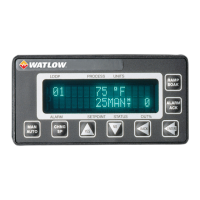
Watlow EZ-ZONE
®
PMI Controller • 237 • Chapter 11 Appendix
As can be seen on the previous pages, the PM Implicit Assembly defaults (factory settings)
to a populated assembly structure for the rst 20 members. If it is desired to modify any of
the given assembly members there are many software tools available to do so, one of which
is available on the Watlow website. Click on the link below and then type "implicit" into the
keyword eld and click the search button.
http://www.watlow.com/en/resources-and-support/Technical-Library/Software-and-Demos
Click on and save the program named "EZ-ZONE Implicit Message Assembly Programming Ap-
plication" to a location on your local storage device. To learn more about working with the
implicit assemblies turn to the section within this user document
entitled Modifying Implicit Assembly Members.
Compact Class Assembly Structure
On the next six pages, the 17 available members of the Compact
Class are displayed. As an orientation to the format as displayed in this document, notice
that each member begins with header identied as "Assembly" and below the header you will
see the member number along with parameter information contained within. While looking
at these illustrations keep in mind that each member is actually 32-bits in length. To better
illustrate this information in this document, the following 6 pages present these members
divided in half where the letter "A" in the page header and assembly number represents the
most signicant 16-bits where the letter "B" in the title and assembly number represents the
least signicant 16-bits of each member. In the event that these pages are printed out and
then mixed up, simply match up the page headers placing them side by side. As an example,
Compact Class 1A through 7A should be paired with Class 1 B through 7 B, left to right.
For further explanation as to what the Compact Class assembly is, navigate to the section
entitled "Compact Assembly Class"

 Loading...