4
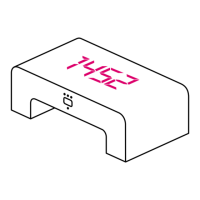
Congratulations on choosing your Wattson energy monitor. Wattson lets you
see your electricity usage and generation, giving you the motivation to use
less and reduce your electricity bills.
With both numbers and colours, Wattson measures the total amount of
electricity being used in your home in real time, and shows this value on
an easy-to-read display. When connected to a Solar PV power system it
will also show how much energy you are generating.
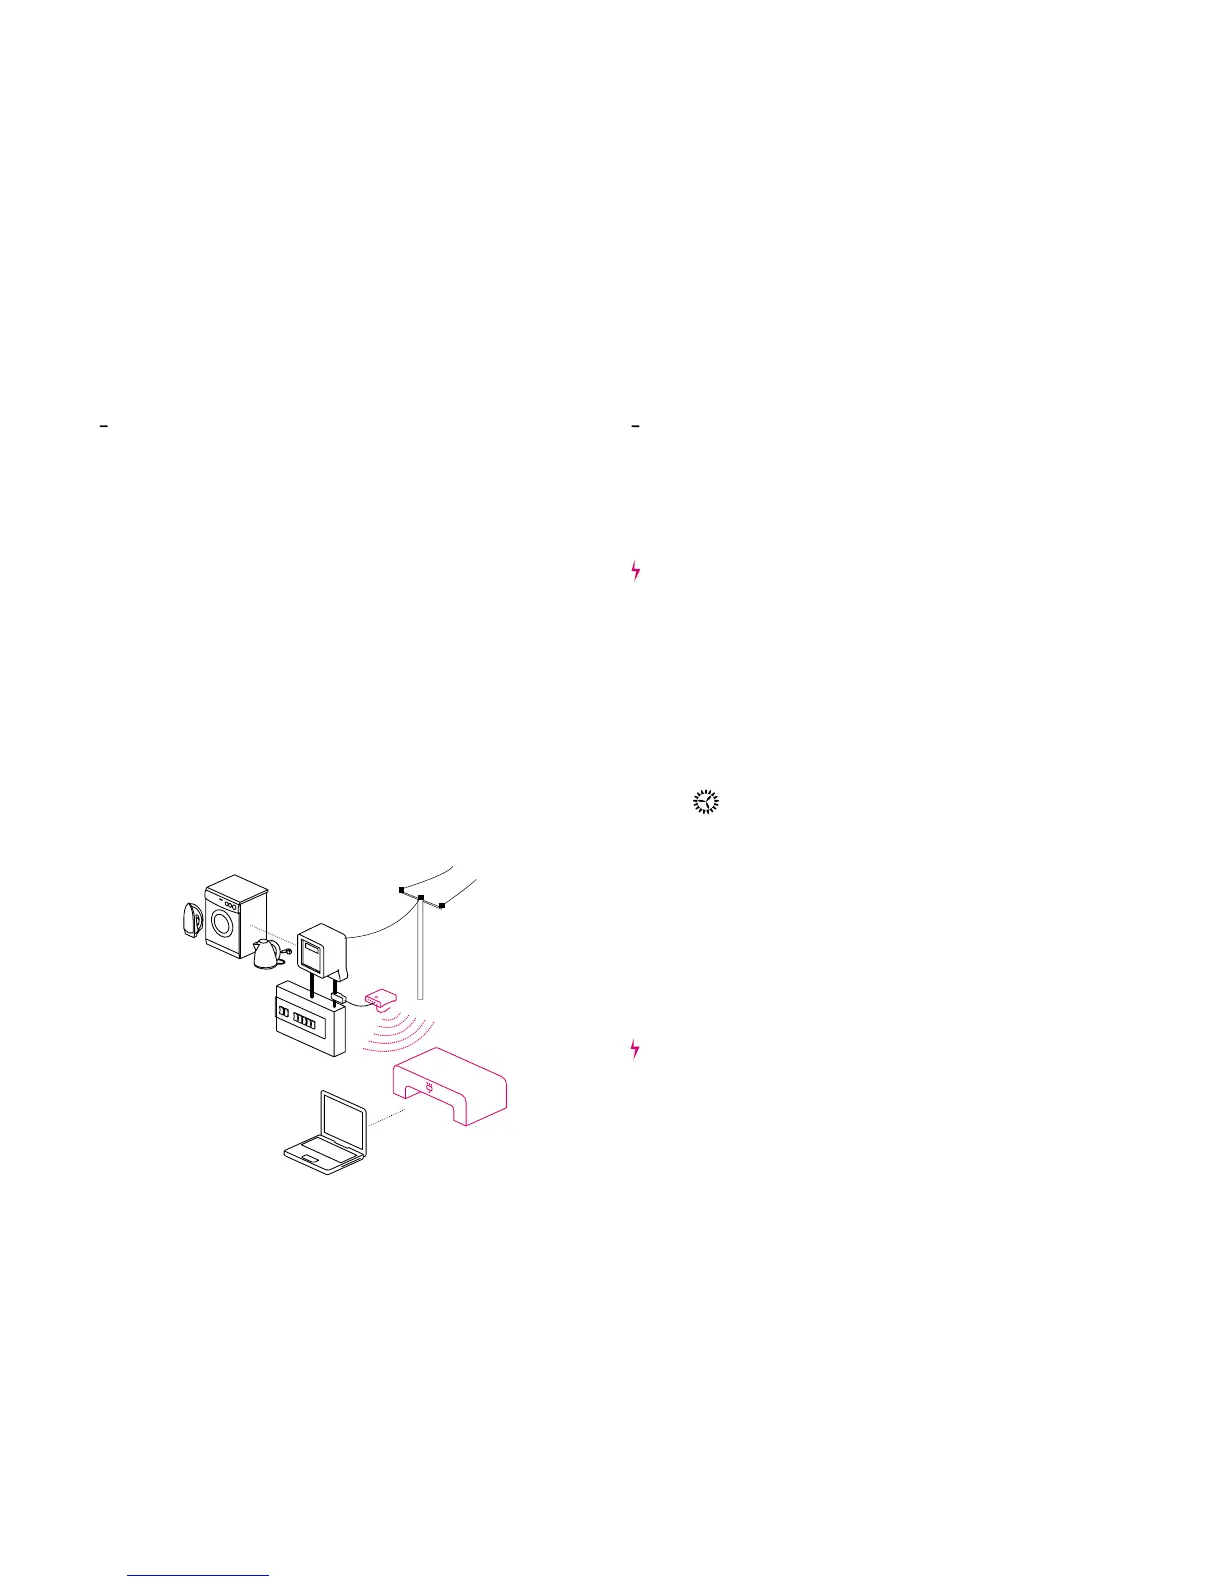
Wattson can also store up to 28 days of energy which can be downloaded
to your computer and viewed using software available from our website:
www.wattsonsolar.com.
Extreme care must be taken when working with electrical equipment
as touching exposed electrical wires or components may result in
electrocution causing death. In AUSTRALIA Wattson must be installed by a
licensed electrician.
The sensor clips are connected to the transmitter which sends the data
wirelessly to the Wattson display. The display is portable, so can be
located anywhere in your home (up to 100 meters through air or
30 meters through walls), but should be kept powered for best results.
I n s t a l l i n g t h e sensors and transmitter.
1 / Attach the sensor clips.
The sensor clips must be attached to single-core cables (either live or
neutral) in order to measure the electrical power. Simply undo the clip
and fit it around the relevant cable. Make sure the clip top is firm and
secure in the clip base.
Warning: The cables must be easily accessible for the sensor clip to be
fitted - if they are not, please consult a qualified electrician. Further
information on www.wattsonsolar.com.
In AUSTRALIA this step must be undertaken by a licensed electrician.
Please see Quickstart Guide for exact placement of sensor clips on cables.
2 / Plug in the sensor lead(s).
There are 4 sockets on the transmitter. Plug the sensor lead(s) measuring
electricity usage into the socket(s) marked 1, 2 or 3
. (If using the
Y-cable, please refer to the Easifit installation guide).
Plug the sensor lead measuring electricity generation into the socket
marked .
3 / Fit batteries or attach power.
Either insert the 4 AA batteries provided or connect the DC power supply
and the transmitter’s LED will begin to flash.
Battery Installation: Make sure the end of the battery marked
+
goes in
the end of the tray marked
+
.
Mains Power: Plug power supply unit firmly into socket on transmitter.
DO NOT store unused batteries in transmitter.
For best operation make sure that the white aerial on the transmitter is
extended. Metal and dense building materials will shorten the range of
transmission and should be avoided where possible.
Warning: The transmitter must not be left hanging from its leads or put
strain on your wiring. The transmitter must be protected from water and
the elements and must not be used outdoors - this will invalidate your
warranty.
5
HELLO.
 Loading...