MAINTENANCE, CLEANING & STORAGE
WARNING
Improper maintenance & storage of the machine may void your warranty.
Keep the machine clean for beer and safer performance.
MAINTENANCE
Before each use, check all nuts & bolts to be sure they are sufficiently ghtened.
We recommend only manufacturer original parts are used when maintaining this machine. Failure to do so
could invalidate your manufacturer’s warranty.
The engine must be switched off, with the spark plug cap removed, before the machine is unassemb
led,
cleaned, serviced or maintained.
ADJUSTING CARBURETOR
Do not adjust carburetor unless necessary. If you have trouble with the carburetor, see your dealer. Improper
adjustment may cause engine damage and void warranty.
SPARK PLUG
Check the Spark Plug aer every 10-15 hours of use.
Remove the Spark Plug cap
Using the Spark Plug Spanner supplied, remove the Spark Plug by turning it an-clockwise.
Clean & adjust the electrode gap to 0.6-0.7mm
If the Spark Plug is visibly damaged or
worn, replace immediately (See Specificaon for details)
Install the new/cleaned Spark Plug to finger ghtness, before fully ghtening with the spanner.
BLADE SHARPENING
Never aempt to sharpen the blade. It is reversible, so should be turned over when blunt. The blade must
remain balanced; an unbalanced blade will cause excessive vibraon through the machine. Always check
for any damage before each use and replace a damaged blade immediately, with an approved
replacement part.
CLEANING
Keep your machine clean.
Thoroughly clean the machine at the end of each use, paying parcular aenon to cungs in and around
the guard and cung tool.
AIR FILTER
Accumulated dust in the air filter will reduce engine efficiency, increase fuel consumpon and allow abrasive
parcles to pass in the engine. Remove & clean the air filter regularly to ensure opmum performance.
Remove the air filter cover, by releasing the securing winged screw from the front of the cover.
Li
off the cover.
Remove the sponge air filter from the housing.
Tap the filter to remove light surface dust.
Heavy deposits should be washed out of the Air Filter in soapy water. Allow the filter to dry completely.
FUEL FILTER
The fuel tank is fied with a filter. It is situated at the free end of fuel pipe and can be picked out through
the fuel filler neck, with a piece of hooked wire or similar.
Check the fuel filter periodically. Do not allow dust to enter into the fuel tank. A clogged filter will cause
difficult
y in starng the engine or abnormalies in engine performance.
When the filter is dirty, replace the filter.
When the inside of the fuel tank is dirty, it can be cleaned by rinsing the tank out with petrol.
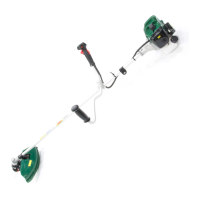
ENGINE STARTING & STOPPING PROCEDURE
STARTING A COLD ENGINE
1. Place the machine onto a flat, firm surface.
2. Keep the cung head off of the ground and clear of any surrounding objects
3. Move the stop switch to "START" posion
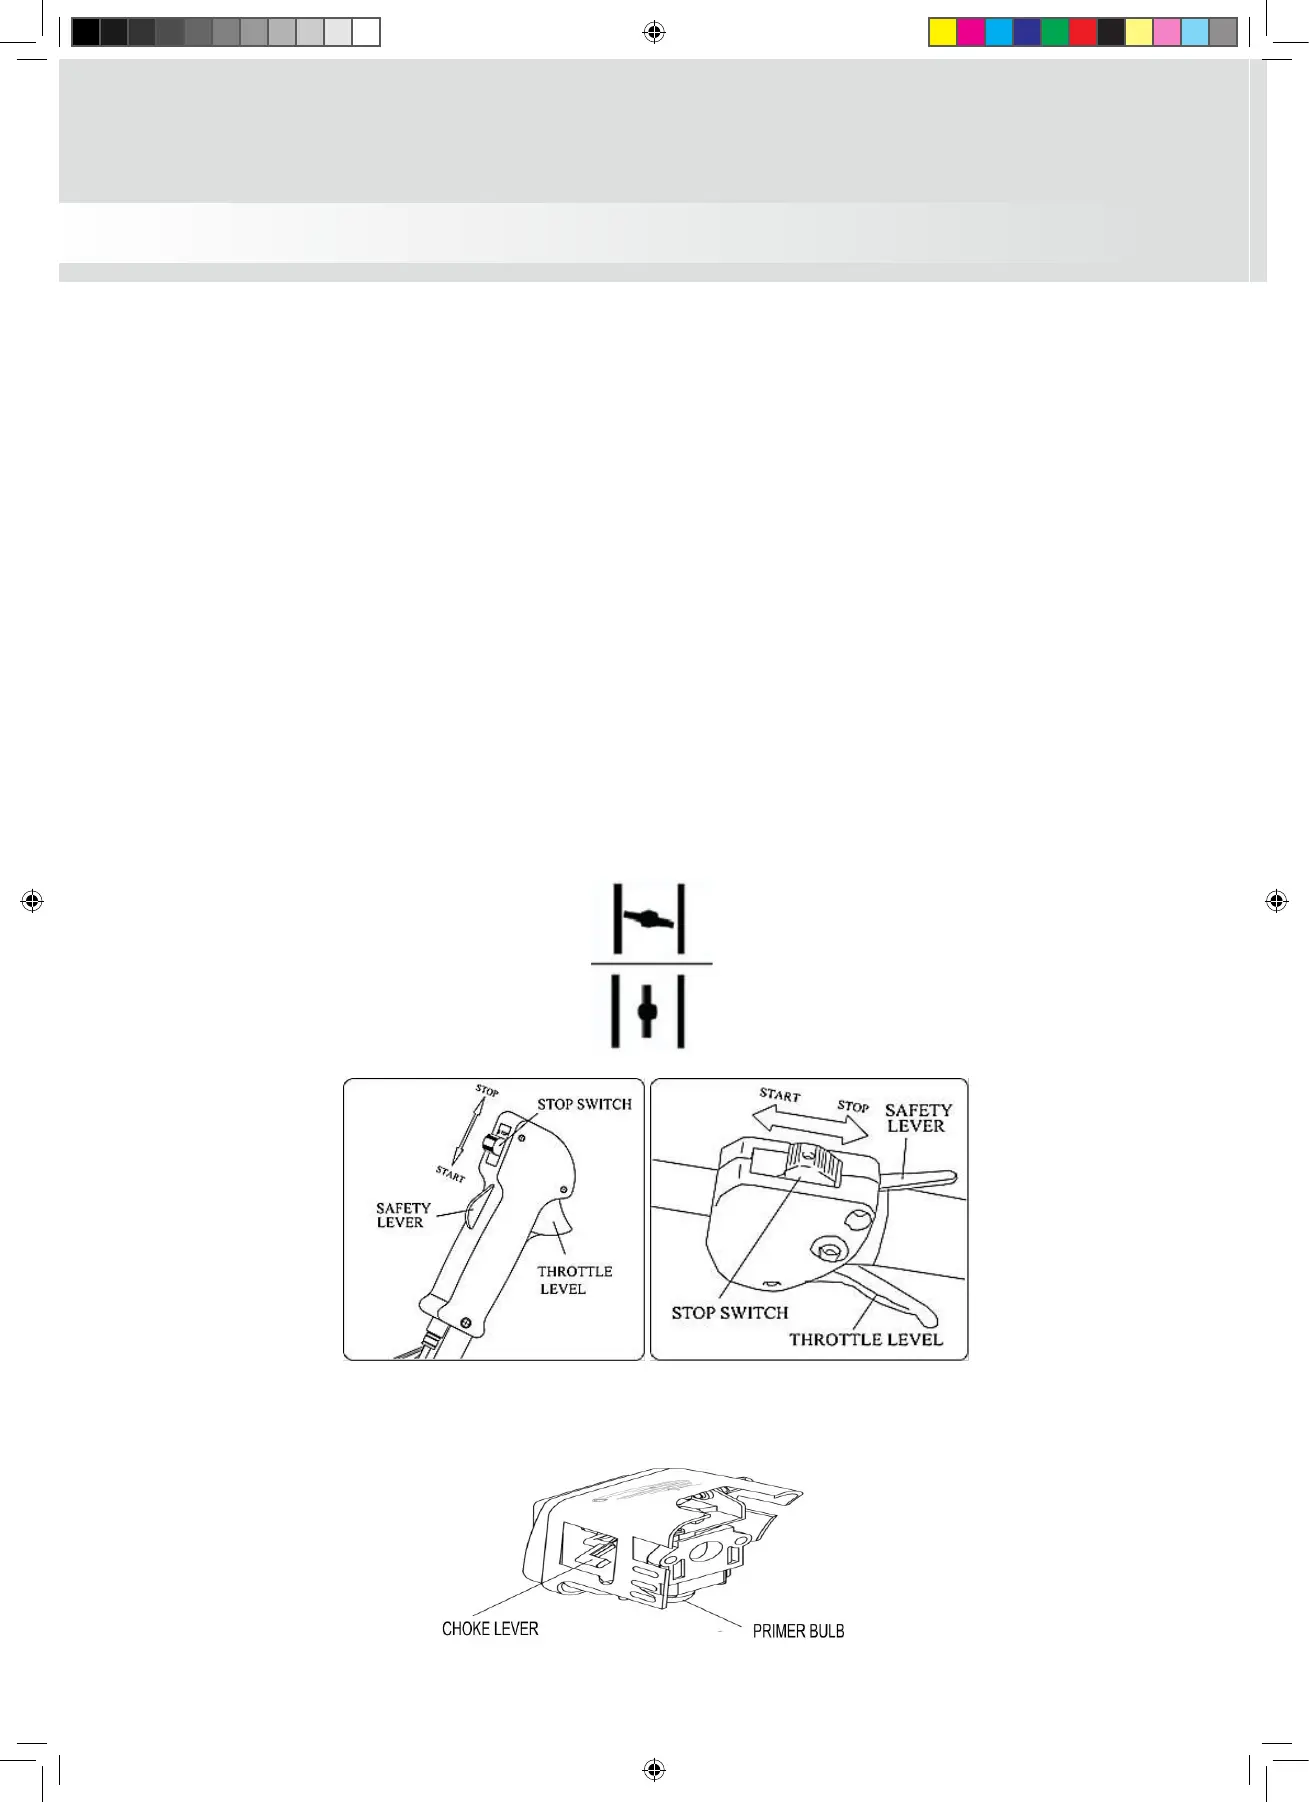
4. Give a gentle push on the primer pump repeatedly (7-10 mes) unl fuel comes into the primer
pump.
5. Pull the Choke Lever up to close the choke
6. Whilst holding the machine down with your le hand, away from the engine and pull the engine recoil
starter rope vigorously, unl the engine false starts.
(DO NOT LET THE RECOIL STARTE
R ROPE RETRACT BY ITSELF, FEED THE ROPE BACK INTO THE HOUSING)
7. Push the choke lever downwards (excessive cranking with choke lever up will cause the engine to
flood, making it difficult to start.)
8. Pull starter handle unl engine starts.
9. Allow engine to warm up for a few minutes before using.
STARTING A WARM ENGINE
1. Move the switch to "START" posion
2. If the fuel tank was run dry on previous operaon, follow steps 3-7 of cold start procedure.
3. Whilst holding the machine down with your le hand, away from the engine and pull t
he engine recoil
starter rope vigorously, unl the engine false starts.
STOPPING THE ENGINE
1. Move the stop switch to the “STOP” posion
Cold Start
Posion
Warm Start or
Run Posion
INSTRUCTION MANUAL
WEBC26 WEBC33 WEBC43 IM.indd 14 27/06/2016 13:42

 Loading...