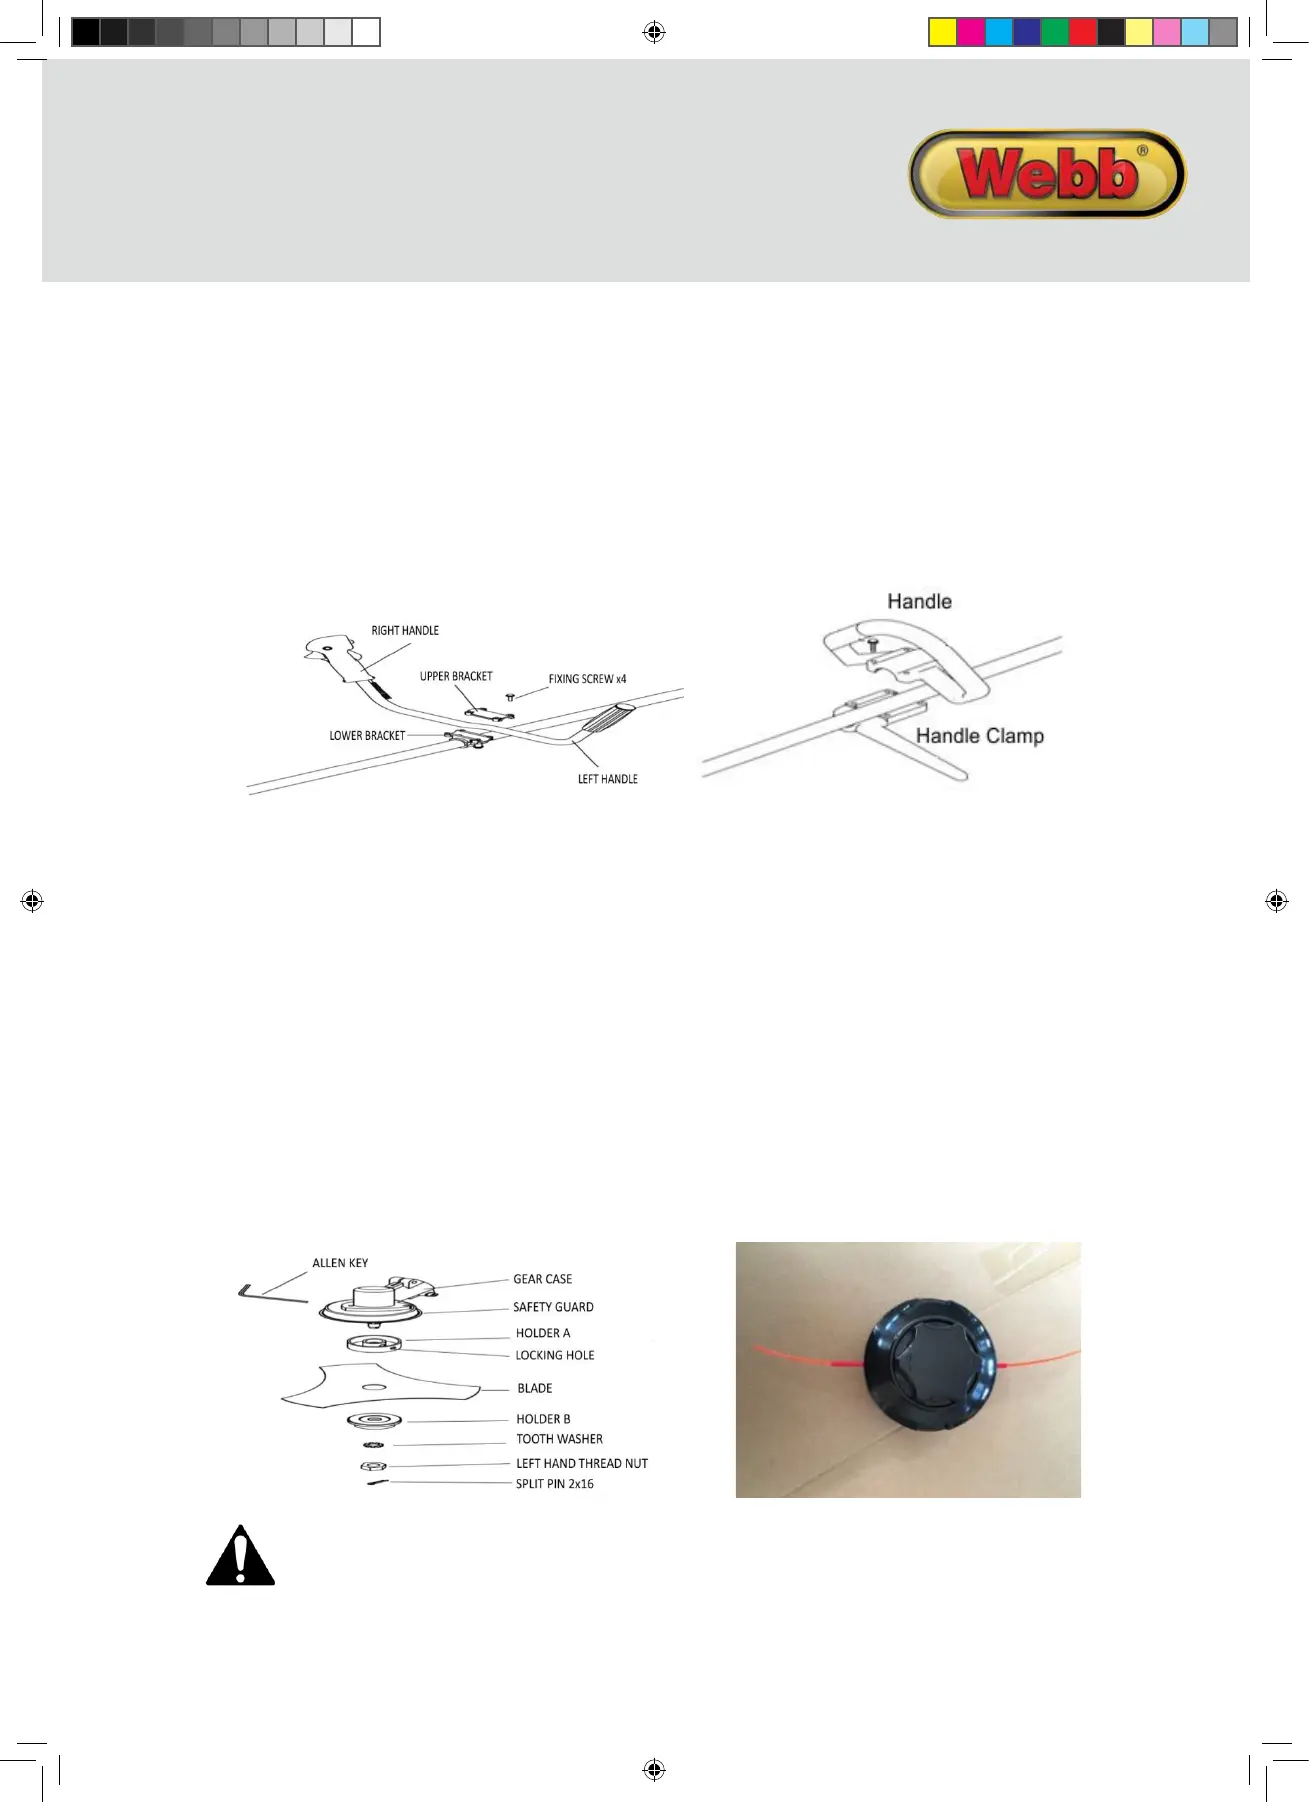
FITTING COW HORN HANDLES (WEBC33 & WEBC43)
1. Install handle on lower bracket.
2. Posion handle in a comfortable operang posion
3. Fit upper bracket.
4. Tighten the four fixing screws.
FITTING D-HANDLE (WEBC26 Only)
1. Place top handle onto drivesha.
2. Posion lower handle, beneath the top handle in a comfortable operang posion
3. Tighten the four fixing screws.
FITTING THE METAL BLADE
1. Install holder A, the blade , holder B, tooth washer, in this order
2. Th
en clamp with the le-hand thread nut.
3. Align hole of gear case and holder A, and insert Allen Key.
4. Rotate le hand thread nut with spanner in clockwise direcon unl securely ghtened.
5. Install the Split Pin 2×16 and split legs to secure.
REPLACING YOUR NYLON LINE
1. Cut 3 metres of 2.5mm diameter Nylon Line.
2. Align the arrows on the feed/bump knob with the eyelets.
3. Feed the line into the feed pipe (supplied).
4. Feed the feed pipe & line in through the first eyelet and out
of the second eyelet.
5. Remove the feed pipe and put in a safe place.
6. Pull the nylon line unl you have two equal lengths.
7. Now rotate the feed/bump knob CLOCKWISE, to wind the nylon line into the head.
8. Stop when you have 150mm of nylon line protruding from both eyelets.
WARNING
EXCESSIVE VIBRATION OF THE METAL BLADE INDICATES IT HAS NOT BEEN INSTALLED CORRECTLY.
STOP THE ENGINE IMMEDIATELY, CHECK THE BLADE INSTALLATION AND RE-INSTALL CORRECTLY. AN
INCORRECTLY INSTALLED BLAD
E CAN CAUSE INJURY.
ASSEMBLY
Remove the machine and contents from the carton. Be sure the carton is empty before discarding.
If you require any assistance with regards to the contents of the lawnmower contact us:
Tel: 01793 333212 - Mon – Fri 8.30am – 5.00pm (excl. Bank Holidays)
Email: customerservice@webblawnmowers.co.uk
FITTING GUARD/SHIELD
1. Install the safety cover onto the sha with the safety cover bracket.
2. Align the four screws of the cover with the safety cover bracket
3. Tighten the screws aer se
ng the safety cover bracket at the appropriate posion.
FITTING THE HARNESS
1. Place the clasp of the harness, through the Harness Eyelet located on the drivesha
2. Adjust the Harness to ensure it is comfortable, but ght enough to allow you to operate the machine
appropriately.
FITTING NYLON LINE CUTTING HEAD
1. Align hole in adapter plate with hole in the sha and install Allen Key.
2. Thread cuer head onto sha (turning it an-clockwise) unl it is ght. Remove locking tool.
INSTRUCTION MANUAL
WEBC26 WEBC33 WEBC43 IM.indd 9 27/06/2016 13:42
 Loading...