CHAIN SHARPENING
Have your chain professionally sharpened at your local approved service dealer. Alternatively, sharpen the
chain yourself using a 3/8” Chainsaw file & guide (We recommend Handy Part HP-106).
CAUTION
Any maintenance and repairs carried out, to any electronic component must be undertaken by a qualified
technician.
CLEANING
• Keep your machine clean.
• Clean the molded plastic housing of the chainsaw using a soft brush and clean cloth.
• Do not use water, solvents or polishes. Remove all debris, especially from the motor cooling vents.
• Remove and brush clean the cover plate, chain and chain bar after 1 to 3 hours of use.
• Clean the area under the cover plate, the drive sprocket and chain bar assembly using a soft brush.
• Clean the oil outlet with a clean cloth.
• If the chainsaw is to be stored for a longer period of time, clean the chain and chain bar.
• Store in a secure, dry place out of the reach of children.
• Do not place other objects on the chain saw.
• To prevent leakage, ensure the machine is left in a horizontal position (oil filler cap uppermost).
• When storing the machine in the original packaging, the oil tank must be completely emptied.
CAUTION
Clean the tool after each use. Failure to carry out proper cleaning can result in damage to the appliance or
cause it to malfunction.
WARNING
Injury may occur when working on the chain. Wear protective gloves.
STORAGE
• For years of trouble free service, make sure the machine is clean and dry before storing.
• Before storing, clean the machine thoroughly as indicated above.
• Store indoors or in a protected area during severe weather and winter months. Always fit the blade guard.
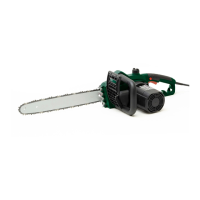
When the log is supported on both ends, as illustrated, cut 1/3 the diameter from the top overbuck. Then
make the finished cut by under bucking the lower 2/3 to meet the first cut.
When bucking on a slope always stand on the uphill side of the log, as illustrated. When “cutting through”, to
maintain complete control, release the cutting pressure near the end of the cut without relaxing your grip on
the chainsaw handles. Don’t let the chain contact the ground. After completing the cut, wait for the saw chain
to stop, before you move the chainsaw. Always stop the motor before moving from tree to tree.
MAINTENANCE, CLEANING & STORAGE
WARNING
Before any maintenance or cleaning operation is undertaken, ensure the mains plug is removed from the
wall socket.
Improper maintenance & storage of the machine may void your warranty.
Keep the machine clean for better and safer performance.
MAINTENANCE
• Before each use, check all nuts & bolts to be sure they are sufficiently tightened.
• Regularly check for obvious defects such as loose, dislodged or damaged chain and guide bar, loose fixings
and worn or damaged components.
• Check that covers and guards are undamaged and correctly fitted. Carry out necessary maintenance or
repairs before using the chainsaw.
• Ensure the breather openings on the motor casing are open and clean from debris. If they are blocked, the
motor could overheat and shut the machine down.
• We recommend only manufacturer original parts are used when maintaining this machine. Failure to do so
could invalidate your manufacturer’s warranty.
REPLACING/CHANGING CHAIN & GUIDE BAR
Fit the chain and guide bar as described in “Assembly and Tensioning Chain”.
The circular groove of the guide bar will wear particularly on the lower edge with time. When replacing the
chain, turn the chain bar 180° to allow even wear, thus extending chain bar life.
Check the drive sprocket. If it is worn out or damaged due to strain, have it exchanged by an authorised service
dealer.
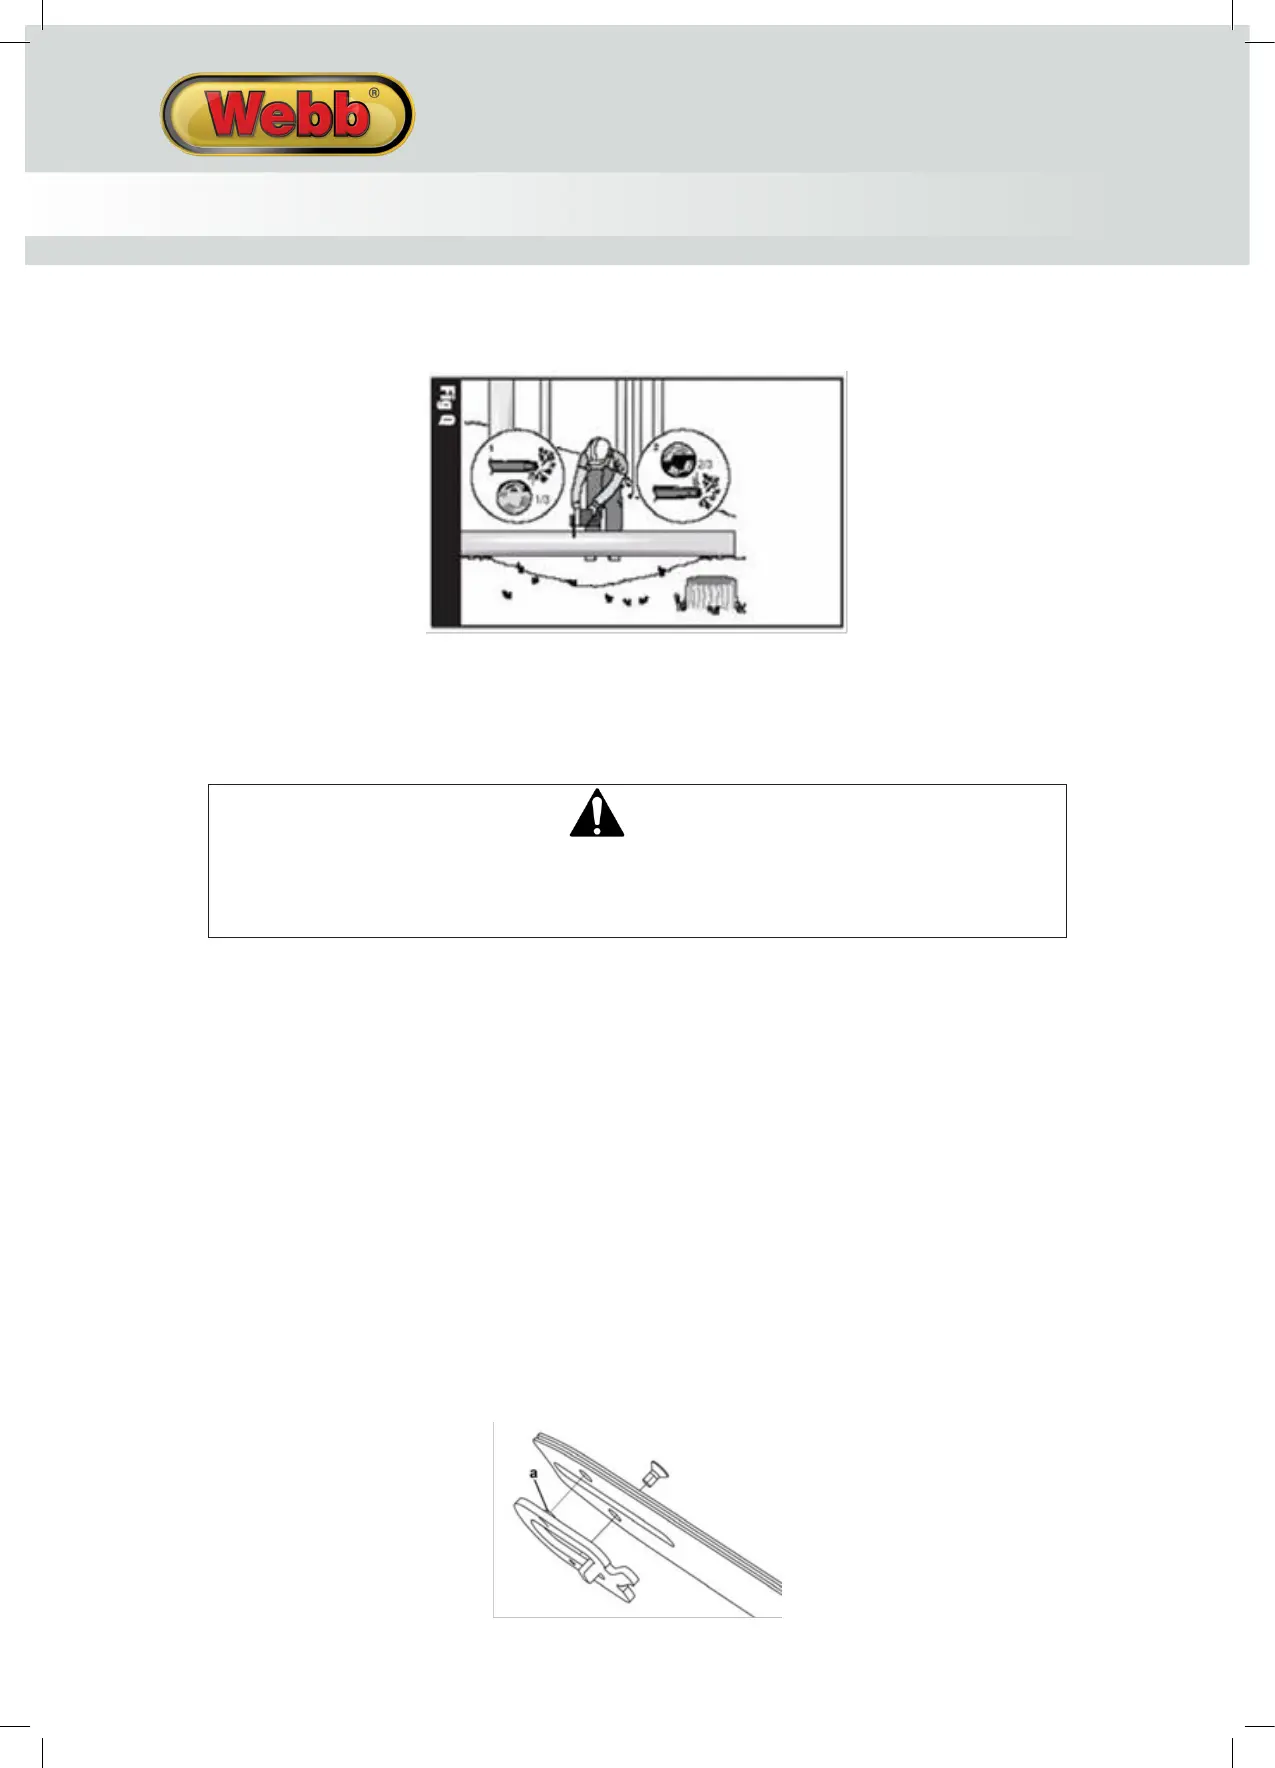
If the chain bar is worn out or damaged, take the chain tensioning catch off the bar by losing the screw anti-
clockwise. Then fit the tensioning catch onto the new bar by tightening the screw clockwise. The catch
protrudes (a) must be fitted into the bar hole.
 Loading...