`çãéäÉíÉ=háí==j^k=
`çãéäÉíáçå=çÑ=~ëëÉãÄäó=Öêçìéë
10
10
632
632
1254
574
574
24
655
655
1258
1255
228
655
282
573
628
210
629
630
282
718
701
560
573
109
628
57-e.DOC / K-MAN Page 9
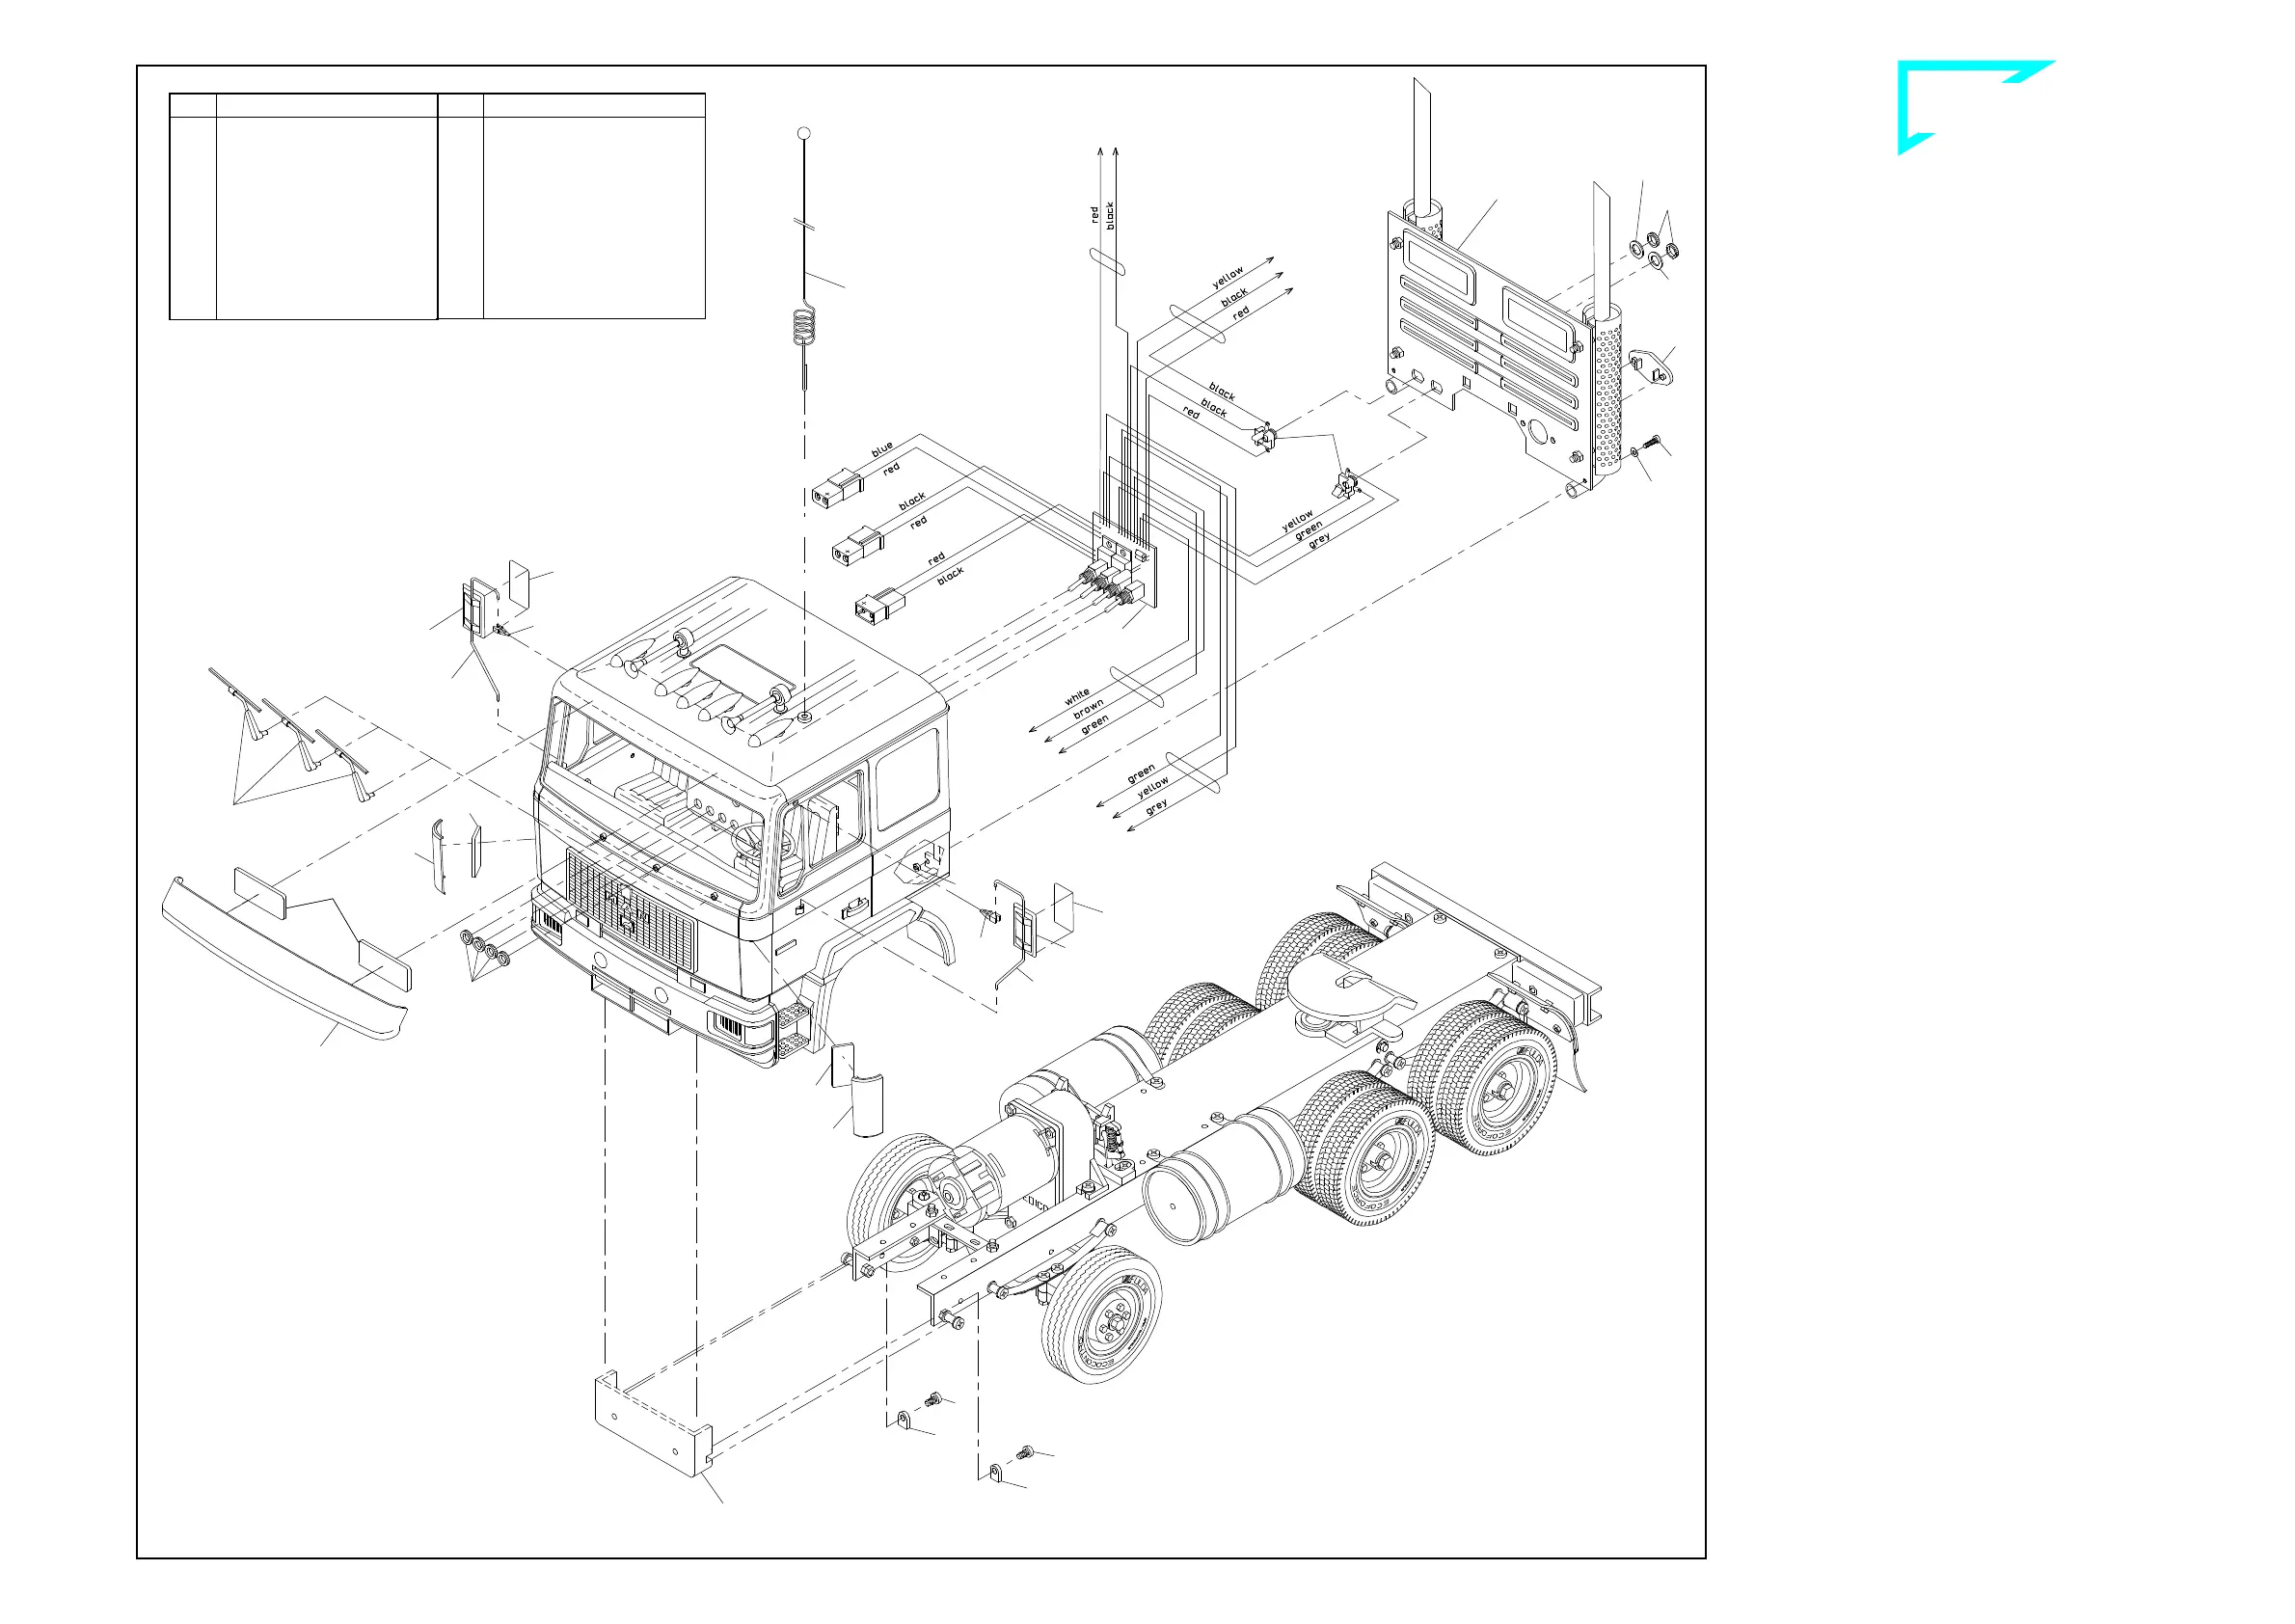
Assembling all sections ill. 12
NO ^ëëÉãÄäáåÖ=~ää=ëÉÅíáçåë=
12.1 Attaching the jacks into the rear panel
The jacks 701 attached to the switch panel are clipped into the
matching slots in the cab rear panel. The insulating discs, red 629
and black 630, are attached from the outside and secured with the
knurled nuts 560. The black insulating disc serves to identify the jack
with the two black conductors.
When installing the rear panel make sure that the solder lugs of
the jacks do not touch!
The oval plug 390 is clipped in the unused holes in the cab rear
panel.
12.2 Attachment of the cab onto the frame
Attach the cab by fixing the front panel onto the frame. Open slots at
the bottom of the front panel serve for this purpose: Slide them onto
those bushings screwed onto the front frame, and then fix them with
two hinge supports 632 and with self-cutting screws 10. Thereby the
cab remains tiltable frontwards. After having slid the rear panel into
the guide grooves of both side panels, use now screws 115, washers
24 and nuts 109 to attach the cab rear panel onto the frame. The
noses of the rear locking device you mounted already onto the frame
will now catch the sparings of the rear panel whereby they are fixing
them, too.
12.3 Attaching the small exterior components
Press the three windscreen wipers 228 into the holes at the front
panel. The sun visor 1258 is attached above the windshield with two
adhesive pads 655. Insert the antenna 718 into the antenna socket
after sliding the ball onto the tip of the antenna.
For the easier identification, both wind deflectors 1254 and 1255 are
marked by different letters: „L“ (left-hand side), and „R“ (right-hand
side); attach them to the cab’s front using one each adhesive pad
655.
Finally add the side mirrors. Stick the reflector foil 574 onto the mir-
rors 573 and press them onto the mirror supports 628. After the clips
282 has been pressed into the upper bore of the door, hang on the
complete mirror unit.
rear panel
section
front panel of the
fully assembled cab
Switch panel
to front PCB
to battery
to blinker
switch
to rear PCB
to terminal strip
for roof lamps
to speed controller
to charging cable
Qty.
No. Assembly part
2
628
Mirror support, MAN
1
629
Insulating disc, red
1
630
Insulating disc, black
2
632
Hinge support
4
655
Adhesive pad,
double-sided
2
701
Jack bush 3.5mm
1
718
Antenna with ball
1
1254
Wind deflector -lh-, MAN
1
1255
Wind deflector -rh-
1
1258
Sun visor MAN
Qty.
No. Assembly part
2
10
Self-cutting screw M3 x 8
2
24
Washer 2.2
2
109
Nut M2
2
115
Screw M2 x 8
4
210
Knurled nut M5
3
228
Windscreen wiper
2
282
Fixing clip
1
390
Welsh plug, oval
2
560
Knurled nut M6
2
573
Mirror black
2
574
Mirror foil
B-57-4
B-57-5


 To Next Page
 Loading...

