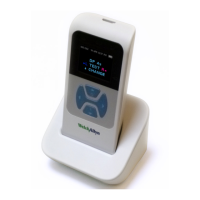
The message "Add a device" appears on the computer.
5. Select this notice, and then enter PIN 1234.
6. The first time the data manager software is launched, select Detect Com Port to
finalize the screener and computer connection.
7. To cancel the pairing process, press the CANCEL control panel button.
The screener returns to the Main menu.
Select a wireless device
When discovery is complete, all discovered devices appear in the order in which they are
found. A compatible thermal printer appears as “ PRT-##-##” (for example, PRT-0a-de).
Other devices appear by their name. These name configurations vary depending on the
device.
1. See "Access menus" for how to access menus.
2. On the WIRELESS DEVICE menu, press either the LEFT or RIGHT control panel
button to select the desired device.
3. Press the PAIR control panel button to pair the screener with the selected device.
The screen confirms pairing with the message “WIRELESS DEVICE PAIRED” .
4. Press the MainMenu control panel button to exit the wireless pairing menu.
5. See “Troubleshooting” in the Maintenance section if wireless pairing is unsuccessful
or if any error messages appear.
Clear test results
The Test Results menu enables you to clear the test results stored in the screener
without printing them.
1. See "Access menus" for how to access menus.
2. Press the DOWN control panel button to advance to the TEST RESULTS menu.
3. Press the LEFT or RIGHT control panel button to clear the results.
4. Press the LEFT or RIGHT control panel button to select Yes or No to clear the
results.
5. Press the NEXT control panel button to advance to the next screen without clearing
the results.
After printing results or transferring data to your computer, all tests saved in memory
are marked for deletion and are permanently deleted when a new test is started. It is
not necessary to manually clear these results.
6. Press the UP control panel button repeatedly to return to the MAIN menu.
Directions for use Device overview 21
 Loading...