
T
Tina CarneyAug 3, 2025
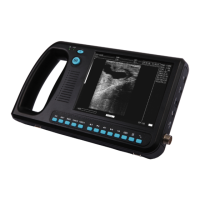
What to do if the WELL.D MEDICAL WED-3000V image display is noisy?
- KKelly MccarthyAug 3, 2025
If the WELL.D MEDICAL Medical Equipment image display is noisy, first verify the stability of the adapter's 14V output. Then, check for any electric or magnetic field interference near the equipment. Finally, ensure the probe plug and jack are correctly connected.