INSTRUCTION MANUAL
OPERATION
Before operation, you must assemble your Service Cart following the instructions above.
1. On a level surface, with the rear casters locked, begin placing objects onto your service cart.
Remember to distribute items evenly; uneven weight distribution could cause the cart to tip.
2. Unlock the rear casters and begin rolling the cart.
3. When stopped, lock the rear casters and unload the cart.
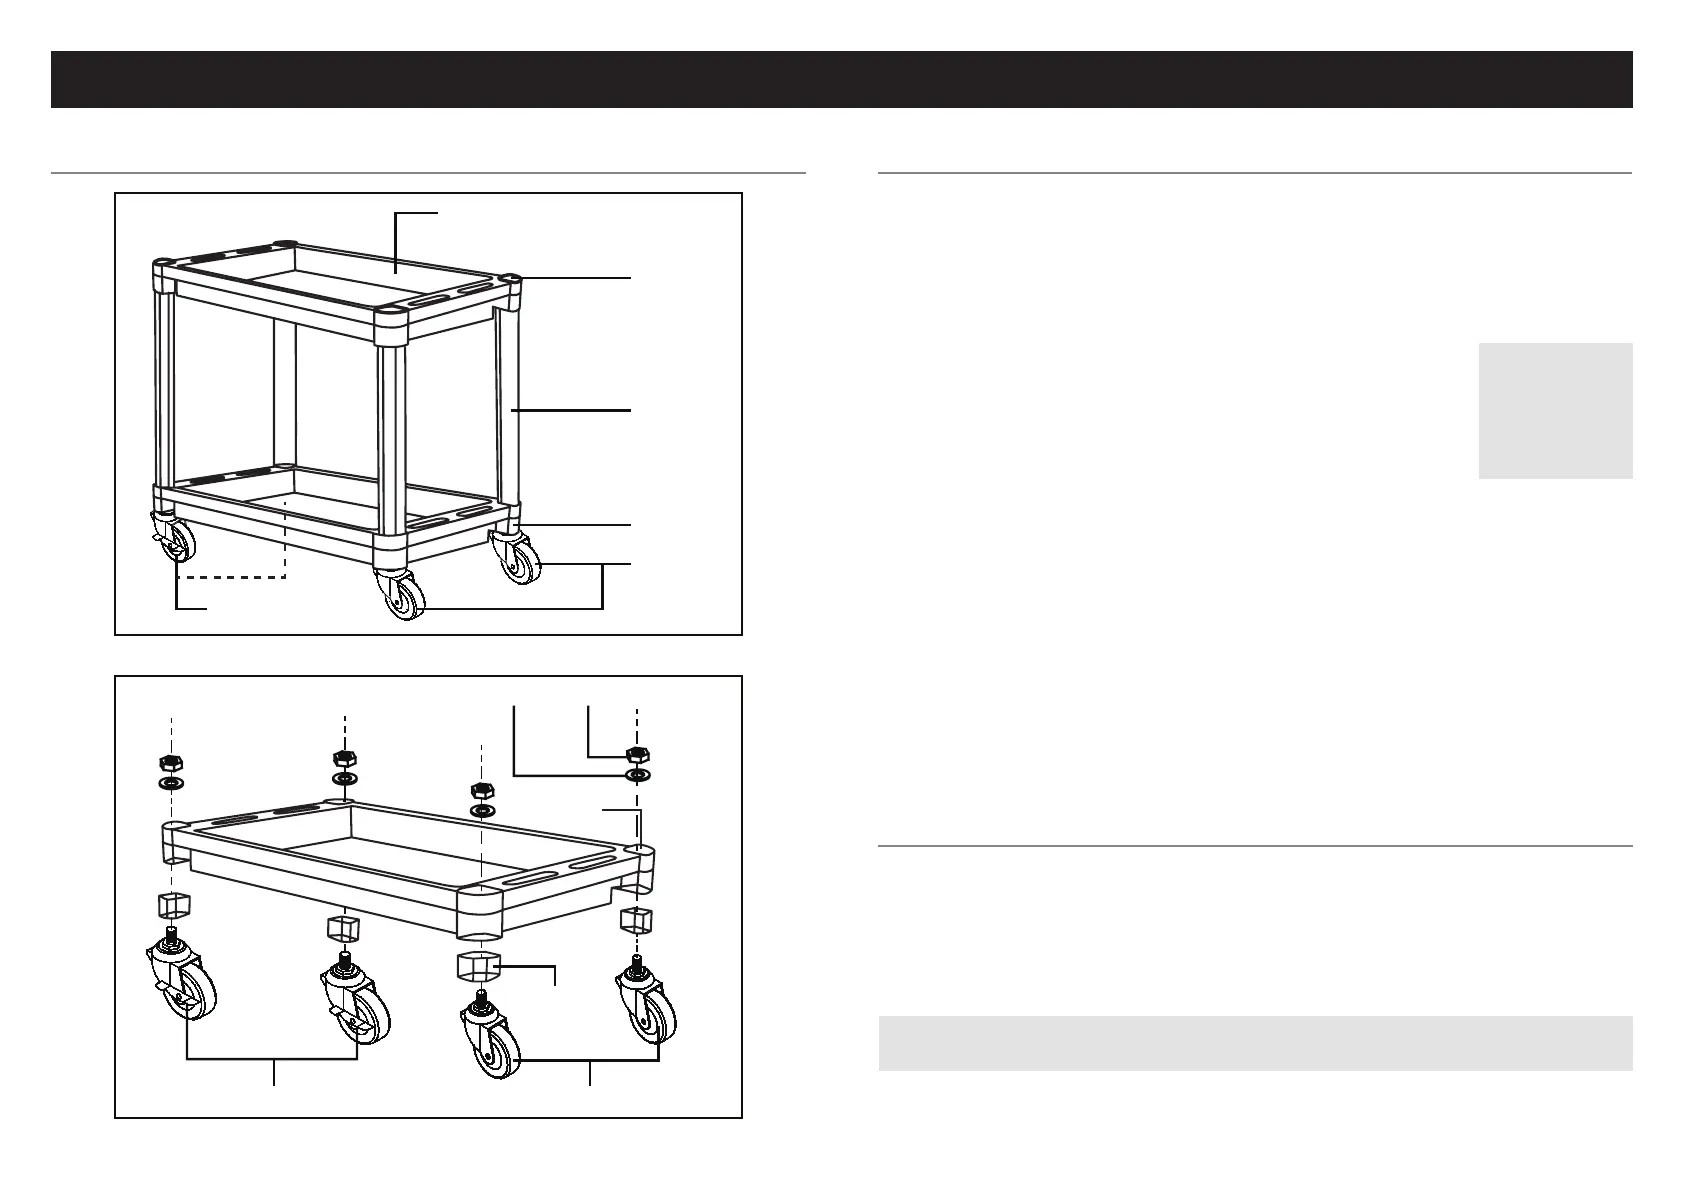
GET TO KNOW YOUR SERVICE CART
ASSEMBLY
See the "Get to Know Your Service Cart" section on page 2.
1. Remove all parts and hex tool from the box.
2. Place the bottom shelf upside down on the oor. Insert a holder into each of the four openings
located on the corners of the shelf. Use a rubber hammer (not included) to secure them into
place; there should be no space where the holders and base meet.
3. Push a nut into the hex tool and set aside. Propping the shelf on its side,
insert a caster through the hole in the holder and the base assembly.
Place a washer onto the thread of the caster shank. Take the loaded hex
tool and turn right to secure the nut onto the thread of the caster shank.
Repeat with all four casters, making sure that the two non-locking casters
and the two locking casters are on the same short sides as each other.
See Fig. 2.
4. Set the assembled base down with wheels touching the oor. Push the four legs into the
openings located on the corners of the base. Tap them into place with a rubber hammer.
5. Take the top shelf and align the legs with the openings in the corners of the shelf. Tap the four
corners of the top shelf with a rubber hammer to fasten the top shelf to the legs.
6. Push the four covers into the openings on the corners of the top shelf. Tap into place with a
rubber hammer.
7. Make sure all connections are ush and hardware is tightly fastened. Roll the cart to make sure
that the casters roll properly.
8. Your service cart is now ready for use. Do not exceed the total load capacity of 300 lbs, evenly
distributed.
NOTE: To fully
tighten the nuts,
use a 17 mm
socket and a
socket wrench or
impact driver.
Cover
Leg
Holder
Casters
Locking Casters
Fig. 1
2 3
Fig. 2
Opening
Holder
Non-Locking CastersLocking Casters
NOTE: Make sure the locking casters are in the OFF/unlocked position before attempting to push
the Service Cart, otherwise you can risk damaging the casters.
 Loading...