1.7.2 WARNING: The maximum working pressure of
each component in the system may not be the same.
To reduce the risk of over pressurizing any component in the
system, be sure you know the maximum working pressure of
each component. Never exceed the maximum working
pressure of the lowest rated component in the system. Over
pressurizing any component can result in rupture, fire, explosion,
property damage, and serious injury. The maximum pressure
in the system is equal to air input pressure times pump ratio.
Regulate air to the pump so that air line or fluid line
component or accessory is over pressurized
1.7.3 CAUTION:
Never allow the pump to run dry of the material
being pumped. A dry pump will quickly accelerate to a high
speed, possibly damaging itself. If your pump accelerates
quickly, or is running too fast, stop it immediately and check
the material supply. If the supply container is empty and air
has been pumped into the lines, prime the pump and lines
with material, or flush it and leave it filled with a compatible
solvent. Be sure to eliminate all air from the material lines.
1.7.4 CAUTION: Maximum fluid pressure 600BAR/8700 PSI.
Under no circumstances should the control
handle be aimed at any person body. Personal injury may be
caused.
1.7.5 Startup
— If there are multiple pumps on the air line, close the air
regulators and bleed-type master air valves to all but one pump.
— Open the master air valve from the compressor.
— Open the dispensing valve into a grounded metal waste
container, making firm metal-to-metal contact between the
container and valve. Open the bleed-type master air valve
and open the pump air regulator slowly, just until the pump
is running. When the pump is primed and all air has been
pushed out of the lines, close the dispense valve.
— If you have more than one pump, repeat this procedure for
each pump.
— Set the air pressure to each pump at the lowest pressure
needed to get the desired results.
— Never allow the pump to run dry of the material being
pumped.
— Relieve pressure before you check or service any system
equipment.
1.8.1 WARNING
— To reduce the risk of serious injury whenever you are
instructed to relieve pressure.
— MOVING PARTS HAZARD Never operate the pump with
the warning plate or the identification plate removed.
These plates protect your fingers from pinching or
amputation by moving parts in the air motor.
1.8.2 Relieve pressure before you check or service any
system equipment.
1.8.3 Problems, cause and solution, see sheet 4.
1.8.4 If lubricant leaks around inlet and threads; apply thread
sealant to tighten threads.
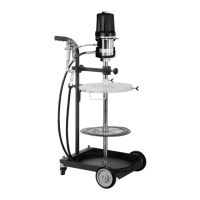
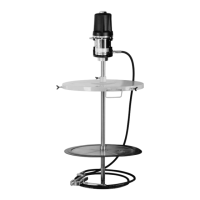
Operating Instructions and Parts Manual
29FX03
Grease Pump Kits
• Maintenance
1. Grease pump should be empty when it’s not been used in a long time.
2. Grease hose and grease gun should be cleaned by kerosene timely so as not to affect the re-use after grease dry.
3. Grease pump, grease gun, grease hose, drum cover, follower plate should be stored in a clean and dry environment.
4. Make sure the grease pump kits clean when you use, then the grease will not be polluted
• Troubleshooting Chart
• Warranty
• LIMITED ONE-YEAR WARRANTY
Should this product fail to perform satisfactorily due to a defect or poor workmanship within ONE YEAR from the date of
purchase, return it to the place of purchase and it will be replaced free of charge. Incidental or consequential damages are
excluded from this warranty.
4
Symptom (s)
Pumps fails to operate
Continuous air exhaust
Erratic pump operation
Pump operates, but output low
Grease leaking from muffler
plates
Possible Causes(s)
Inadequate air supply pressure or restricted air lines
Closed or clogged pump valves
Clogged fluid line, hose, valve, or
other accessory
Damaged air motor
Exhausted fluid supply
Worn or damaged air motor
gasket or seal
Exhausted fluid supply
Worn pump seals
Damaged shovel tube
Worn piston seal
Worn seals
Clogged fluid line, hose, valve, or other accessory
Worn throat seal
Corrective Action(s)
Increase air supply and/or clear restriction.
Open and/or clean.
Relieve pressure.
Clear obstruction.
Assess damage, and service air motor.
Refill and reprime or flush
Assess wear or damage, and service air motor
Refill and reprime or flush
Replace.
Replace.
Replace.
Replace.
Relieve pressure.
Clear obstruction.
Replace
 Loading...