ENGLISH: Instructions for Attaching Facebow Transfer Assembly
4
Positioning the Facebow on the
Patient
1. Before attempting to place the facebow
onto the bitefork, it is suggested the
operator rehearse the following procedure
with the patient. Caution the patient that
the plastic ear pieces in the auditory canal
will greatly amplify noises during the
procedure.
2. A nger cot placed over each ear piece
will help facilitate proper disinfection of the
facebow.
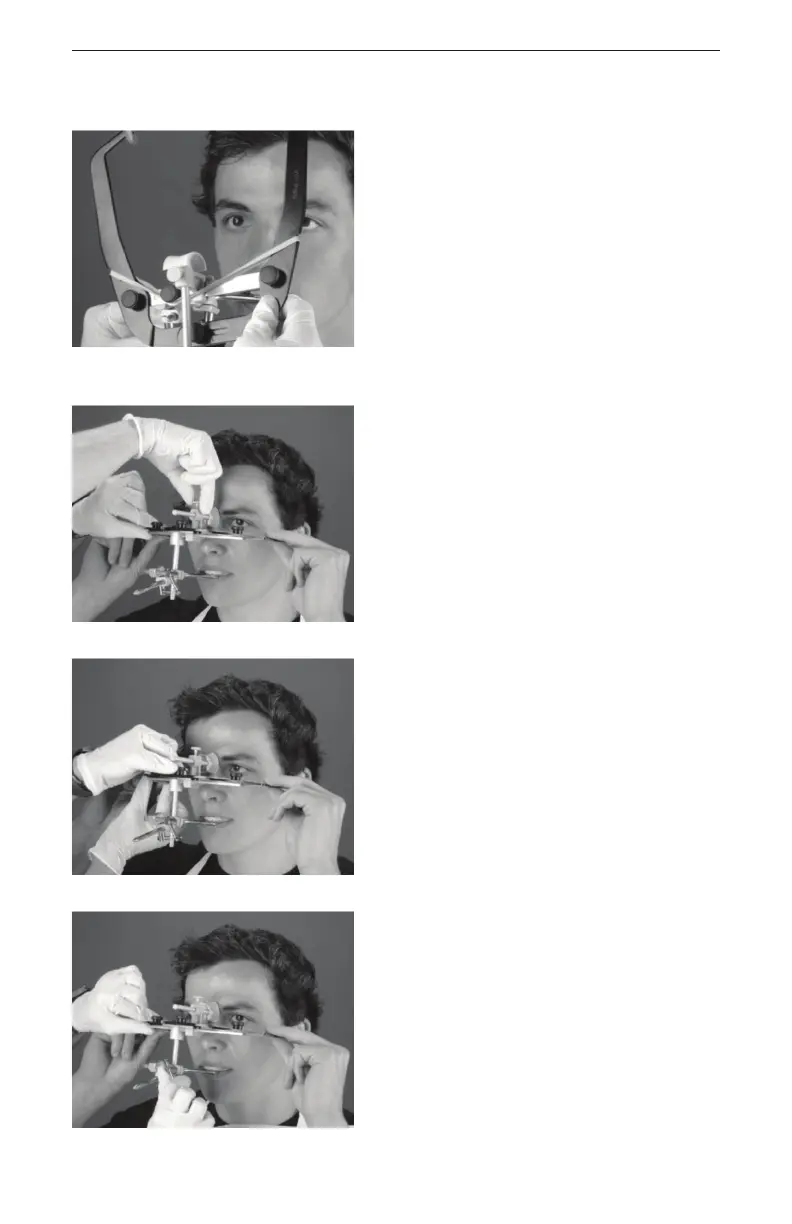
3. With the bitefork positioned in the patient’s
mouth, slowly slide the transfer jig on to
the bitefork shaft. (Figure 6)
4. Have the patient grasp both arms of the
facebow and bring them backwards to
a position just forward of the patient’s
ears. Then have the patient place each
earpiece in the external auditory meatus
and hold in place with a rm forward
pressure.
5. Center the plastic nose piece on the
patient’s nasion and exert rm pressure
on the nose piece shaft while tightening
the thumbscrew of the nasion relator
assembly. This pressure will help to rmly
seat the ear pieces into the external
auditory meatus.(Figure 7)
6. Tighten the thumbscrew on top of the
facebow.( Figure 8)
7. Support the horizontal bar with one hand
and tighten the thumbscrew on the vertical
rod. (Figure 9)
Fig. 6
Fig. 7
Fig. 8
Fig. 9
 Loading...