Do you have a question about the Whirlpool Duet Sport WED8500SR and is the answer not in the manual?
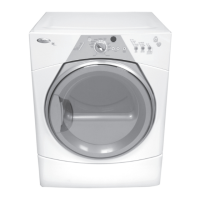
| Appliance Category | Dryer |
|---|---|
| Brand | Whirlpool |
| Model | WED8500SR |
| Capacity | 7.0 cu. ft. |
| Color | Silver |
| Dryer Venting | Vented |
| Number of Drying Cycles | 10 |
| Number of Temperature Settings | 5 |
| Wrinkle Control Option | Yes |
| Moisture Sensor | Yes |
| Energy Star Certified | Yes |
| Control Type | Electronic |
| Width | 27 inches |
| Features | Moisture Sensor |
| Weight | 120 lb |
| Height | 38 inches |
Outlines the objectives for service technicians using this Job Aid.
Lists tools and parts required for dryer installation, both electric and gas models.
Warns about flammable materials and placement for garage installations.
Provides the physical dimensions of the dryer unit.
Details recommended spacing for installing the dryer in confined spaces like closets.
Shows installation spacing when the dryer is placed on a pedestal.
Provides spacing for stacked dryer and washer installations.
Details the electrical supply requirements for electric dryer models.
Explains how to properly connect the dryer to the electrical supply.
Instructions for connecting the dryer using a power supply cord.
Instructions for connecting the dryer directly to the house wiring.
Details on installing strain relief for power supply cords.
Details on installing strain relief for direct wire connections.
Safety warning related to electrical shock for gas models.
Safety and procedural requirements for connecting the gas supply.
Information on Natural gas and LP gas conversion for the dryer.
Guidelines for connecting the gas supply line, including pipe size and shutoff valves.
Details the dryer's gas pipe connection and height considerations.
Recommends heavy metal vent material and specifies acceptable types and sizes.
Recommends rigid metal vent for best performance and to prevent damage.
Discusses acceptable use and installation considerations for flexible metal vents.
Guidance on choosing the best exhaust installation type for the dryer.
Information on converting the dryer for side or bottom exhaust.
Advice on planning the most efficient route for the dryer's exhaust vent.
Provides guidelines for vent material, hood combinations, and maximum lengths.
Specific checks for electric dryers after installation, focusing on starting and heating.
Specific checks for gas dryers after installation, focusing on starting and heating.
Basic steps and important safety warnings for using the dryer.
Instructions for selecting and using automatic drying cycles.
Instructions for selecting and using manual drying cycles.
How to pause, restart, or cancel a drying cycle.
How to enable and disable the child lock feature for the dryer controls.
Details on automatic cycles that adjust time based on fabric moisture.
Description of the Heavy Duty auto cycle for heavy fabrics.
Description of the Normal auto cycle for mixed loads.
Description of the Casual auto cycle for no-iron fabrics.
Description of the Delicate auto cycle for synthetics and knits.
Description of the Super Delicate auto cycle for lingerie and sheer items.
Description of the Damp Dry auto cycle for items needing slight dampness.
Explanation of manual cycle selection for time and temperature.
Using the Timed Dry manual cycle for specific drying times.
Using the Quick Dry manual cycle for small loads.
Using the Touch Up manual cycle to smooth wrinkles.
How the WRINKLE SHIELD feature helps reduce wrinkles after drying.
How to adjust temperature settings for manual cycles.
Using the Air Only setting for drying items without heat.
How to turn the end-of-cycle audible signal on or off.
How to change cycle selections after the dryer has started.
Instructions for using the optional drying rack.
Chart showing suggested settings and times for drying items on the rack.
Importance of keeping the dryer area clear for ventilation and safety.
How to clean the lint screen after every load and for residue buildup.
Instructions for cleaning the dryer drum and interior.
How to remove lint from inside the dryer cabinet and exhaust vent.
Procedures for preparing the dryer for vacation or moving.
Troubleshooting steps for when the dryer fails to power on or start.
Troubleshooting steps when the dryer drum turns but no heat is produced.
Common causes for unusual noises during dryer operation.
Explains how to interpret and respond to error codes displayed by the dryer.
Steps to diagnose and fix issues with drying performance.
Troubleshooting for automatic cycles ending prematurely.
Troubleshooting lint transfer to clothes, often related to the lint screen.
Addressing stains on clothes or inside the dryer drum.
Solutions for wrinkled clothes, usually related to load removal or size.
Identifying and resolving unusual odors from the dryer.
Diagram showing the location of major components within the dryer.
Detailed instructions for removing the console electronics assembly from the console.
Steps to remove the roller shaft and associated parts.
Detailed steps for removing the belt switch.
Steps to remove the flame sensor.
Steps to remove the high-limit thermostat or thermal cutoff.
Procedure for testing the moisture sensor using an ohmmeter.
Procedure for testing the flame sensor.
Procedure for testing high-limit thermostat and thermal cutoff on gas dryers.
Procedure for testing the burner ignitor resistance.
Procedure for testing the gas burner coils resistance.
Procedure for testing the thermal cutoff on electric dryers.
Procedure for testing the heater resistance.
Steps to enter the dryer's diagnostic test mode.
Troubleshooting for when the console indicators do not activate.
Action to take when fault codes are displayed.
How to retrieve and interpret saved fault codes.
How to identify and interpret active fault codes.
Testing the door switch function using the diagnostic mode.
Testing the moisture sensor function using the diagnostic mode.
Testing motor, heater, and console identification in diagnostic mode.
Troubleshooting steps for when the dryer does not power up.
Troubleshooting steps for when the dryer won't start.
Troubleshooting steps for when the dryer does not shut off.
Troubleshooting steps for when control panel selections are not accepted.
Troubleshooting steps for when the dryer does not produce heat.
Troubleshooting for when heat is present in the Air Cycle.
Troubleshooting steps for when the dryer shuts off prematurely.
Verifies proper electrical supply connections to the dryer.
Supply connection tests specific to gas dryer models.
Specific heater test procedures for electric dryers.
Specific heater test procedures for gas dryers.
Adjusts drying mode settings for customer preference.
Steps to access the machine control electronics.
Steps to access the console electronics and housing assembly.
Procedure for removing the dryer's back panel.
Wiring diagram specific to electric dryer models.
Wiring diagram specific to gas dryer models.