Do you have a question about the White Knight 437 and is the answer not in the manual?
This document provides instructions for the use and maintenance of a White Knight Tumble Dryer. It emphasizes safety precautions, proper installation, operational guidelines, and troubleshooting tips to ensure efficient and safe operation of the appliance.
The tumble dryer is designed for normal domestic use. It is crucial to ensure adequate ventilation to prevent backflow of gases from other fuel-burning appliances, such as open fires. Exhaust air should not be discharged into a flue used by other gas or fuel-burning appliances. The dryer should not be placed directly next to ovens or cookers, as this may affect its performance. Ventilation openings at the base of the dryer must not be obstructed by carpets. If stacking the tumble dryer on other appliances, a correct stacking kit must be used. All electrical installation work should be performed by a qualified person.
Regular cleaning of the lint filter after each drying cycle is essential to maintain proper airflow, prevent extended drying times, and avoid tripping the safety cut-out. Only recommended articles should be placed in the tumble dryer. The appliance should be serviced by an appointed service organization using only genuine parts. Any alteration or modification of the product, other than fitting authorized accessories, is dangerous.
It is recommended to unplug the appliance after each use and disconnect it from the electricity supply for long periods, such as weekends or holidays. The rear of the dryer can become quite hot during use, so it should be positioned to prevent access to the back while in operation, and sufficient space should be left on the sides for airflow. The special mains cable and plug assembly must only be replaced with a genuine part from the manufacturer or an appointed service agent. Fluff should be cleaned from the dryer window and around the door seal after each drying cycle to prevent water leakage.
Children aged 8 years and above, and persons with reduced physical, sensory, or mental capabilities, or lack of experience and knowledge, can use the appliance if they are supervised or instructed on safe use and understand the associated hazards. Children should not play with the appliance. Cleaning and user maintenance should not be performed by children without supervision. Children under 3 years old should be kept away unless continuously supervised.
WARNING: The tumble dryer should never be stopped before the end of a drying cycle unless all items are quickly removed and spread out to dissipate heat. All objects, such as lighters and matches, must be removed from pockets. Do not use a two-way adaptor or extension lead; the dryer must be connected to its own socket. Air inlets at the front, base, rear, and sides of the dryer must not be blocked. Fluff accumulation around the tumble dryer should be prevented due to the risk of fire.
The recommended maximum load should not be exceeded. Do not dry unwashed items or articles cleaned with anything other than a water solution. Dripping wet articles should not be dried. If the tumble dryer is suspected to be damaged, it should not be used. Attempting to repair the appliance by inexperienced persons can cause serious injury. Consult a local appointed service engineer and insist on genuine spare parts.
Position the tumble dryer so that the plug remains accessible. Do not block the vent at the front or base of the dryer, as this will impair its operation. The appliance must not be installed behind a lockable door, a sliding door, or a door with hinges on the opposite side to that of the tumble dryer.
The tumble dryer releases warm, damp air in one of three ways:
Rear-vented dryers can be used without a vent hose but not in a confined space. If installed under a work surface, rear-vented machines must use a vent hose. To minimize condensation, it is preferable to vent to the outside, possibly through an open door or window. The best solution is to connect the vent hose to a permanent connection through a wall or a single-glazed window, especially for small, cool rooms. A kit for this purpose is available as an accessory. Front-venting machines must be converted to extendible rear venting before a permanent connection can be made to the outside.
When using a vent hose:
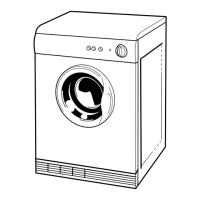
Push the filter into its operating position as shown in the diagram. Instructions for changing the door opening side are on the back page. Remove any dust by wiping the drum and door with a damp cloth. Any initial burning smell will be caused by dust on the heater and will quickly dissipate.
Check care labels inside garments.
Do not tumble dry woollen or wool mixture articles unless specified as suitable to avoid shrinkage. Place delicate articles (e.g., tights, scarves) inside a pillowcase. To avoid ironing easy-care polyester/cotton items, dry small loads (half-fill drum). It is best to dry small and large articles together. Use fabric softeners or similar products as specified by their instructions. Do not overload the dryer or dry large bulky items like duvets or sleeping bags, as this obstructs airflow.
The final part of a tumble dryer cycle is a cool-down period without heat to ensure items are left at a temperature that prevents damage. Items soiled with substances like cooking oil, acetone, alcohol, petrol, kerosene, spot removers, turpentine, waxes, and wax removers should be washed in hot water with extra detergent before being dried. Items such as foam rubber (latex foam), shower caps, waterproof textiles, rubber-backed articles, and clothes or pillows with foam rubber pads should not be dried.
ALWAYS CLEAN THE FILTER AFTER EACH USE. Failure to do so could cause the safety cut-out to operate.
If clothes are not dry after normal drying time:
If the machine does not work, check the following before calling a service engineer:
A call-out charge will be applied for a service visit if the issue could have been avoided by following these instructions.
If problems persist after checking the above points, contact your service agent. Have your serial number and model number ready. The serial number is on a white label inside the door opening. This label also indicates the appliance model number.
A label on the rear of the dryer indicates that the surface is hot when in operation; avoid touching.
This appliance is marked according to European Directive 2012/19/EU on Waste Electrical and Electronic Equipment (WEEE). This guideline provides a European-wide validity for the return and recycling of Waste Electrical and Electronic Equipment.
| Drying Capacity | 7 kg |
|---|---|
| Capacity | 7 kg |
| Color | White |
| Loading Type | Front Load |
| Dimensions (H x W x D) | 850 x 595 x 580 mm |