Do you have a question about the White 30 series and is the answer not in the manual?
Ensure proper installation and grounding by a qualified technician according to codes.
Do not repair parts unless recommended; servicing by qualified technician only.
Avoid touching hot surfaces, wear proper apparel, do not use range to heat room, etc.
Do not store flammables, remove oven door if unused, avoid certain materials.
Use potholders, handle doors carefully, know burner controls, keep vent clear.
Avoid certain utensils, plastic items, wok rings, oven cleaners, and door gaskets.
Do not operate oven during power failure; turn off if power fails.
Range must be properly grounded via a three-prong plug to prevent electrical shock.
Use lids, medium-weight pans, preheat oven only when needed, check food via window.
Push and turn to LITE, then adjust to desired flame size. Manual lighting instructions provided.
Match flame to utensil size; adjust flame for different cooking types like frying and waterless cooking.
Use flat-bottomed, well-balanced pans with tight lids for best results and energy conservation.
Switch controls cooktop light; replacement instructions provided.
Oven light turns on with door; switch controls it when door is closed; bulb replacement provided.
Use selector and temperature controls; turn to OFF when done. Preheating recommended for baking.
Set time of day and use minute timer as a buzzer.
Automatic timer to start and stop oven for cooking. Set start/stop times and function.
Oven air is released through vents at the back of the cooktop for circulation.
Arrange racks while cool; positions for one or two racks provided.
Use proper pans; darkened pans are not suitable. Adjust temp for glassware/dark pans.
Follow recipes, center pans, do not open door frequently, check for doneness.
Common baking issues like burning, uneven cooking, and their causes/corrections.
Dry heat cooking for tender cuts; use meat thermometer; allow to stand after cooking.
Chart with approximate cooking times and internal temperatures for various meats.
Moist heat cooking method for less tender cuts, involves browning and slow oven cooking.
Direct heat cooking under the upper broil burner. Use broiler pan and grid.
Tips for meats, poultry, fish, and vegetables; preventing sticking and curling.
Guide for approximate broiling times for various foods based on thickness.
Clean spills immediately; use mild detergent and water; specific instructions for aluminum, glass, porcelain, stainless steel.
Knobs are removable for cleaning; instructions for removal and replacement.
Routine removal and cleaning of burners to ensure proper ignition and flame.
Range top can be lifted for cleaning underneath; instructions for raising and lowering.
Remove items, wipe spills, clean specific areas before starting the cycle.
Instructions for setting immediate or delayed self-cleaning cycles and locking the door.
How to stop the cycle, dealing with lock light, and turning controls OFF.
What to expect after completion, dealing with residue, and managing excess smoke.
How to adjust the oven temperature control knob to increase or decrease heat.
Must install bracket to prevent tipping, which can cause serious injury.
Detailed instructions for securing the bracket to the floor and attaching the range.
Troubleshooting for burners not lighting, uneven flame, or orange flame.
Troubleshooting for the entire oven not working or lights not functioning.
Troubleshooting for excessive smoke during broiling.
Troubleshooting poor baking results and self-cleaning cycle failures.
Troubleshooting for range not being level or floor instability.
Steps to follow before calling service, including using the checklist and contacting Tappan.
Covers defects in material or workmanship for one year from purchase date.
Service terms for Alaska and Hawaii, with potential additional travel costs.
Conditions and damages not covered by the warranty, like misuse or accidental damage.
How to obtain service and consumer responsibilities for warranty claims.
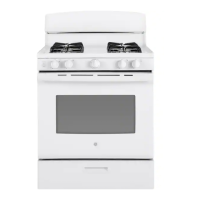
| Fuel Type | Gas |
|---|---|
| Color | White |
| Number of Burners | 4 |
| Ignition Type | Electronic |
| Width | 30 inches |
| Gas Type | Natural Gas |
| Weight | 150 lbs |
| Dimensions | 30 x 27 x 36 inches |