3. Place the shorter screw, #2FAS011 #¼ - 20 x ½”, in the front hole and the longer screw, #2FAS012 #¼ - 20 x 5/8”, in the
rear hole. Reach inside the boat and slip a #59602000 #¼ x 5/8” rubber washer onto each screw between hull and
extrusion. Start the screws into the threaded holes of the extrusions with a hand screwdriver, being careful not to cross
thread. Tighten fully.
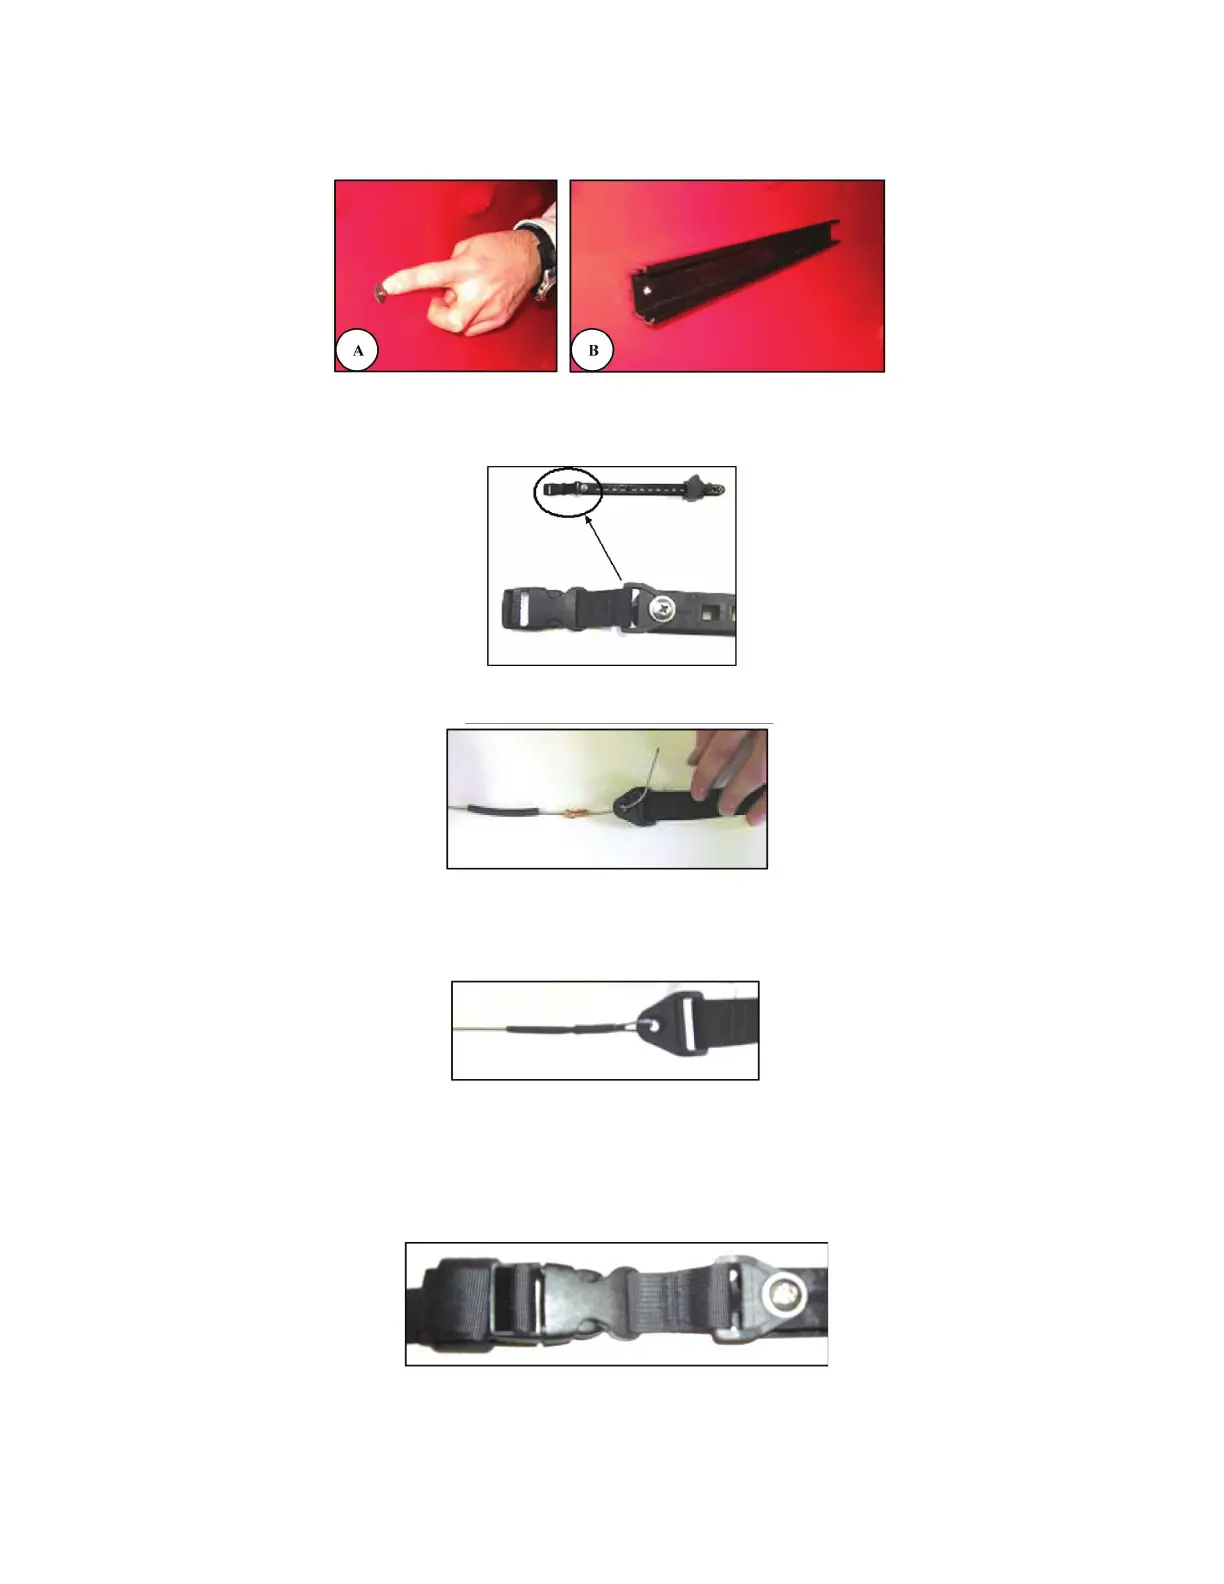
4. Attach the eyelet of the #2RUD008 Rudder Strap Buckle to the rear hole the #17010028 Keeper Footbrace using #
K4FAS007-1 #14 x ¾” Truss Head Screws and #1FAS0121/4 x 11/16 Aluminum Washers.
5. The cable enters the cable housing at the stern end of the boat and exits the housing into the cockpit area.
6. Place one section of shrink tubing # 5715-32001-1/4” Section of Shrink Tubing on the cable followed by 2 #3250-0100
cable swages. Thread the end of the cable through the eyelet of the rudder strap and then through the 2 cable swages
to form a loop.
7. Use the crimping tool to pinch the swages securely to the cable. Crimp both ends of each swage.
8. Slide the shrink tubing over the crimped swages and use lighter or matches to shrink the tubing tightly around the
swages.
9. Press the male connecter from the rudder strap into the rudder buckle and then slide the footbraces into the rear set of
extrusions. Roll up the excess rudder strap and secure it with the velcro tab.
10. If you are converting a ‘stern only’ rudder system additional swedges and shrink tubing are included for adjusting the
rudder cable length to attach to the strap.
Wilderness Systems, 575 Mauldin Road, Suite 200, Greenville, SC 29607 Rev. 09/15
#59504259
 Loading...