Do you have a question about the Williams RHAPSODY III and is the answer not in the manual?
Warning regarding electrical hazards and user-serviceable parts.
Compliance information regarding digital device operation and interference.
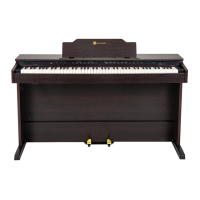
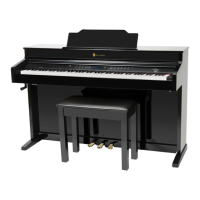
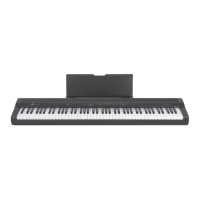
Lists all necessary components and hardware for piano assembly.
Instructions for installing cylindrical nuts into stand legs.
Instructions for attaching feet using bolts and washers.
Securing the piano base to the left and right legs.
Securing support brackets to the piano base.
Attaching the modesty panel to the brackets and legs.
Placing and securing the main piano section onto the legs.
Installing the headphone hook to the underside of the piano.
Plugging in the pedal array and power adapter.
Conditions requiring professional servicing and contact information.
Guidelines for safely handling and moving the instrument.
Recommendations for cleaning the piano's exterior and keys.
Advice on optimal placement to avoid damage and interference.
Best practices for powering the instrument on/off and handling the adapter.
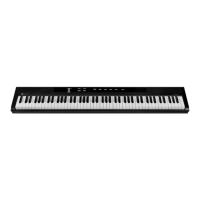
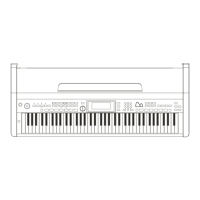
Controls for powering the piano and adjusting its overall volume.
Adjusts bass and treble frequencies for sound shaping.
Features for playing demo songs and recording user performances.
Tools for timing practice and changing pitch/octave.
Resets settings to factory defaults and accesses advanced functions.
Selects and layers different instrument sounds.
Divides the keyboard for playing different voices with left and right hands.
Manages Chorus, Modulation, and Reverb effects for sound enhancement.
Adjusts function settings and manages Bluetooth connectivity.
Utilizes buttons as a numeric keypad for value input.
Connects sustain and sostenuto pedals to the piano.
Provides line-level signal for external amplification.
Connection port for the AC power adapter.
Allows silent practice by connecting headphones.
Supports MIDI sequencing applications via USB.
Allows playback of audio devices through piano speakers.
Procedure for turning the piano on and managing auto power-off.
How to choose and switch between the 12 built-in instrument sounds.
Instructions for layering two sounds or variations.
How to activate the split mode for left/right hand voices.
Adjusting the volume for the left-hand voice.
Selecting different voices for the left and right hands.
Determining the keyboard split point.
Adjusting the octave for the lower split voice.
Disabling the split mode.
Instructions on how to play the built-in demo songs.
Activating and deactivating the metronome.
Setting time signatures for the metronome.
Steps for recording and stopping musical performances.
Switching between or deleting recorded tracks.
Adjusting piano tuning by cents to match other instruments.
How to activate and deactivate Reverb, Chorus, and ModFX.
Introduction to Modulation effects and their presets.
Table detailing ModFX for each voice.
Instructions for turning ModFX on or off.
Explanation of Rotary and Tremolo effects and their control.
Using EQ knobs to adjust equalizer settings.
Connecting personal devices for wireless audio playback.
Connecting for wireless MIDI communication with apps.
Configuring the automatic power-off function.
Procedure to restore piano settings to factory defaults.
Adjusting keyboard response to playing dynamics.
Explanation of MIDI protocol and its use with the piano.
Explanation of MIDI channel assignments for voices.
Disabling internal sound engine for use as a MIDI controller.
Receiving MIDI information on multiple channels simultaneously.
Changing the MIDI channel for receiving data.
Sending general MIDI reset messages.
| Brand | Williams |
|---|---|
| Model | RHAPSODY III |
| Category | Musical Instrument |
| Language | English |