Maintenance
2124−2/A1
Winterthur Gas & Diesel Ltd.
7/ 7
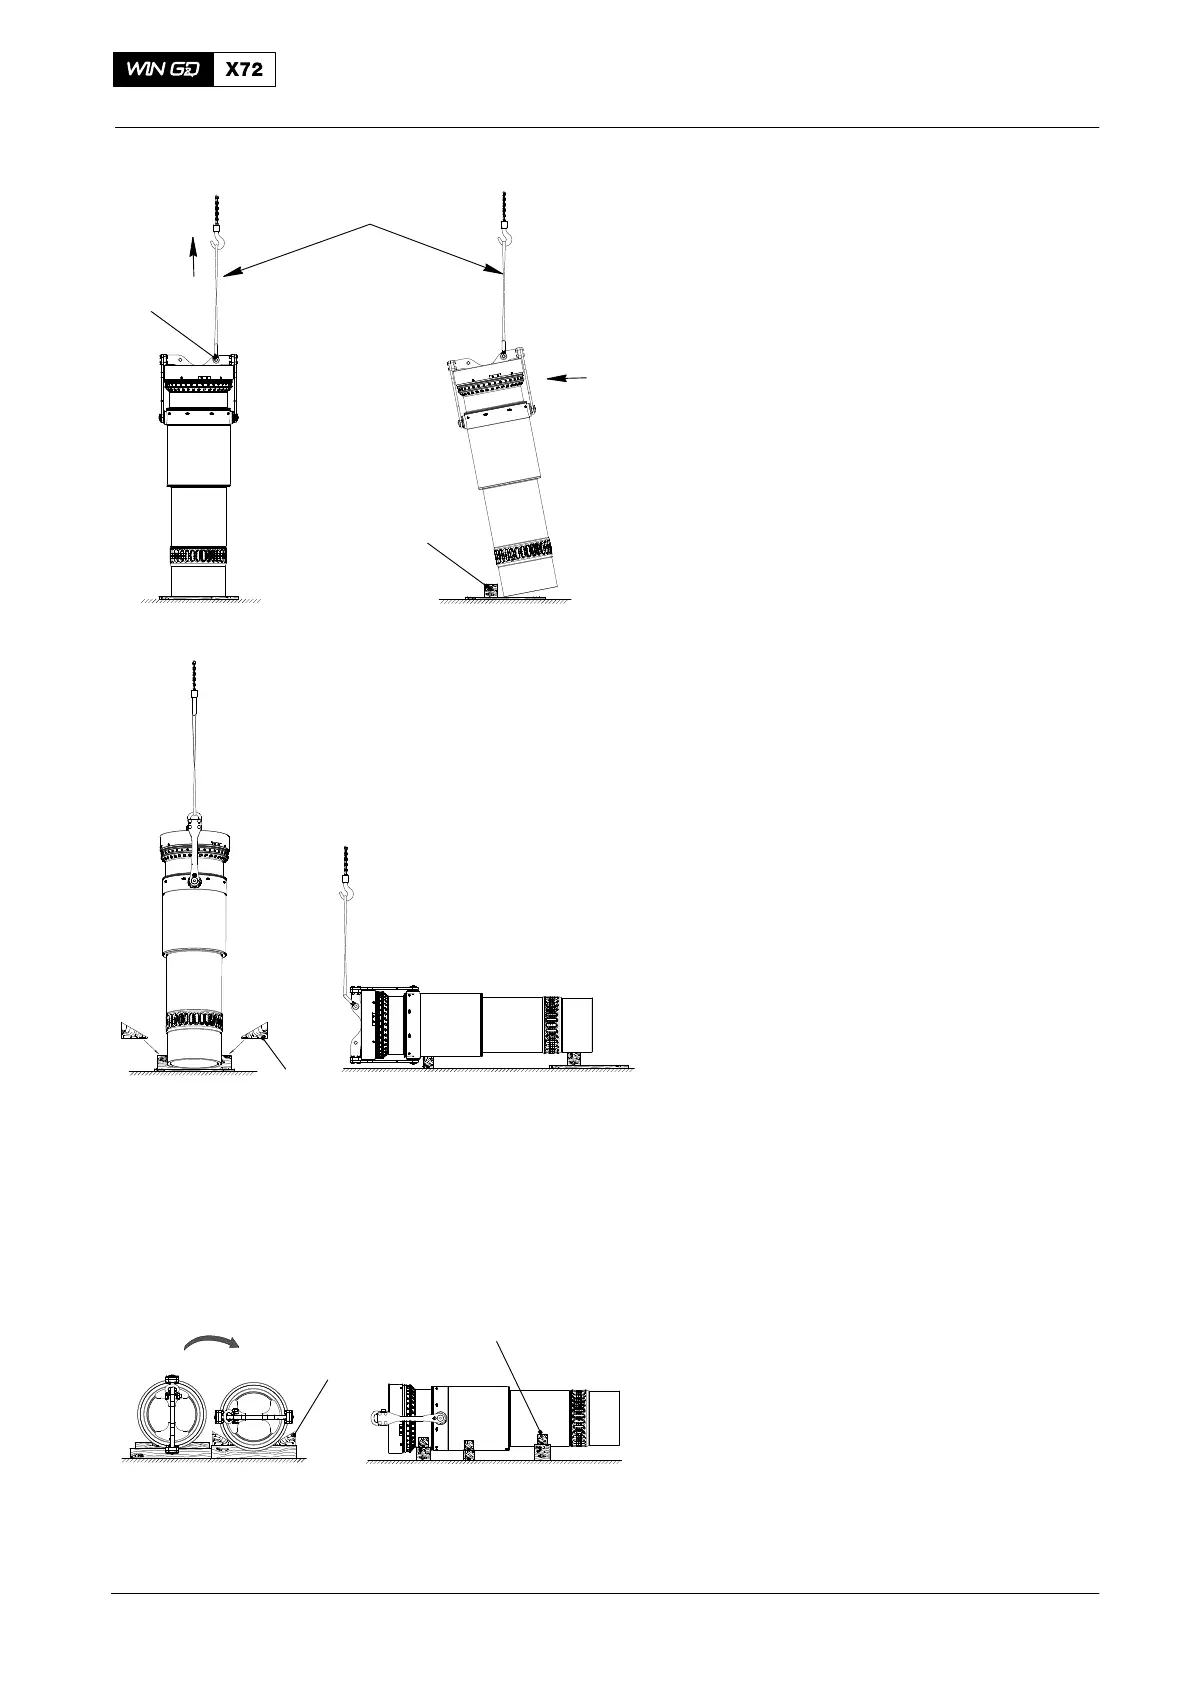
8. Cylinder Liner − Safe
Storage
1) Make sure that the water guide jacket
is removed (refer to paragraph 4).
2) Make sure that the insulation bandage
is removed (refer to paragraph 5).
3) Install the lifting tool (94210) on the
cylinder liner (see paragraph 2.1).
4) Attach the shackle (24, Fig 10) of the
lifting tool (94210) in the position shown
in Step 1.
5) Attach the sling (94202K) to the
shackle (24) and the crane hook.
6) Operate the crane to put a light tension
on the sling (94202K).
7) Put the wooden underlay (16) in
position as shown in Step 2.
8) Carefully push the cylinder liner in the
direction shown and at the same time
lower the cylinder liner.
9) Put the wooden chocks (14) in position
to prevent movement of the cylinder
liner (see Step 3).
10) Fully lower the cylinder liner (Step 4).
11) Remove the sling (94202K) from the
lifting tool.
12) Put more wooden underlays in position
(see Step 5).
13) Remove the wooden chocks (14).
14) Carefully turn the cylinder liner 90_.
15) Put the two wooden chocks (14) in the
position shown to prevent movement.
16) Remove the lifting tool (94210) from the
cylinder liner.
9. Cylinder Liner −
Preparation
1) Attach the lifting tool (94210) to the
cylinder liner (see paragraph 2.1).
2) Make sure that shackle (24) is in the
position shown in Step 1.
3) Put more wooden underlays (16) in
position (see Step 5).
4) Remove the wooden chocks (14).
5) Carefully turn the cylinder liner 90_.
6) Attach the sling (94202K) to the lifting
tool.
7) Carefully lift the cylinder liner to the
vertical position.
2015
Cylinder Liner: Removal and Fitting
WCH02349
Step 1 Step 2
Step 3
24
16
14
14
14
94292K
Step 4
Step 5
Fig. 10

 Loading...


