Maintenance
3303−4/A1
Winterthur Gas & Diesel Ltd.
9/ 9
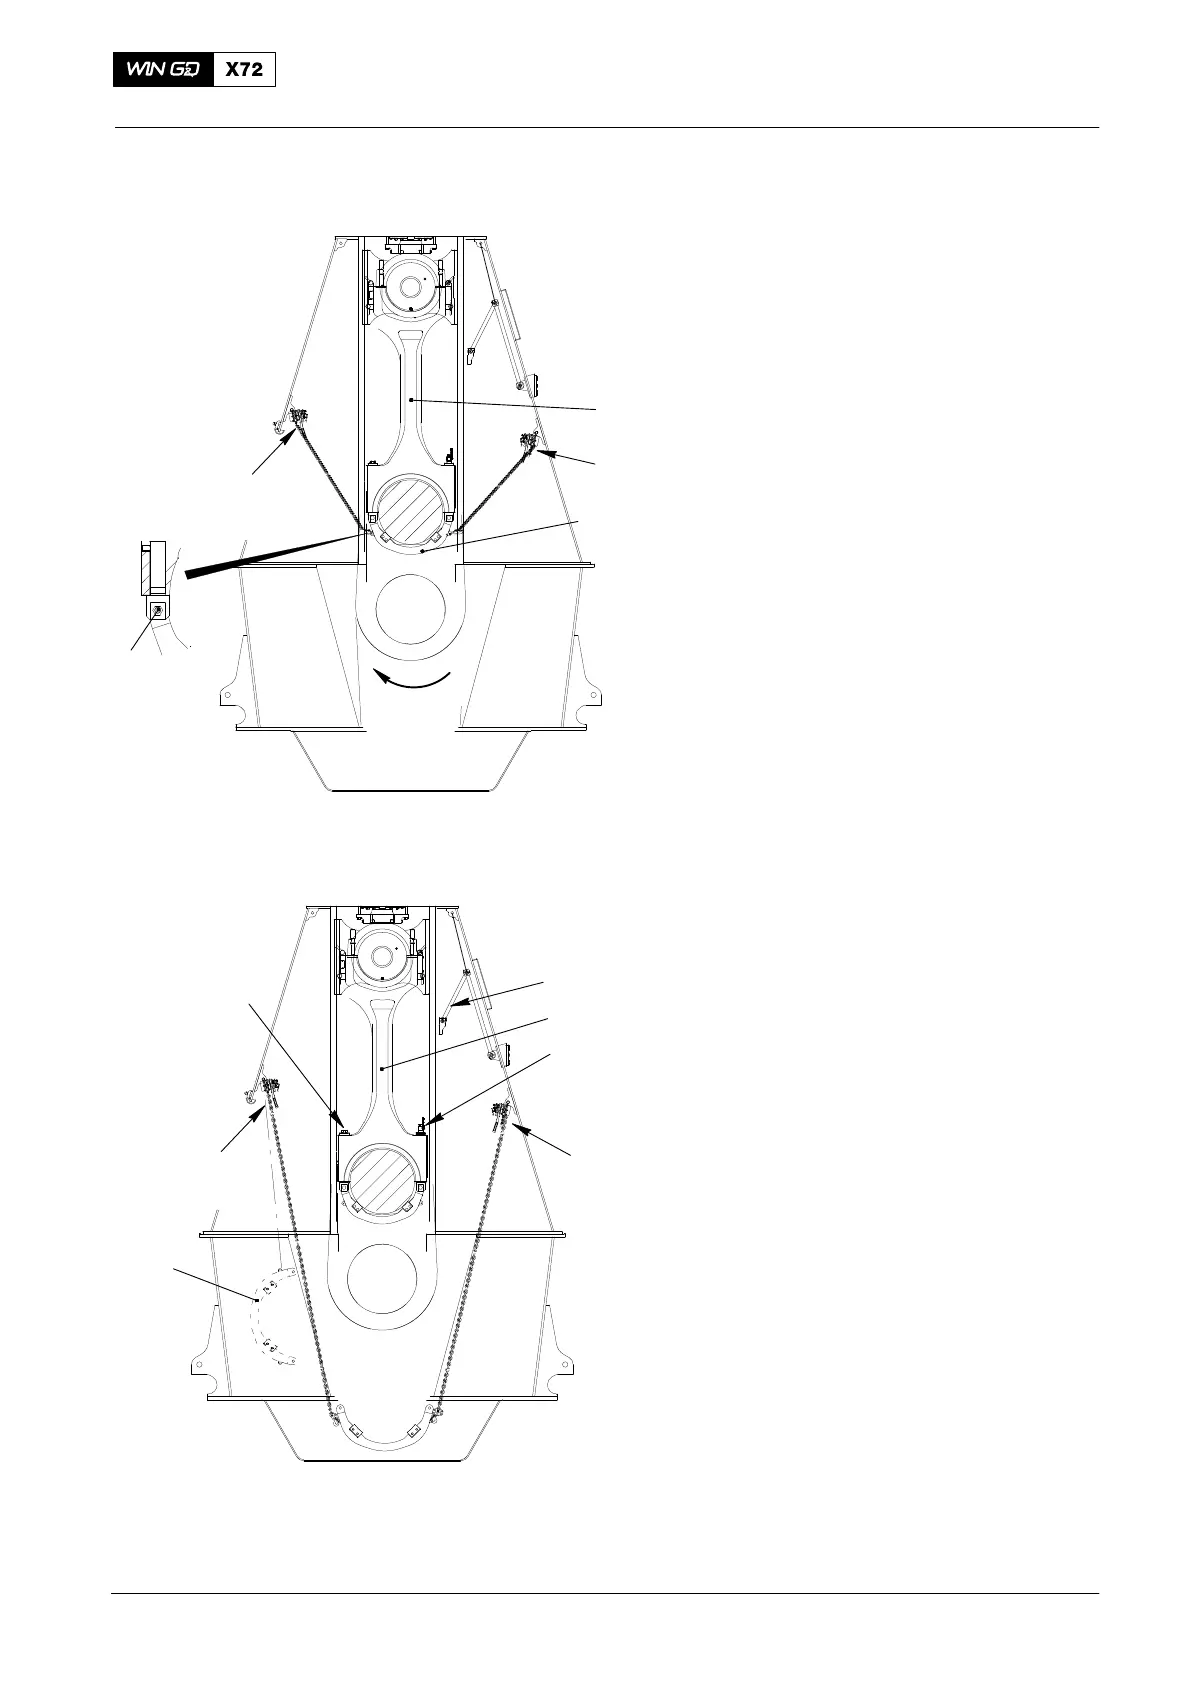
36) Use the turning gear to move the
connecting rod (1, Fig. 14) clockwise to
TDC.
37) Attach the manual ratchets (H1, H2) to
the eyelets on the the bracket (94334).
38) Apply a light tension to the chains of
the manual ratchets (H1, H2).
39) Remove the two nuts and bolts (2) from
the plate (94334).
40) Operate the manual ratchets (H1 and
H2, Fig. 15) to lower the plate (94334).
41) Remove the manual ratchet (H2) from
the eyelet on the plate (94334).
42) Use the manual ratchet (H1) to remove
the plate (94334) from the crankcase.
43) Connect the toggle lever (1) to the
connection piece on the connecting
rod (2).
44) Remove the rods (3) from the
connecting rod (2).
5. Completion
1) Install the bearing cover, refer to 3302,
paragraph 8.
2) Install the platform, (see 3303−1).
3) Attach the crosshead to the piston rod
foot, refer to 3303, paragraph 7.
4) Make sure that all tools and equipment
are removed from the area.
2015
Removal and Installation
Fig. 14
H2
H1
1
2
WCH02669
94334
H2
H1
3
3
2
1
Note: Some parts can look
different. Data from W-X62
Note: Some parts can look
different. Data from W-X62
Fig. 15
94334

 Loading...


