Troubleshooting
Integrated Modules
Integrated Modules
4-3
#826498 - Revision B - December, 2016
Diagnostic Mode Procedures - All Models
a. LED Test
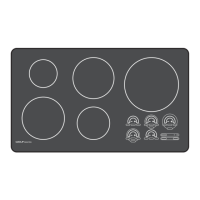
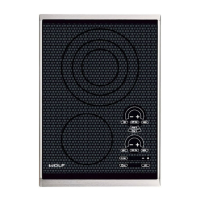
All LED indicators for all control zones are on. •
CE152TF/S and CI152TF/S: front control zone SIM/MLT, “…” or HI pads cycles LEDs to on, dim, or•
off.
SM15TF/S, FM15TF/S and GM15TF/S: front control zone LO or HI pads cycles LEDs to on or off.•
TM15TF/S: rear control zone LO, “…” or HI pads cycles LEDs to on, dim, or off.•
CE152TF/S and CI152TF/S: one “.” displayed on the rear control zone indicates LED test is run-•
ning.
SM15TF/S, FM15TF/S and GM15TF/S: one “.” displayed on the rear control zone indicates LED•
test is running.
TM15TF/S: one “.” displayed on the front control zone indicates LED test is running.•
“+” pad advances to Unit Reconfiguration.1
SM15TF/S, FM15TF/S and GM15TF/S - “-” returns to Software Version indication.2
b. Unit Reconfiguration and Unit Derating - CE152TF/S, CI152TF/S and TM15TF/S
CE152TF/S - This mode is present but shows 00 as it is not active.•
Unit Reconfiguration CI152TF/S and TM15TF/S - software version below version V.10:•
Touch “+” pad during the LED test. 1
Two “.” are displayed on rear control zone.2
CF is displayed in the 2-digit display.3
Only one “.” is displayed in the front control zone.4
Press and hold “+” and “-” pads together for 3 seconds activates the unit reconfiguration.5
Acceptance beep is sounded after the requisite press-and-hold and the cooktop resets.6
“-” pad engages LED Test.7
“+” pad engages Control Temperature Readout.8
Fully Rated to Derate and Unit Reconfiguration CI152TF/S and TM15TF/S - software version•
above version V.10:
Touch
“+” pad during the LED test. 1
Two “.” are displayed on rear control zone.2
CF is displayed in the 2-digit display.3
Front control zone SIM/MLT/LO, or HI pads cycles between “fully rated,” or “derated” mode.4
If first “.” is brighter then the second “.” on the front control zone, unit is in “fully rated” mode.5
If second “.” is brighter then the first “.” on the front control zone, unit is in “derated” mode.6
Press and hold “+” and “-” pads together for 3 seconds activates the unit reconfiguration, and sets7
the unit in the “fully rated” or “derated” mode.
Acceptance beep is sounded after the requisite press-and-hold and the unit resets.8
“-” pad engages LED Test and “+” pad engages Control Temperature Readout.9
NOTES on Unit Reconfiguration and Unit Derating:
Reconfiguring the unit resets the communication between the generator and control board software.•
Reconfiguring the unit is recommended to be performed for any electronic communications error and after
replacing a generator or control board.
Derating the unit reduces the total amp draw of the unit during the highest demands.•
The power rating of the unit does not have to be changed to perform unit reconfiguration.•
The rear “.” remains at two and CF is displayed in the 2-digit display during unit reconfiguration.•
After replacing a generator the LOCK light does not illuminate. The unit is locked.•