PRIORITY:
Before using you new WOODS D IALOc harge, ensure that you have the foll owing items;
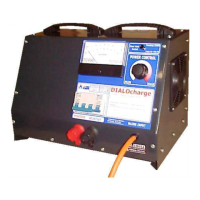
1 the DIALOcharge unit
2 mains AC 3 pin cable
3 RED and BLACK battery cables with alligator clamps
If any of the ab ove items are missing from the original packaging, contact your supplier.
ENVIRONMENTS:
D ue to the versatil e por tability of the DIALOcharge, it may be employed in almost all environments, provided the following
conditions apply;
•
Ensure that the DIALOcharge cabinet is mounted in an upright position, carry-handle on top.
•
DO NOT mount the DIALOcharge ins ide an unventilated enclosure. The DIALOcharge must have mi nimum air intake and
outlet areas of 10 ,0 00mm² (1 6in²).
•
Allow adeq uate ventilation around th e cabinet. eg: 1 00mm c learance to the left and right side panel s for effective fan
cooling.
•
DO NOT mount the DIALOcharge in direct sunlight or in environments with a high ambient temperature, as extreme
temperat ures will cause the DIALO charge to shut down operation.
•
DO NOT use the DIALOcharge in wet areas where it may be sprayed with water or other liquids.
•
DO NOT use the DIALOcharge in excessively dusty environments.
CONNECTIONS:
B EFORE MAK ING ANY EL ECTR ICAL CONNE CTI ONS, ENSURE THAT THE 2 40Va c MAI NS IS SWIT CHE D OFF !
AC MAINS Input connection:
The AC mains inlet socket is situated on the lower right of th e fron t panel, and is the International IEC connector type.
The mains cable supplied is fitted with a standard 3 pin plug, for connection to an Australian GPO and the IEC connector.
♦
If using a GenSet for mains supply, ens ure that its capacity is at least double the DIALO charge’s input VA rating.
eg: 750VA charger = 15 00VA GenSet minimum
maximum all owable GenSet distortion 16 % THD (Total Har monic Dist ortion)
Output connection:
The output connections are the RED and BLACK binding posts loc at ed on the lower left of the front p anel, labelled POSITIVE
and NEGATIVE respectively.
MULTIPLEXING DIALOchargers:
PARALLEL: eg: D1260 + D1260 = 12V 120A
Two or more DI ALOcharge unit s may be connected in parallel to increas e the charging AMPERAGE capacit y.
You may now individually control eac h charger upto the total maximu m.
SERIES: eg: D1260 : D1260 = 24V 60A
Two or more DIALOcharge units may be connected in series to increase the charging VOLTAGE capacity.
You may now individually control eac h charger upto the total maximu m.
The added bonus of multiple individual DIALOcharge unit s facilitates the use of the units separately if required.
PREPARATIONS: PREPARATIONS:
D1230, D2415, D2430, D4815 D1260
Ensure the OUTPUT circuit breakers are in the OFF position. Use RED and BLACK cables supplied.
1 Loosen BLACK insulated post nut anti-clockwise to
open terminal.
1 Loosen anti-clockwise and remove the BLACK
insulated securing nut.
2 Insert the ferrule end of the BLACK cable into the
open BLACK terminal.
2 Fit the ey e t erminal of the B LACK cabl e o nto the
metal BLACK terminal.
3 Tighten BLACK insulated post nut clockwise to
close connection.
3 Refit and tighten the insulated BLACK securing
nut and tighten clockwise.
(DO NOT cr os s-t hread)
4 Re peat steps 1 to 3 for the R ED cable. 4 Repea t steps 1 to 3 for the RED cable.
7
 Loading...