5
A. Operating instructions
1.Starting the dehumidier
Press the ON/OFF key to start and
stop the unit. When the unit is turned
on, the running light shows green.
2. Set humidity
Rotate the switch to the control humi-
dity range.
If the humidity of the dehumidier has
reached the set humidity, the run-
ning lights off, the compressor shut
down into the three-minute protection
and the fan delay 1 minute to stop
running. If you turn to ”ON”, the unit
will enter continuous dehumidication
mode.
3. Manual water drainage
When the tank is full for 3 second-
s,the pump will open and the drain
will run for 30 seconds. When
the pump is properly drained, the
compressor and fan are operating
normally.
4. Full water lamp
When the machine lights up, it
means that the water pump inside
the machine is out of order, the water
can not be discharged automatical-
ly, the machine stops and beeps. In
case of this situation please contact
the professional staff for maintenan-
ce.
5. Timer
It is used to accumulate the machine
running time, and once the fan is
turned on, the timer will be timed. It is
only used to see the machine running
time.
4.Water drainage
Connect the included water hose to
the pipe on the side of the dehumi-
dier. Lead the other end to a drain.
The dehumidier will automatically
drain the water when needed.
If the drain is located above the
dehumidier, the maximum capacity
of the water pump is 5 m. If the water
is drained downwards, there is no
limit for the distance. The width of the
water hose is 12 mm.
Drain the water manually before sto-
ring or moving the unit.
5. The air lter
The air lter prevents dust and dirt
from entering the machine, prolong-
ing its life expectancy.
It is very important that the
lter is cleaned regularly;
otherwise the dehumidier
might lose capacity and even
be seriously damaged.
wFilter cleaning
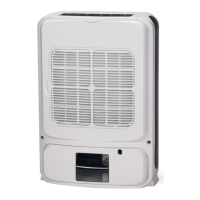
1. Open the front panel (see g A).
2. Remove the lter inside.
3. Clean the lter with a soft cleaner
and warm water. Make sure that the
lter is fully dried before reinserting it.
Alternatively, you can clean the lter
with a vacuum cleaner.
4. Reinsert the lter and close the
front panel.
6. Maintenance
Clean the unit with a soft moist
cloth. Do not use solvents or strong
cleaners as this might damage the
surface of the unit.
- The front and side grids can be
vacuum-cleaned or cleaned with a
brush.
- The cooling coils are best cleaned
with a rag and warm water.
7. Service
If the dehumidier requires servicing,
you must rst contact your local retai-
ler. Proof of purchase is required for
all warranty claims.
8. Hints
Sometimes it may be useful to use
a frost guard or heater fan to make
sure that the temperature does not
fall below +5˚C. Even if the WCD-
6HG works down to temperatures as
low as 0°C, its capacity will increase
at higher temperatures as warm air
carries more water.
For maximum dehumidifying power
in a room, it is recommended that
the air supply from outside and from
adjoining rooms is minimized – close
doors and ventilators.
Expect higher dehumidication
capacity during Autumn / Summer
because the outside air is warmer
and more humid.
To achieve a safe and reliable pro-
tection against mould and moisture
damage, keep the relative humidity
between 50% and 60%.
English
 Loading...