6
R
E
P
A
I
R
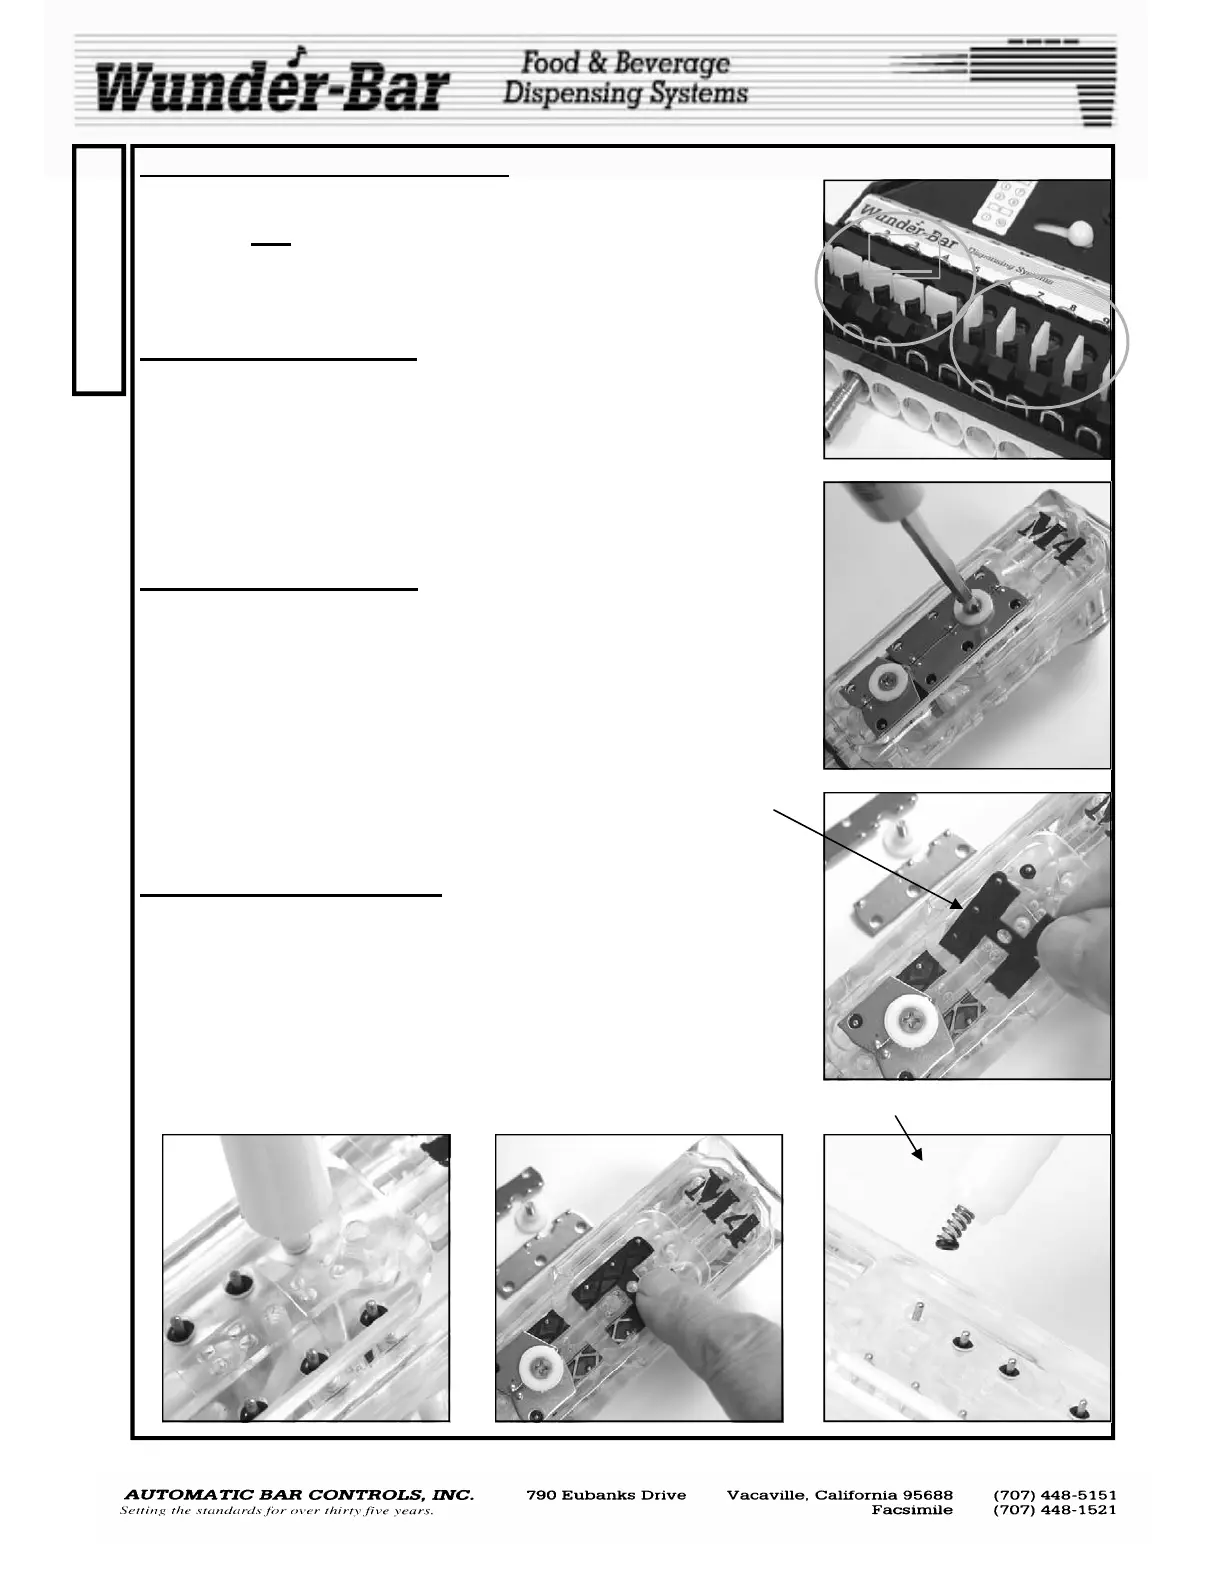
REPLACING O-RINGS IN THE HANDLE.
Any one or all of the valve positions on the handle may be serviced individu-
ally, by first turning the shut-off’s for the products to be serviced, 90 de-
grees to the OFF
position (Fig.16). The flex-hose assembly does not
have to be disconnected from the manifold, as long as the Shut-Off’s
are in the OFF position before servicing any valve on the handle. See
SHUT-OFFS section on page 5.
REPLACING A STEM O-RING
(leak under the button plate)
If any syrup, soda, or water leak from under the button plate, when dispens-
ing, the Stem O-ring for that flavor, the soda or the water must be removed
and replace. The Mark 4 dispenser allows for replacement of the stem o-ring
from the top of the handle without depressurizing the dispenser.
NOTE: Although the stem O-rings may be replaced with the dispenser fully
pressurized, it is wise to close the shut-off, for the position to be serviced, to
avoid product leakage if the valve stem is accidentally depressed.
REMOVAL OF STEM O-RING
'.
Remove the button plate. Remove only the butterfly plates located directly
above the stem O-ring to be replaced (Fig.17). Lift up and remove the O-
ring retainer plate from above the stem O-ring that is to be replaced
(Fig.18). Use the “spring” end of the Stem O-ring Removal Tool (p/n: PH10-
112) to stab and then remove the defective Stem O-ring from the O-ring cav-
ity (Fig.19). Turn the spring end counterclockwise while pushing down to
pierce the defective O-ring. Remove and discard the defective O-ring. Do
not re-use leaking or defective O-rings.
" ,
REPLACING THE STEM O-RING
Position the replacement stem o-ring onto the valve stem. Use the opposite
end of the stem o-ring removal tool, (the end with no spring), to push the
stem o-ring into the o-ring recess, fully (Fig.20).
Position the stem o-ring retainer plate so that the six or eight valve stems
protrude through the retainer plate as shown in Fig.21. Push all four cor-
ners of the plate down, fully, to completely seat the retainer plate. Re-install
the Butterfly plates, butterfly retainer, and screw (Fig.17). DO NOT OVER-
TIGHTEN THE RETAINER SCREWS!
Re- in-
Fig.18
O-ring Removal Tool
MARK 4 MANUAL
Fig.16
OFF
ON
Fig.17
Fig.19
O-ring Retainer Plate
Fig.20 Fig.21
www.wunderbar.com

 Loading...