Do you have a question about the X-lander X-RUN and is the answer not in the manual?
Detach fastening tape and unfold the stroller by raising the handle until locks engage.
Fold the hood, unblock locks, fold the stroller and handle, and fasten with safety webbing.
Pull the assembly lock's lever to remove the front wheel; block it during assembly.
Push the rubber button in the middle of the wheel to assemble or disassemble.
Slide plastic elements through the fence and fasten snaps to mount; unfasten snaps to remove.
Expand the hood by undoing the zipper between the upper and lower parts.
Push the brake lever to block wheels; release to unblock.
Squeeze lock levers to lower backrest; pull strap to lift.
Press both buttons on the handle to adjust the push bar height.
Move the belt towards a regulator to adjust its length.
Adjust shoulder belt height by inserting the regulator through holes in the reclining seat.
Slide belt lock into slot and press to fasten; press round button to unfasten.
Pull red lock lever, remove plugs, slide adapters in until locks engage.
Remove guardrail adapters by pulling the red lock lever from the mounting slots.
Push guardrail ends into mounting holes; press lock buttons to slide out for disassembly.
Press buttons on both sides of the footrest to adjust its position.
Use hand brake for speed reduction, especially on slopes; tighten wristband for jogging.
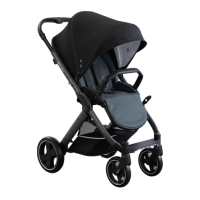
Unscrew, unfasten snaps, release buckle, unfasten hooks, and slide seat unit off frame.
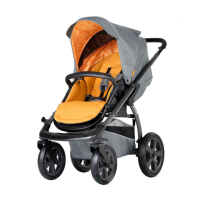
Use special adapters; remove seat unit, insert adapters, then place carrycot on adapters.
Unblock locks, lift carrycot off adapters; remove adapters by drawing them out.
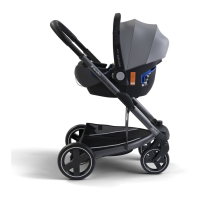
Use adapters; remove seat unit, insert adapters until locked, then press car seat onto adapters.
Release safety locks, pull car seat up; remove adapters by drawing them out.
Cover unused assembly sockets with protecting caps as shown.
Adjust stroller driving by screwing/unscrewing Allen screws on front wheel assembly brackets.
Put the bottom part of the cover on and attach snaps to both sides of the hood.
Unscrew valve pin, attach pump, and inflate wheel to recommended pressure (1.0-1.5 atm/bar).
Roll elasticated flap over backrest, pass straps through D-rings, and fasten snaps.
Use straps with snap fasteners to attach the basket around frame bars.
Place net over footrest and hood, then fasten straps around frame bars.
Attach X-Bag nursery bag and X-Mug holder to the frame using provided holders.
Keep instructions for future reference; review compatibility and safety guidelines.
| Type | Jogging Stroller |
|---|---|
| Seat Capacity | 1 |
| Maximum child weight | 22 kg |
| Foldable | Yes |
| Wheel Type | Air-filled |
| Suspension | Yes |
| Brakes | Yes |
| Adjustable Handlebar | Yes |
| Canopy | Yes |
| Recline Positions | Multiple |
| Harness | 5-point |
| Sun Canopy | Yes |
| Storage Basket | Yes |
| Brake Type | Handbrake |