THE ULTIMATE GIMBAL
Your no tools adjustable gimbal is the most precision gimbal made in the steadicam industry.
Care should be taken so it will provide you with many years of service and reliability.
To adjust the gimbal up or down the post, simply turn the Kipp handle to loosen and move the
gimbal into position and retighten. You do not have to over tighten a gimbal’s Kipp lock on the carbon
fiber post. Snug is generally significant enough and doesn’t need the force required by other gimbal and
post designs.
When making very fine gimbal balance adjustments I have learned that by turning the gimbal
sleeve a little bit like a screw, this helps when making very precise micro adjustments.
One of the unique gimbal sleeve design features is the symmetrical contours on the fork and
cap. This gives the operator the same feel when operating in either high or low mode. The symmetrical
fork design allows considerably more hand room under the gimbal fork in normal mode and you will never
have to worry about pinching your thumb on the fork in low mode. Precise alignment of all three axis, no
tools balance adjustment, complete interchangeability and durability has made this gimbal the most
popular gimbal on the market.
On our standard 115 degree gimbal handle there is a 10-32 locking screw which is used for
tightening the gimbal handle onto your post in low mode. If you are using an XCS precision ground arm
post the screw lock is enough to hold the handle on the post. If you are using any other arm posts we
recommend you use the .187” safety pin that goes through the gimbal handle and arm post. We have
measured to many poor tolerance, undersized arm post on the market that may slip out of the standard
gimbal handle.
Under the foam grip on the standard handle is a .1875” through hole in the handle, if you like to
use a safety pin. We recommend melting the hole open with a soldering pencil. Or ask us to do this prior
to shipping.
If you are using the Ergo handle you will not need the locking screw because you do not flip the
handle over for low mode work.
Gimbal Cleaning & Care
You will find that you most likely will not be disassembling your gimbal and cleaning it very often.
In fact it may be years before you would need to do it, if at all. It varies on environmental conditions.
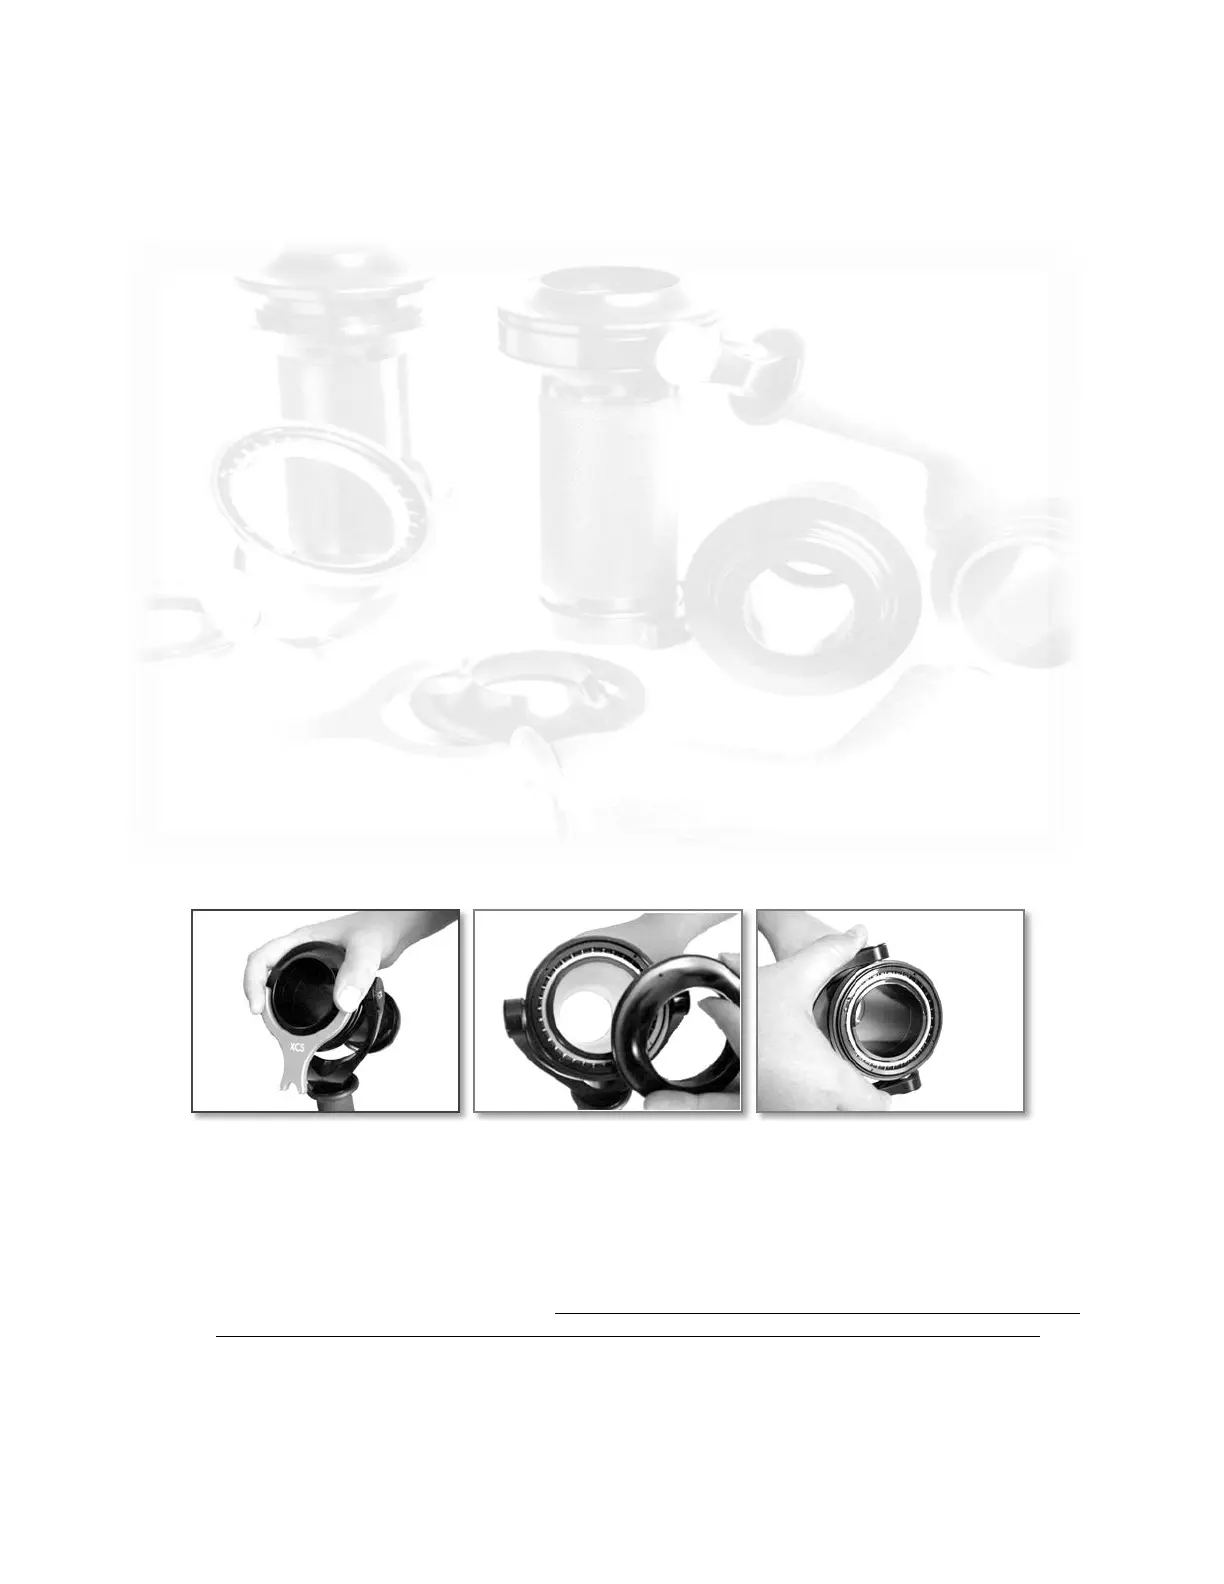
To remove the gimbal cap place gimbal wrench pins in two of the matching holes on the gimbal
cover.
Hold down on gimbal wrench pictured above, and turn to remove gimbal dust cover. A light tap
with a plastic screwdriver handle may be necessary.
Hold the gimbal upright when removing cap so not to have the fork and bearing cup fall off the
gimbal sleeve. Using the same gimbal wrench, remove the side dust covers on the gimbal fork.
This will reveal the two fork bearings. It is not necessary or recommended to remove the two side
journals or bearings from the gimbal fork or large main bearing in the gimbal cup for cleaning.
When removing the fork & bearing cup from sleeve be careful to slide it off evenly. It is a perfect
fit. DO NOT PRY, TAP OR DISASSEMBLE THE FORK OR BEARING TO REMOVE IT FROM
GIMBAL SLEEVE. If the bearing does not remove from sleeve smoothly, put it in the freezer for
30-40 minutes, as this will allow the bearing to be easily removed from the gimbal sleeve.
4
 Loading...