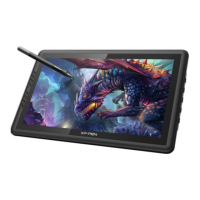
This document serves as a Quick Guide for the XP-PEN Artist 22 Pen Display (2nd Gen) and Artist 24 Pen Display, providing essential information for setup, connection, and driver installation. It is designed to help users get started with their pen display quickly and efficiently.
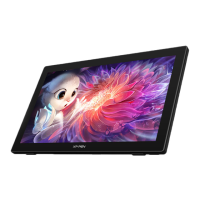
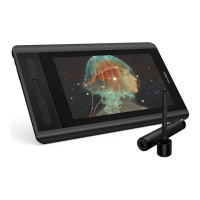
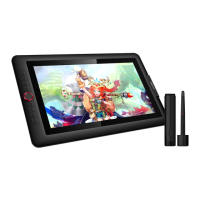
The pen display functions as an interactive screen that allows users to draw, paint, and edit directly on its surface with a pen. It is intended to enhance creative workflows by providing a more natural and intuitive digital art experience compared to traditional mouse and keyboard input. The device integrates a display with pressure-sensitive pen input, making it suitable for various creative professionals and hobbyists, including illustrators, graphic designers, animators, and photographers.
Product Overview and Usage Features:
The device features a clear and accessible layout of controls and ports, ensuring ease of use. The front of the pen display includes the active area where users interact with the pen, along with several control buttons.
- Display/Active Area (1): This is the primary interactive surface where all visual output is shown and where pen input is registered.
- Back Key (2): This button is used to navigate back through menus or cancel an action.
- Brightness Down (3) and Brightness Up (4): These buttons allow users to adjust the display's brightness to suit their working environment and preferences, ensuring optimal visibility and reducing eye strain.
- Menu/OK (5): This button is used to access the on-screen display (OSD) menu and confirm selections within it.
- Power Switch (6): To turn the pen display on or off, users need to press and hold this button for approximately 3 seconds. This prevents accidental power cycles during use.
- Power LED (7): This indicator light provides visual feedback on the device's status:
- Always On (White): Indicates that the pen display is correctly connected to the computer and its power supply is switched on. This confirms the device is ready for use.
- Flashing (White): Signifies that the pen display's power supply is on, but it is not receiving a signal from the computer. This often suggests a loose or incorrect video cable connection.
- Off: Means the pen display's power supply is turned off, indicating the device is not active.
The side or back of the pen display houses various ports for connectivity and audio.
- Headphone Port (8): Allows users to connect headphones for audio output, which can be useful for multimedia tasks or simply for personal audio while working.
- HDMI Port (9): This is a standard video input port used to connect the pen display to a computer for video transmission.
- USB-C Port (10): A versatile port that supports both video and data transmission. For full-featured USB-C ports on the computer, a single USB-C cable can handle both functions, simplifying cable management.
- Power Jack (11): This port is where the power adapter connects to supply electricity to the pen display.
Connection Modes:
The pen display offers flexible connection options to accommodate different computer setups.
-
HDMI Connection Mode:
- To use this mode, connect the pen display to your computer using an HDMI cable for video and a USB-A to USB-C cable for data transmission.
- Ensure the power jack is connected to the adapter, which is then plugged into a wall outlet.
- This dual-cable setup is common for computers that do not have a full-featured USB-C port.
-
USB-C Connection Mode (for full-featured USB-C ports only):
- If your computer has a full-featured USB-C port, you can connect the pen display using a single USB-C cable. This cable transmits both video and data simultaneously, offering a cleaner and more streamlined connection.
- As with the HDMI mode, the power jack must be connected to the adapter and then to a wall outlet to power the device.
Driver Download and Installation:
For the pen display to function correctly and to unlock its full potential, driver installation is crucial.
- Ensure Proper Connection: Before installing drivers, verify that the pen display is correctly connected to your computer using one of the methods described above.
- Visit XP-PEN Website: Navigate to www.xp-pen.com.
- Access Support Section: Click on the "Support" section, then proceed to "Download."
- Select Product Model and Download Driver: Choose your specific product model (Artist 22 Pen Display (2nd Gen) or Artist 24 Pen Display) and download the latest driver compatible with your computer's operating system.
- Follow Installation Prompts: Execute the downloaded driver file and follow the on-screen instructions to complete the installation process.
Maintenance Features:
- Regular Driver Updates: The guide emphasizes the importance of regularly checking and updating the device driver from the XP-PEN website. This ensures the best performance, stability, and access to the latest features and bug fixes for your pen display. Keeping the driver updated is a key aspect of maintaining optimal device functionality.
- Support Contact: For any further assistance or troubleshooting, users are encouraged to contact XP-PEN support via email at service@xp-pen.com or visit their website at www.xp-pen.com. This provides a direct channel for resolving issues and getting expert help.
This comprehensive guide ensures that users can effectively set up, connect, and maintain their XP-PEN Artist Pen Display, allowing them to focus on their creative work with minimal technical hurdles.