Page 20
The X-Terminator 2 RTR 4WD Nitro Buggy features front, centre and rear gear differentials that each feature o-ring seals and cup-style
housings. All three differentials are packed with differential grease that is good for most driving conditions.
You can make ne-tuned adjustments to each differential by removing the differentials from the chassis, opening them up and replacing
the grease already inside the differentials with silicone differential oil.
●
Front and Rear Differentials: Adding heavier silicone oil will tighten the differentials and adding lighter silicone oil will loosen
the differentials. If your X-Terminator 2 RTR 4WD Nitro Buggy feels 'loose' (uncontrollable) during turns, you can tighten the
front differential or loosen the rear differential. If your Nitro Buggy is 'pushing' (understeer) during turns, you can loosen the front
differential or tighten the rear differential.
●
Centre Differential: For the centre differential, using a lighter weight oil will cause the differential to unload easier. Generally, this is
good for loose tracks with little traction. Using a heavier weight will provide a more even amount of power to the front and rear. On loose
tracks, this can cause the X-Terminator 2 RTR 4WD Nitro Buggy to be too 'squirrely' (uncontrollable) or cause the rear end to slide out.
For this reason, we only suggest using heavier oil if you are driving on a high-traction surface.
For general use, we recommend using XTM Racing 50K oil in the centre, 30K in the front and 10K in the rear. Some might consider
this light, but it's a pretty good starting point. If the track or tyres seem to have a lot of traction, then you might use 70K in the centre,
50K in the front and either 50K or 30K in the rear.
For your convenience, we show you how to remove and disassemble the front differential. Removing and disassembling the
centre and rear differential is similar.
●
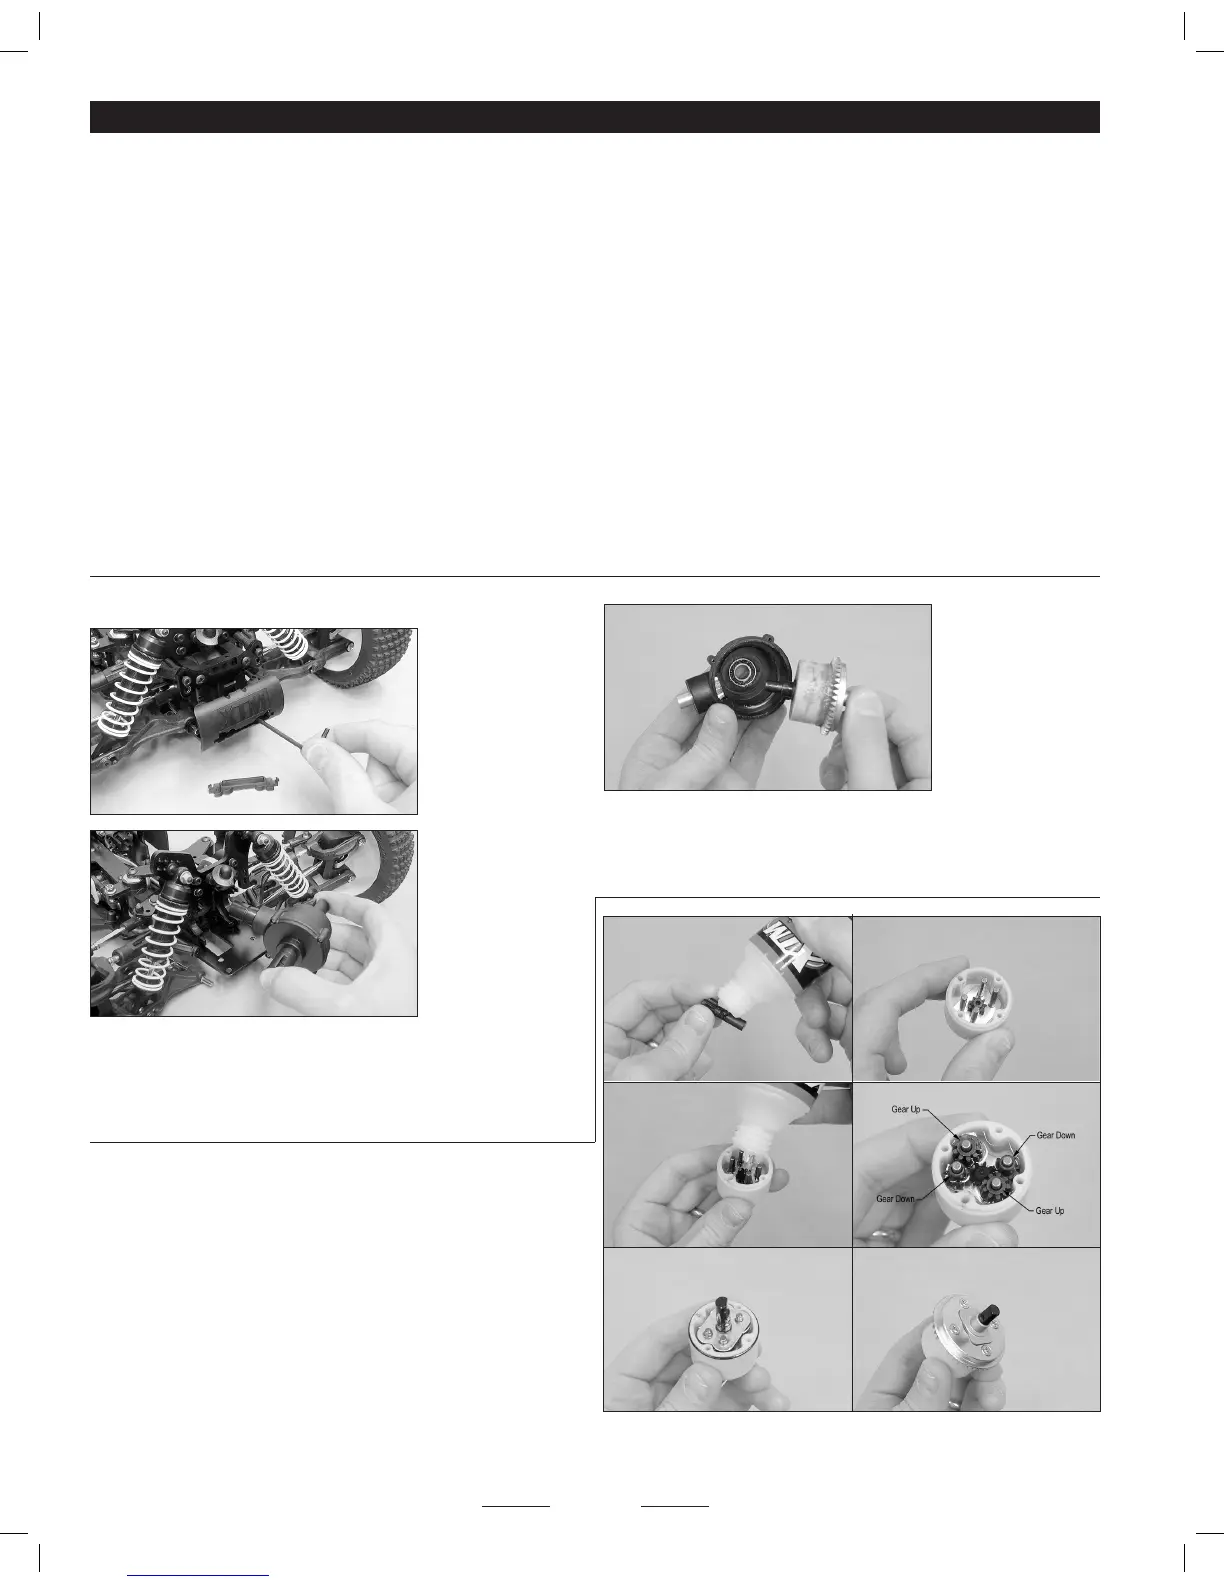
Remove the screws from the bottom of the chassis that hold the
front bumper and the differential assembly in place.
●
Use a small flat
blade screwdriver to
pry the screw cover off
the front of the bumper
and remove the two
screws from inside the
bumper, then remove
the bumper.
●
Next, remove the
upper hinge pins, then
remove the screws
that hold the upper
hi nge pin sup port
p l a t e i n p l a c e .
R e move the upper
and lower hinge pin
support plates.
●
Pull the front half of the diff case straight out, then remove the
hinge pins and drop the lower suspension arms and pull the diff
assembly straight out.
●
Remove the two CVD drive shaft cups from the diff assembly,
then remove the four
screws that hold the
diff halves together.
●
Pull the diff halves
apart, then pull the diff
assembly (w/ring gear
attached) out of the
diff housing.
●
Remove the four screws that hold the diff case together, then pull
the diff case apart to open up the diff. You can now remove the
grease inside the diff and rell the diff with the differential oil
of your choice, using the instructions below.
Figure 1
Figure 2
Figure 3 Figure 4
Figure 5 Figure 6
1) Apply a light coat of silicone diff oil to the output gear o-rings. DO NOT install the
output gears dry or the diff may leak (gure 1).
2) Install one metal plate, one output gear and the four diff pins into the diff cup
(gure 2).
3) Fill the diff cup 2/3rds of the way full with your choice of silicone diff oil (gure 3).
4) Install the diff gears onto the pins. NOTE: Notice the direction that each gear
is installed (gure 4).
5) After installing the diff gears, ll the diff cup completely with diff oil, then let it "rest"
until any trapped air bubbles disappear. SEE NOTE BELOW.
6) Apply a light coat of silicone diff oil to the large o-ring, then install the o-ring over the
"step" in the diff cup. Next, install the second output gear and metal plate (gure 5).
7) Press the metal diff end-cap into place, then install the ring gear. Tighten the four screws
equally in a criss-cross fashion to prevent warping the diff cup or ring gear (gure 6).
NOTE: It's important that there are no air bubbles in the diff oil. Having too much air in the differential will cause the oil to work inconsistently and result in
poor vehicle performance.
 Loading...