5-3
Outboard Rigging Guide - 2001 Tachometer
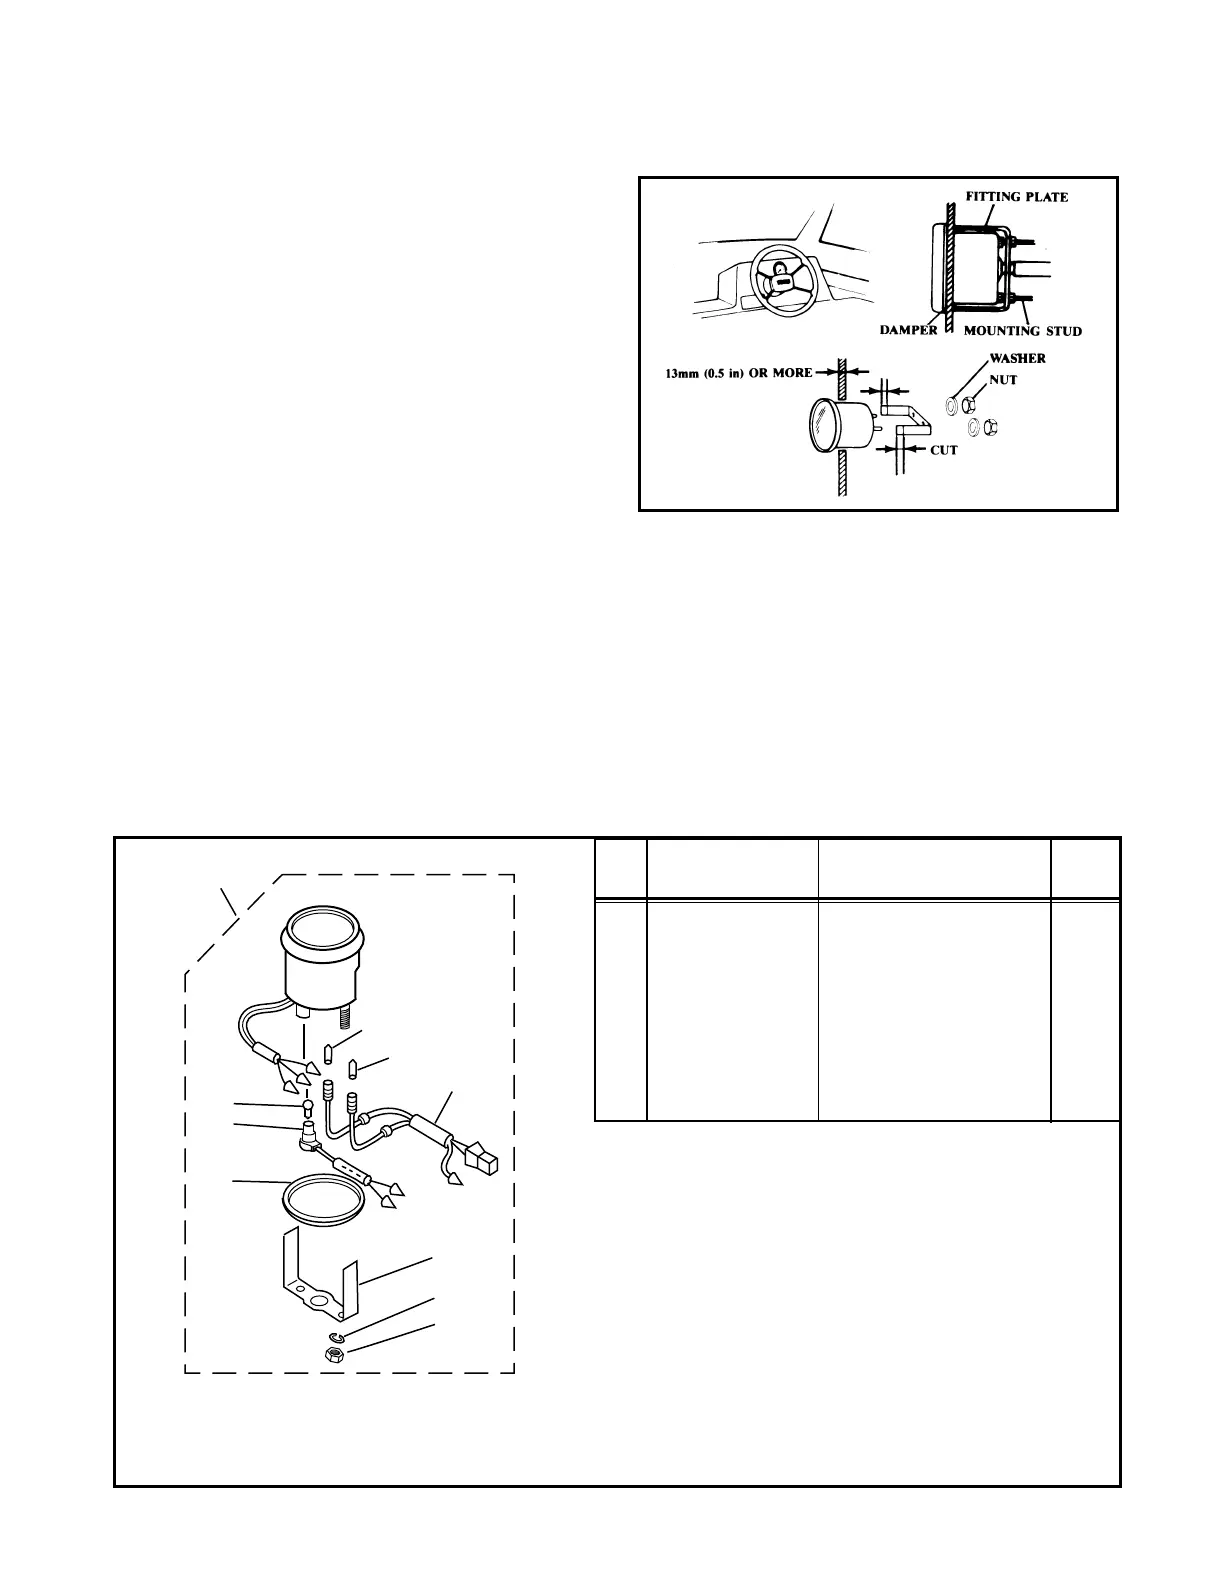
Mounting
1. Select a mounting location so the tachometer
is easy to read from the operating position. Be
sure there is sufficient clearance behind the
panel for the meter.
2. Make a 3-3/8 inch diameter hole in the
desired location.
3. Remove the fitting plate from the meter, fit
the meter into the panel, and install the fitting
plate over the mounting studs.
4. Place the washers over the studs, and then
evenly tighten the mounting nuts until the
meter can no longer be rotated by hand.
NOTE: If the dashboard has a thickness of more
than 13mm (0.50 in) and it is impossible to secure
the meter with the fitting plate, cut the fitting plate
so the meter may be installed.
Pro Series Tachometer
REF
NO PART NUMBER DESCRIPTION QTY.
1 Tachometer Assembly 1
2 6Y5-83517-00-00 • Bulb (12V-1.7W, T10) 1
3 6Y5-83536-10-00 • Socket, Meter 1
4 6Y5-83523-00-00 • Damper 1
5 6Y5-83514-00-00 • Plate, Fitting 1
6 6Y5-83509-10-00 • Socket Cord Assembly 1
7 6Y5-83518-00-00 • Bulb (12V-1.7W, T6.5) 2
8 95380-05600-00 • Nut 2
9 92990-05100-00 • Washer, Spring 2
• Component parts
 Loading...