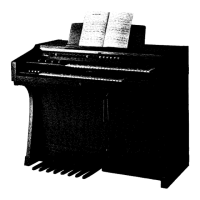
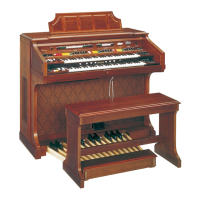
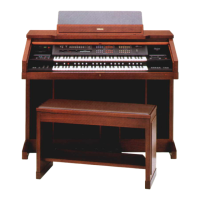
Do you have a question about the Yamaha Electone US-1 and is the answer not in the manual?
Explains safety symbols and important notices for the product.
Discusses compliance with regulations and potential interference from other devices.
Product safety testing and warranty implications of modification.
Yamaha reserves the right to change specifications without notice.
Clarifies warranty coverage for service due to lack of user knowledge.
Covers power verification, plugs, environment, and ventilation.
Covers cord safety, hearing, water, object/liquid spills.
Covers servicing guidelines, user limits, and power off procedures.
Covers RFI and FCC compliance, testing, and correction measures.
Instructions for turning the US-1 on, ABC setup, and volume.
Choosing accompaniment modes and preset registrations.
Guide to playing musical examples and stopping accompaniment.
General advice for cleaning and maintaining the instrument's cabinet.
Instructions for operating and locking the instrument's fall board.
Description of the panel illumination and its control switch.
Details on the two 61-note keyboards and their range.
Information on the 20-note pedalboard and its usage.
Instructions for cleaning the instrument's keys and pedals.
Explanation of the MULTI MENU display and its interactive controls.
Headphone, Aux In/Out, and Mic In connections.
EXP. IN jacks for connecting external instruments.
Instrument power switch and factory reset procedure.
Indicates when volume is controlled by remote or Music Disk Recorder.
Mentions foot switches located on the expression pedal.
Describes ORCHESTRAL, PERCUSSIVE, and LEAD voice types on the upper keyboard.
Describes ORCHESTRAL and PERCUSSIVE voice types on the lower keyboard.
Describes the single voice section available for the pedals.
How to activate voice buttons and select sounds using the MULTI MENU.
Using the DATA dial to change voices and assign sounds to buttons 1 and 2.
Using the DATA dial for precise volume adjustments.
Adjusting vibrato DELAY, DEPTH, and SPEED parameters.
Using key pressure (aftertouch) to add vibrato to lead voices.
Choosing between automatic preset slide or user-defined speed.
How the knee lever can be used to control the slide function.
Creates a symphony-like effect by dividing sound into channels.
Similar to Symphonic but with a slower sense of motion.
Adjusting STAGE, FREQ., DEPTH, and F.B. for the Phaser effect.
Controls for Flanger effect: D.TIME, DEPTH, FREQ., and F.B.
Parameters for Delay effect: D.TIME, F.B., DIRECT, and DELAY volumes.
Controls for Wah effect: SPEED, FREQ., and DEPTH.
Applying Touch Tone to LEAD, UPPER, LOWER, and PEDAL sections.
Setting the volume balance between the Upper and Lower keyboards.
Choosing between slow (Chorus) or fast (Tremolo) rotation effects.
Adjusting the speed of the Tremolo effect using the DATA dial.
Explains the three modes (MODE1, MODE2, MODE3) for Melody On Chord.
How the knee lever can be used to control the M.O.C. function.
Adjusting sustain length from SHORT to LONG for different sections.
Using the knee lever to control sustain on Upper and Lower keyboards.
Enabling sustain for the pedal section, independent of the knee lever.
Assigning the knee lever to control M.O.C. or SLIDE.
Adjusting the volume of the reverberant sound.
Selecting reverb modes (MODE 1 to MODE 4) for varying reverberation length.
Selecting named rhythm patterns or numbered buttons 1-4.
Changing accompaniment patterns (ACC. 1-4) and voices.
Adjusting the overall volume of the rhythm section.
Adjusting the balance among rhythm instruments.
Using START and SYNC. START buttons to control rhythm playback.
Using INTRO./ENDING and FILL IN buttons for song structure.
Understanding the tempo display and bar/beat indicator.
Selecting between PRESET and USER modes for percussion assignment.
Function to assign rhythm instruments to specific keys.
Assigning instruments and effects to rhythm percussion.
Process for assigning rhythm instruments to keyboard keys or pedals.
How to verify assigned rhythm instruments to keys.
Method to cancel percussion assignments for individual keys.
Procedure to cancel all percussion assignments at once.
How to exit the percussion assignment mode.
Explains Single Finger, Fingered Chords, and Custom modes for A.B.C.
Lower Memory and Pedal Memory functions for uninterrupted playback.
Selecting and controlling accompaniment voices, including volume and effects.
Controlling Rhythm, Glide, and Tempo with the left foot switch.
Controlling Registration and Tremolo with the right foot switch.
Choosing between GENERAL and THEATER/CLASSICAL registration groups.
Table listing the 16 preset registrations by number and category.
How buttons 1-16 recall preset registrations when the P. lamp is ON.
Note that ABC settings are not changed by Preset Registrations.
Steps to store current settings into one of the 16 registration memory locations.
Details on what types of settings can be saved in registration memory.
Data regarding Rhythm buttons, patterns, and tempo that can be stored.
ON/OFF status for ABC, Lower Memory, Pedal Memory, M.O.C.
List of settings that cannot be stored in registration memory.
Procedure to recall a stored registration from memory.
Procedure to set a custom name for programmed registrations.
Allows changing registrations without altering rhythm/accompaniment settings.
Basic steps for playing back recorded chord sequences.
Playing back multiple recorded C.S.P. songs sequentially.
Configuring TACT, REPEAT, and CHORD settings for playback.
Steps to initiate the recording process for a C.S.P. sequence.
Choosing the duration for recorded chords.
Steps for recording registration numbers into C.S.P.
Steps for recording rhythm patterns into C.S.P.
Recording song structure elements into C.S.P.
Recording Segno, Coda, and D.S. repeat marks.
Methods for ending the recording process.
Listening to C.S.P. data as it is being recorded.
Navigating through recorded C.S.P. data using the DATA dial.
Limitations on changing rhythm during C.S.P. operation.
Limitations on changing registration names during C.S.P. operation.
How MULTI MENU functions behave during C.S.P. operation.
Impact of meter changes on BAR/BEAT display.
Steps to access the edit mode for C.S.P. sequences.
Replacing existing data with new data in a C.S.P. sequence.
Erasing data from a C.S.P. sequence.
Adding new data before existing data in a C.S.P. sequence.
Inserting a new ending point for a C.S.P. sequence.
| Type | Electronic organ |
|---|---|
| Manufacturer | Yamaha |
| Model | US-1 |
| Rhythm | Built-in rhythm patterns |
| Speakers | Built-in speakers |
| Power Supply | AC 120V, 60Hz |
| Keyboard | 49 keys |
| Pedalboard | 13 keys |
| Effects | Reverb, Sustain |
| Voices | Multiple orchestral and synthesizer voices |