MOXF6/MOXF8 Owner’s Manual
Quick Guide
44
Creating a synthesizer part by
using Arpeggio
Next, record Arpeggio playback via Realtime Recording to
Trac k 3.
1 In the Song Play mode, select the same Song to
which the Drum and Bass parts have already been
recorded.
2 Press the ARP [ON/OFF] button so that its lamp
lights.
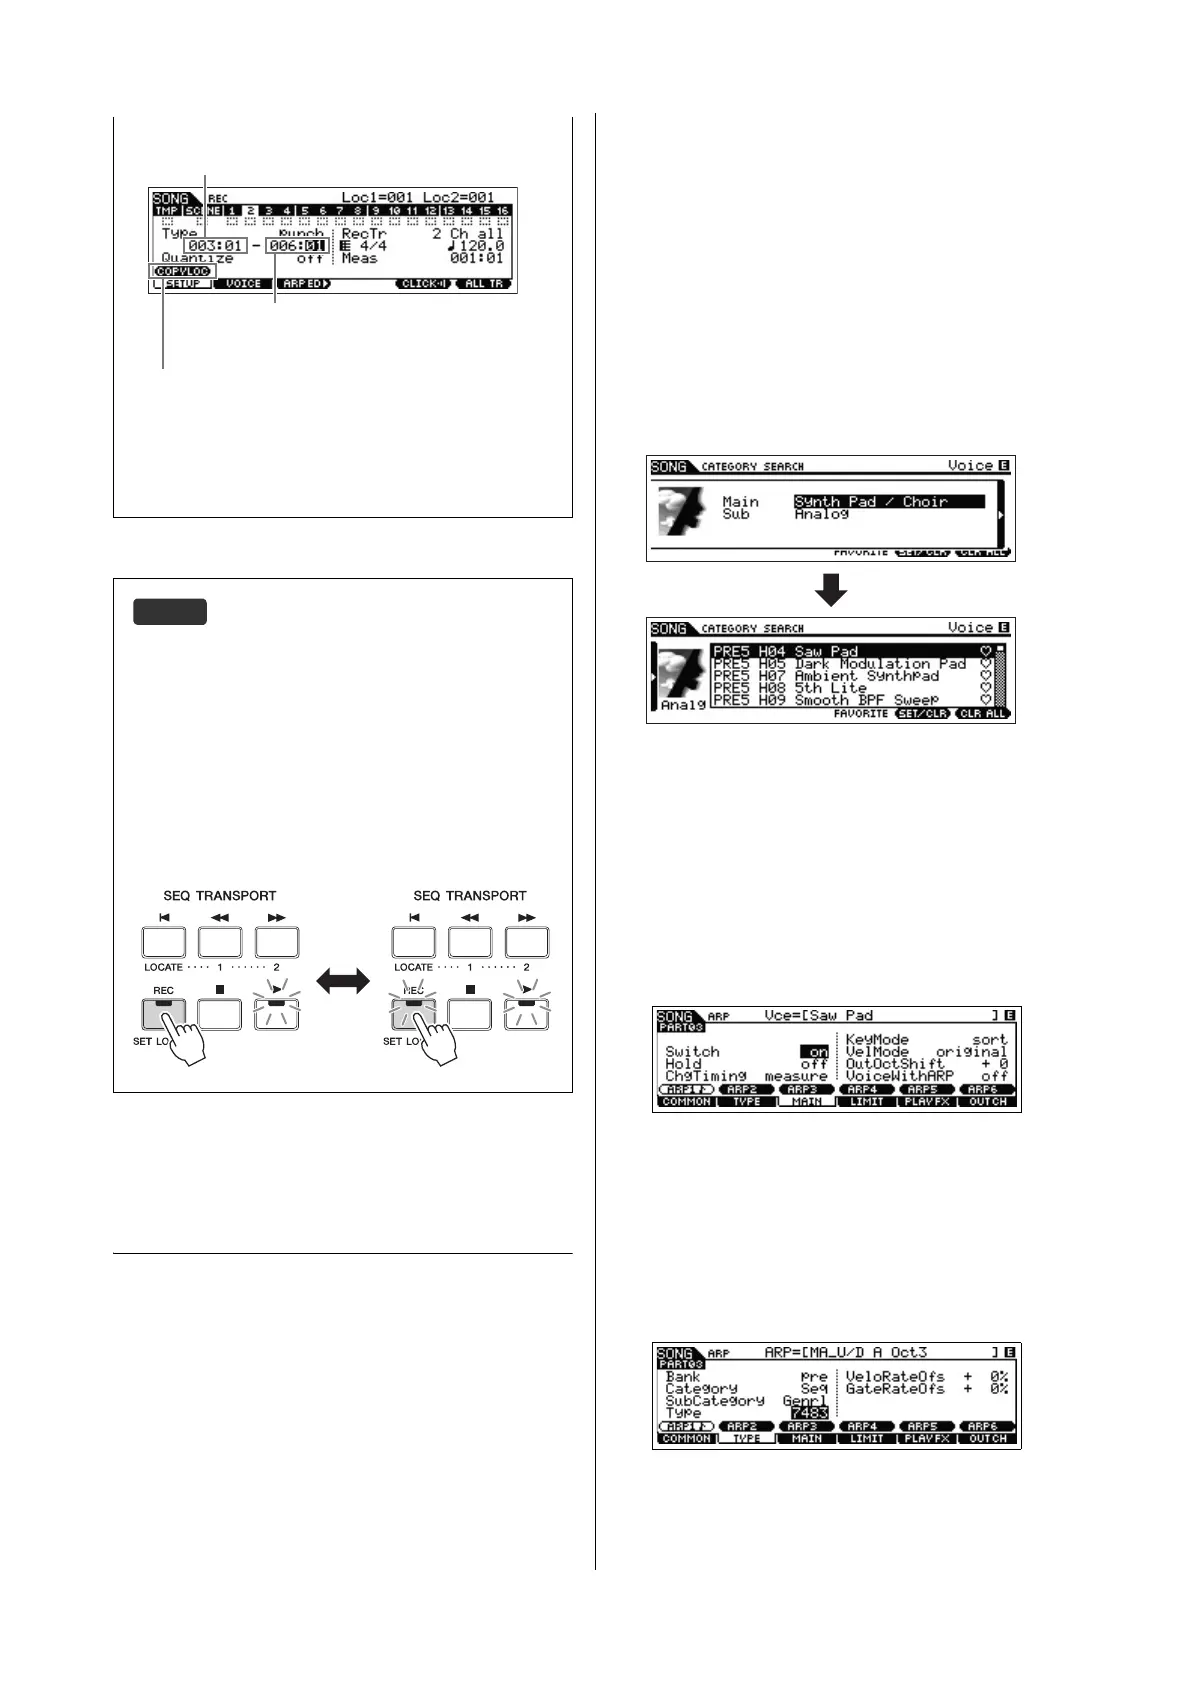
3 Press the [REC] button, followed by the [F1]
SETUP button, then set the parameters as below.
• “Type” = “replace”
• “Quantize” = “off”
• “RecTr” = “3”
4 Press the [F2] VOICE button, followed by the
[CATEGORY SEARCH] button then select the
Synthesizer Voice.
Set the Main Category to “Synth Pad / Choir” then set the
Sub Category to “Analog.” Move the Cursor [>] button to call
up the Voice List. From this list, select “PRE5 H04 Saw Pad”
then press the [ENTER] button.
5 Press ARP [EDIT] or [F3] ARP ED [F3] MAIN,
then set the Switch parameter to “on” and set the
“VoiceWithARP” parameter to “off.”
With the “Switch” parameter “on,” the Arpeggio of Track 3
can be played back.
If the “VoiceWithARP” parameter is set to “on,” selecting the
Arpeggio Type will change the Voice from the one selected
in step 4. This is why you should set the “VoiceWithARP”
parameter to “off” here.
6 Press [F2] TYPE [SF1] ARP1, then assign the
Arpeggio Type to the [SF1] ARP1 button.
On this display, set the parameters as below:
• “Bank” = “Pre”
• “Category” = “Seq”
• “SubCategory” = “Genrl”
• “Type” = “7483”
If desired, assign different Arpeggio Types to the [SF2] –
[SF6] buttons.
NOTE
For instructions on using the Location settings, see the
“Reference Manual” PDF document.
Rehearsing function while recording
During Realtime Recording in the Song/Pattern mode, pressing
the [REC] button will call up the “Rehearsal” mode. In this
mode, the [REC] indicator will flash and playback will continue
uninterrupted; however, no data will be recorded, letting you
practice a part or try out various ideas (while listening to the
other tracks) without actually recording. To return to the Record
mode, press the [REC] button again—the [REC] indicator will
light continuously.
Punch Out point
Recording ends at this point and normal
playback of the recording Track starts.
Punch In point
Playback of the recording Track is turned off from this point,
and your keyboard performance will be recorded to the Track.
[SF1] COPYLOC button
Press the [SF1] COPY LOC to assign the measure numbers
registered to the Locations (Loc1 and Loc2) to the Punch
In and Punch Out points.
Recording
Rehearsal mode
(playback continues)
 Loading...