model number 060-1744-0 | contact us: 1.866.523.5218 model number 060-1744-0 | contact us: 1.866.523.5218
12 13
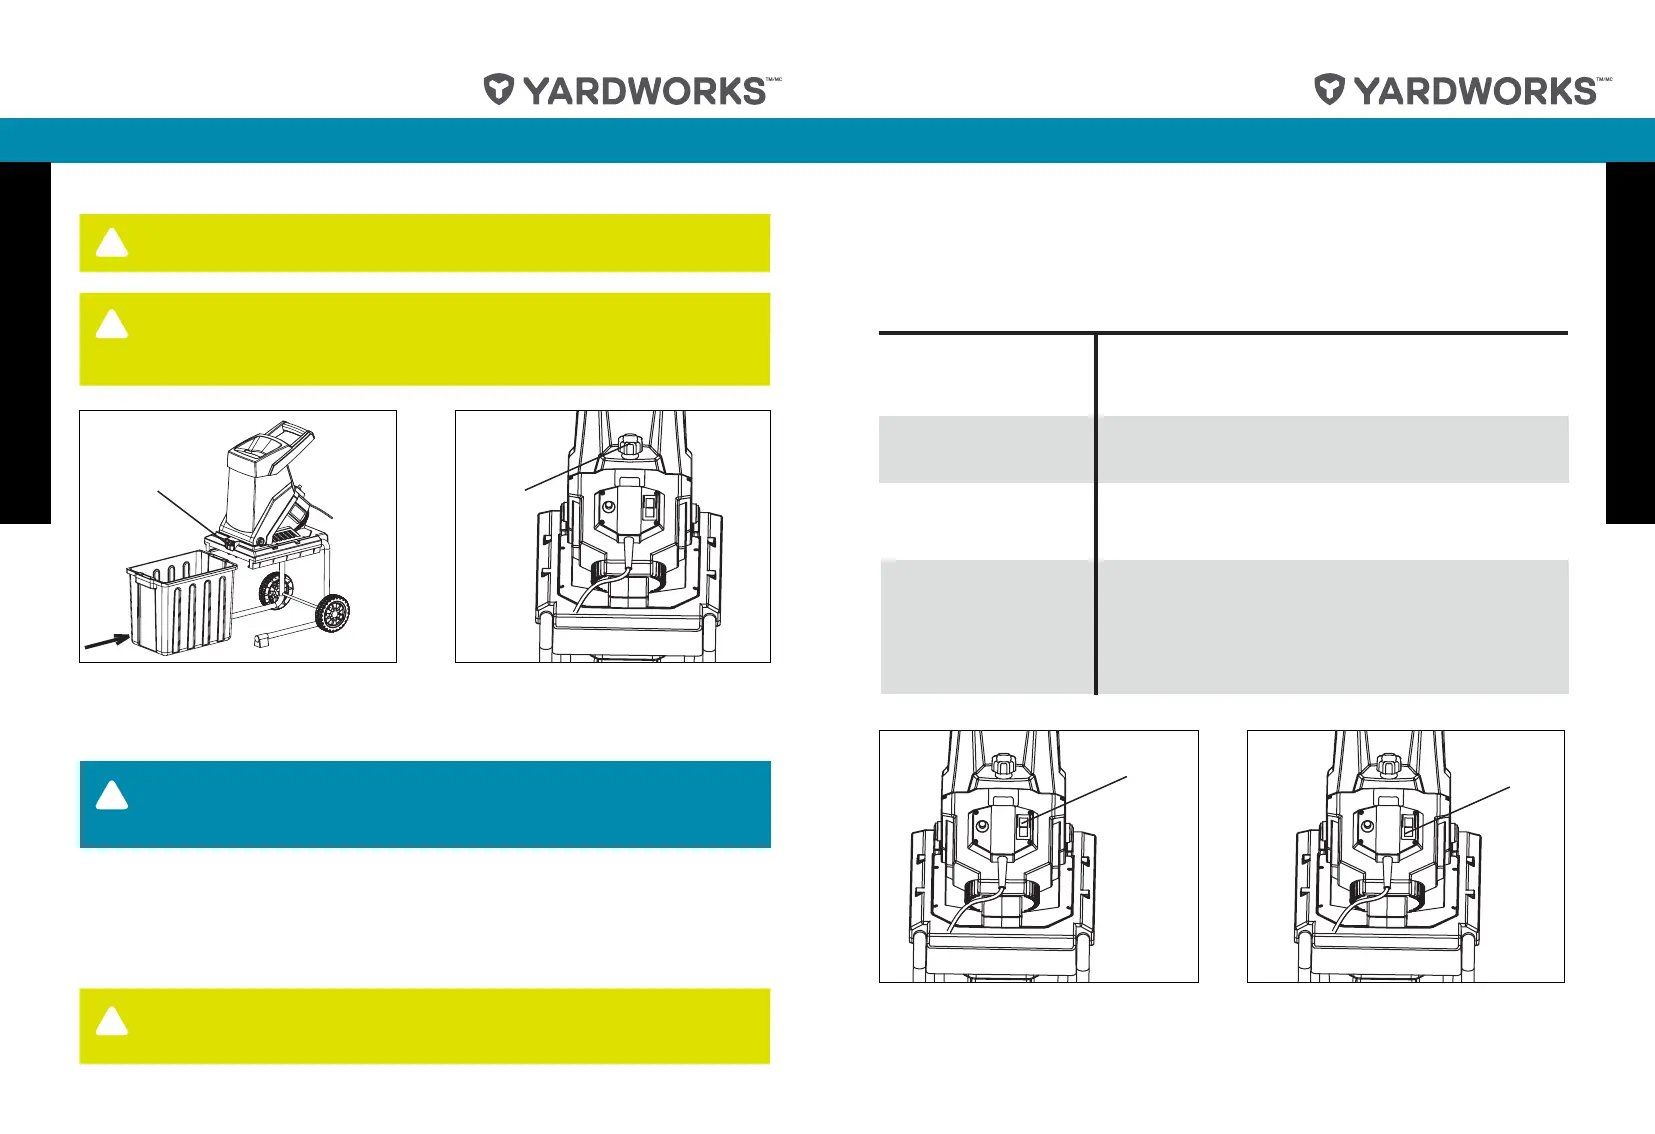
FITTING THE COLLECTION BOX
1. Lift the locking button then attach the collection box into the frame as
shown in Fig. 3.
2. Make sure the locking button and locking knob (Fig. 4) are locked
before using the machine.
Assembly
Fig. 3
!
WARNING!
Before assembly, make sure that the machine is
switched off and unplugged.
!
WARNING!
Take care when tilting the unit onto its wheels as
the unit has an uneven weight distribution when tilted and during
wheeled transportation.
NOTE:
Before assembling the collection box, make sure the
machine is in the upright position and two brackets are placed on
the ground.
!
locking button
!
WARNING!
To ensure the stability of the shredder, make sure that
the cap-headed bolts and washers are securely tightened.
Fig. 4
locking knob
For best results when shredding, follow the guidelines shown in the table
below.
MATERIAL SHREDDING METHOD
Operation
Feed into the feeding chute at a rate which the shredder
will accept without overloading. Use the plunger to push
the material into the chute if required.
Twigs and pruning up to
1/4" (6 mm) diameter.
Branches and pruning
up to 1 1/2" (39 mm) in
diameter.
Bedding plants, weeds
and shrubby growth.
Clip off all side growth with pruning shears before
feeding into the feeding chute with the plunger.
Knock soil and stones off the roots to avoid damage to
the blades. Avoid weeds that may have seeded. The
seeds may not decompose and may germinate later.
With any material having a high, moisture content, it is
advisable to feed in some drier sticks at regular intervals
to help push the material through the cutting assembly
and prevent it from clogging.
Freshly cut foliage,
hedge pruning, and
kitchen waste (e.g.,
cabbage leaves,
vegetable peelings,
etc.)
Fig. 5
On position
Fig. 6
Off position