5 Disassembly and Reassembly of the Motor
5.1 Disassembly and Reassembly of the S-Axis Motor
5-1
176183-1CD
HW1483638
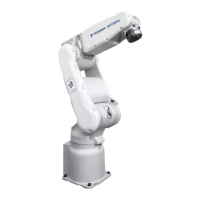
MH5S(II)/MH5F
5 Disassembly and Reassembly of the Motor
5.1 Disassembly and Reassembly of the S-Axis Motor
• Refer to Fig. 5-1 “Disassembly & Assembly of S-Axis Motor”.
Disassembly
1. Turn OFF the DX100/DX200/FS100 power supply.
2. Unscrew the installation bolts and put the manipulator down sideways.
Before unscrew the bolts, be sure to perform positioning to restore the
installed position. If the installed position is changed after the motor
replacement, all the teaching points for the JOBs need to be modified.
3. Unscrew the hexagon socket button head screws and remove the
cover .
4. Connect the backup battery with the cable of S-axis motor .
(Refer to Chapter 2 “Notes for Maintenance”.)
5. Disconnect the cables (both encoder and power-cables) of the S-axis
motor from the internal wiring harness.
6. Unscrew the hexagon socket head cap screws and remove the
S-axis motor with the M-base , using the tap of the hexagon socket
head cap screw as a removal tap.
7. Unscrew the hexagon socket head cap screws and remove the
gear .
8. Unscrew the hexagon socket head cap screws and remove the
M-base from the S-axis motor .
Reassembly
1. Install the M-base
on the S-axis motor . At this time, be careful
not to damage the oil seal of the M-base
.
2. Tighten the hexagon socket head cap screws with the tightening
torque shown in Table 5-1 “S-Axis Motor Parts Checklist”.
3. Mount the gasket and then the gear
on the S-axis motor .
4. Attach the conical spring washer to the hexagon socket head cap
screw , then apply LOCTITE 242 to its thread part and tighten it with
the tightening torque shown in Table 5-1.
5. Before mounting the S-axis motor which is reassembled in step 3 on
the base, apply Three Bond 1206C to the matching face between the
M-base and the base.
6. Tighten the GT-SA bolts with the tightening torque shown in
Table 5-1.
7. Connect the cables (both encoder and power-cables) of the S-axis
motor with the internal wiring harness.
Refer to Chapter 3 “Home Position Return” and Chapter 4
“Grease Replenishment” in this manual.
If you replace the motor, you don’t need to insert the backup
battery.
Remove old sealing from each parts before starting
assembling.
 Loading...