6 Disassembly and Reassembly of Speed Reducer
6.2 Disassembly and Reassembly of L-Axis Speed Reducer
6-5
176183-1CD
HW1483638
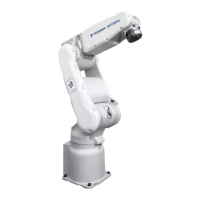
MH5S(II)/MH5F
6. Temporarily tighten the GT-SA bolts .
7. Apply Harmonic Grease SK-1A on the surface between the teeth of
flex spline and the circular spline and insert the circular spline
in the L-arm.
8. Attach the conical spring washers to the hexagon socket head cap
screws and tighten them with the tightening torque shown in
Table 6-2 “L-Axis Speed Reducer Parts Checklist”.
9. Apply ThreeBond 1206C to the thread parts of the GT-SA bolts and
tighten them with the tightening torque shown in Table 6-2.
10. Insert the bearings in the wave generator . Then insert it in the
housing . (Apply ThreeBond 1206C to the outside and inside walls of
*a and insert it in the housing and the wave generator .) (When
replace the speed reducer, replace the bearings too.)
11. Tighten the GT-SA bolts with the tightening torque shown in
Table 6-2.
12. Mount the pulley on the wave generator .
13. Attach the conical spring washer to the hexagon socket head cap
screw and apply LOCTITE 638 to its thread part. Then tighten it
with the tightening torque shown in Table 6-2.
14. Apply ThreeBond 1206C to the matching face between the housing
mounted the wave generator and the circular spline . Then mount
the housing and the circular spline .
15. Put the timing belt on the pulley
. (Refer to section 8.1 “Disassembly
and Reassembly of L- and U-Axis Timing Belts”.)
16. Put the internal wiring harness back and mount the cover . (Refer to
Chapter 10 “Cable Wiring”.)
17. Turn ON the DX100/DX200/FS100 power supply.
 Loading...