2.8.19 TOOL NOSE RADIUS COMPENSATION
(G40 THROUGH G 44) (Cent’d)
(7) How to cances compensation
mode (Cent’d)
~.
T–
-
-
-
T+– T-
(a) Normal Insert
4
G42
G41 ~_
G-il
G42
T.
T : T,+
All ROUND INSERT
(b) All Round Insert ( G code to
is decided
by setting side of virtual
@
VIRTIJAL
TOOL NOSE
I
be used
tool nose. )
Fig. 2.33 Relations between G code and Sign of T Code
for Tool Nose Radius Compensation.
2.8.19.1 Automatic Nose R Function
Nose R compensation is performed by the nose R
control point (0 to 9) command and G41, G42.
The offset side switching from the end face to
the outer diameter becomes simple.
When the T command is executed, the tool is
selected and the nose R and control point
corresponding to the tool is also selected,
Then the tool coordinate system based on the
machine coordinate system is set.
After the T command is given, the calculation
for nose R compensation is performed by the
control point and G41, G42.
2.8.19.2 Conditions for the Automatic Nose R
Compensation Function to be Enabled
Automatic nose R compensation
becomes effective
by four conditions:
the projected tool nose point
designation set by the offset number, the radius
of tool nose R, the offset side setting by G41 and
G42, and the T code command.
The following are the details.
2.8.19 .2.1 Designation of the projected tool nose
point
(1) Direction of the projected tool nose point
The shift direction of automatic nose R is
prescribed by determining the projected tool nose
point position by specifying a numeral of O to 9.
The direction is as shown in Fig. 2.34 (X
plus specification).
2 6
71
0’9
I
L
3
8
5
Fig. 2.34 Projected Tool Nose Direction
(2) How to set the projected tool nose point
The projected tool nose point is set through the
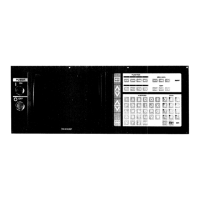
offset screen (Fig, 2.35) .
m
n
(a) Select the “ •~~ “ function.
(b) Select the corresponding tool offset memory
from TO1 to T49.
projected tool nose point is 3.
Fig. 2.35 Offset Screen
56
 Loading...


