6 Disassembly and Reassembly of Speed Reducer
6.1 Disassembly and Reassembly of S-Axis Speed Reducer
6-1
159281-1CD
HW1480357
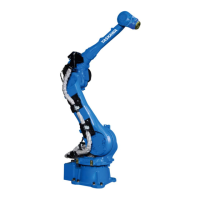
HP20D
6 Disassembly and Reassembly of Speed Reducer
6.1 Disassembly and Reassembly of S-Axis Speed Reducer
• Refer to Fig. 6-1 “Disassembly and Reassembly of S-Axis Speed
Reducer”.
Disassembly
1. Turn OFF the DX100 power supply.
2. Remove the S-axis motor . (Perform the steps 2 to 6 of
“Disassembly” in section 5.1 “Disassembly and Reassembly of S-Axis
Motor”.)
3. Remove the hexagon socket head cap screws , then remove the M-
base .
4. Remove the GT-SA bolts . Then, lift up the upper part of the
manipulator including the S-head by using a chain block, and put it
down next to the base. Before putting it down, lay shock absorbing
material (such as wooden blocks and boards) under it to avoid
damages on the bottom face of the S-head. Be careful not to pinch the
internal wiring harness when putting it down.
5. Remove the GT-SA bolts . Then, remove the speed reducer by
using the tapped holes.
6. Drain grease which remains inside.
Reassembly
1. Apply ThreeBond 1206C on the matching surface between the base
and the speed reducer . Then, mount the speed reducer on the
base.
2. Tighten the GT-SA bolts with the tightening torque shown in Table
6-1 "S-Axis Speed Reducer Parts Checklist".
3. Apply ThreeBond 1206C on the matching surface between the speed
reducer and the S-head. Then, mount the upper part of the
manipulator including the S-head on the speed reducer .
4. Tighten the GT-SA bolts with the tightening torque shown in Table
6-1 "S-Axis Speed Reducer Parts Checklist".
5. Remove the old sealing bond on the matching surface between the M-
base and the S-head, then apply ThreeBond 1206C on the matching
surface. Then, mount the M-base on the S-head. Tighten the
hexagon socket head cap screws with the tightening torque shown
in Table 6-1 "S-Axis Speed Reducer Parts Checklist".
• Refer to chapter 3 “Home Position Return”, chapter 4
“Grease Replenishment and Exchange”, chapter 5
“Disassembly and Reassembly of Motors”, chapter 7
“Disassembly and Reassembly of Wrist Unit”, and chapter
10 “Cable Wiring”.
• Remove old sealing bond on each part completely before
reassembly.
 Loading...