3
ASSEMBLY INSTRUCTIONS
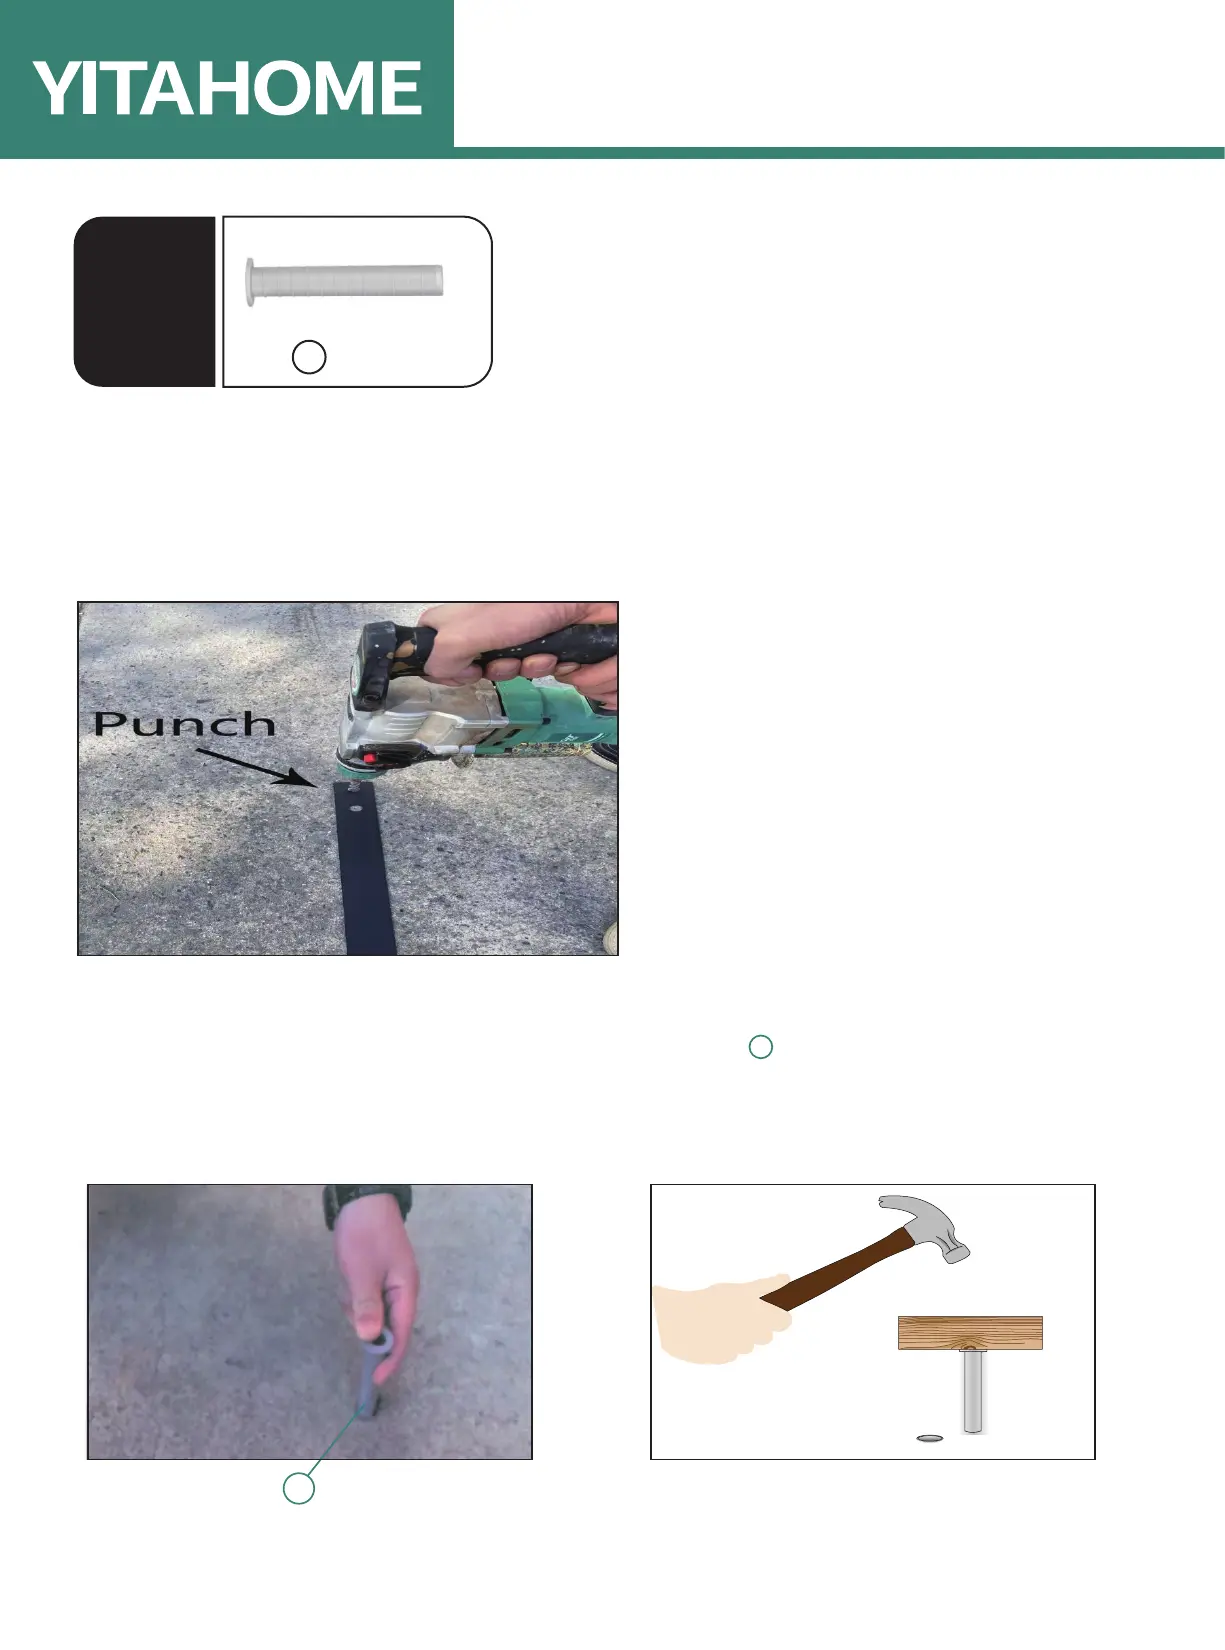
Drill 20 holes on the markings made in step 1 using an electric drill with a 17-17.5mm drill bit.
The drilling should be 4 inches deep and perpendicular to the ground (Fig. 1).
(Users should prepare their own electric drill and drill bit.)
Note: Make sure that all markings are correctly placed before drilling.
20pcs
3
2
(Fig.1)
(Fig.2) (Fig.3)
3
After drilling, clear out debris from the holes, then insert Part (plastic sleeve) in the hole (Fig. 2).
NOTE: To fully insert and prevent damage, place a wooden block on top as shown in Fig. 3 and
gently tap the sleeve down into the hole until it is flush with the ground.
3