P5417090
15
(2) Attaching Flat Panel
Insert the arm shafts on both sides of the
at panel into the holes on the unit body,
along the guide of the front panel. After the
at panel is attached completely, insert the
catches for the air lter to complete.
TIWM006B22S to TIWM012B22S
(1) Removing Flat Panel
(a) Hold both sides of the at panel and lift it up.
(b) Release the two (2) catches and pull the air
lter downward to remove it.
(c) Open the at panel fully and slightly extend
the right arm shaft outward. After the shaft
is removed from the front panel, pull the
at panel forward with the right arm shaft
slightly extended outward and then remove
the at panel.
(2) Attaching Flat Panel
Insert the arm shafts on both sides of the at
panel into the holes on the unit body, along
the guide for the front panel. After the at
panel is reattached, insert the catches for air
lter to complete.
(b) Release the two (2) catches and pull the air
lter downward to remove it.
(c) Open the at panel fully and push the
right arm shaft inward. After the shaft is
removed from the front panel, pull the
at panel forward with the right arm shaft
slightly pushed inward and then remove the
at panel.
TIWM015B22S to TIWM030B22S
(1) Removing Flat Panel
(a) Hold both sides of the at panel and lift it up.
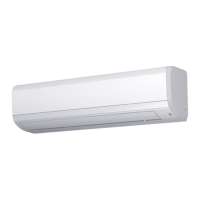
5.2.5 Removing Flat Panel
When removing the at panel, remove it according to the following instructions. Take care not to scratch
any other plastic parts.
Remove and attach the at panel with both hands. When installing or removing the front panel, do not use
excessive force as it and other portions can easily break.
Hole
Guide at
Front Panel
Front Panel
Flat Panel
Flat Panel
Remove this part
from the hole.
Expand the shaft
toward arrow
direction.
Front Panel
Flat Panel
Hole
Guide at
Front Panel
Remove this part
from the hole.
Push the shaft
toward arrow
direction.
 Loading...
