EasyManua.ls Logo

Z-Wave.Me RAZBERRY 7 - User Manual

Z-Wave.Me RAZBERRY 7
6 pages
Print Icon
To Next Page IconTo Next Page
Loading...
Installation steps:
1. Install the RaZberry 7 shield on the Raspberry Pi GPIO
2. Install Z-Way software
The RaZberry 7 shield is designed to work with the Raspberry Pi 4 Model B,
but is fully compatible with all previous models, such as: A, A+, B, B+, 2B, Zero,
Zero W, 3A+, 3B, 3B+. The maximum potential of the RaZberry 7 is achieved
together with Z-Way software.
There are several ways to install Z-Way:
1. Download a ash card image based on Raspberry Pi OS with pre-installed
Z-Way (ash card minimum size is 4 GB)
https://storage.z-wave.me/z-way-server/raspberryPiOS_zway.img.zip
2. Install Z-Way on Raspberry Pi OS from an apt repository:
wget -q -O - https://storage.z-wave.me/RaspbianInstall | sudo bash
3. Install Z-Way on Raspberry Pi OS from a deb package:
https://storage.z-wave.me/z-way-server/
It is recommended to use the latest version of Raspberry Pi OS.
NOTE: RaZberry 7 is also compatible with other third party Z-Wave software
supporting Silicon Labs Z-Wave Serial API.
After the successful installation of Z-Way, make sure that Raspberry Pi has
Internet access. In the same local network go to https://nd.z-wave.me, you
will see the local IP address of your Raspberry Pi below the login form. Click
on the IP to reach the Z-Way Web UI initial setup screen. The welcome screen
shows the Remote ID and will prompt you to set the administrator password.
NOTE: If you are in the same local network as the Raspberry Pi, you can access
Z-Way Web UI using a browser by typing in the address bar: http://RASPBERRY_
IP:8083.
After setting the administrator password you can access the Z-Way Web UI
from anywhere in the world, to do this go to https://nd.z-wave.me, type ID/
login (e.g. 12345/admin) and enter your password.
PRIVACY NOTE: Z-Way by default connects to the server nd.z-wave.me
in order to provide remote access. If you don’t need this service, you can turn
off this feature after logging into Z-Way (Main menu > Settings > Remote
Access). All communications between Z-Way and the server nd.z-wave.me
areencrypted and protected by certicates.
Congratulations!
You have got amodern Z-Wave
shield RaZberry7 with extended
radio range.
RaZberry 7 will transform your
Raspberry Pi into a full featured
smart home gateway.
Dashboard (1)
Rooms (2)
Widgets (3)
Device widgets (7)
Widget settings (8)
Events (4)
Quick automation (5)
Main menu (6)
INTERFACE
The “SmartHome” user interface looks similar on different devices such
asdesktops, smartphones or tablets, but adapts to the screen size. The user
interface is intuitive and simple:
1. Favourite devices are displayed on the Dashboard (1)
2. A devices can be assigned to a Room (2)
3. The full list of all devices is in Widgets (3)
4. Every sensor or relay triggerings are displayed in Events (4)
5. Set up scenes, rules, schedules and alarms in Quick Automation (5)
6. Apps and system settings are in the Main menu (6)
The device can provide several functions, for example a 3-in-1 Multisensor
provides: motion sensor, light sensor and temperature sensor. In this case there
will be three separate widgets (7) with individual settings (8).
Advanced automation can be congured using local and online Apps. Apps
allow you to set up rules like “IF > THEN”, to create scheduled scenes, set auto
off timers. Using applications you can also add support for additional devices:
IP cameras, Wi-Fi plugs, EnOcean sensors and set up integrations with Apple
HomeKit, MQTT, IFTTT etc. More than 50 applications are built-in and more
than 100 can be downloaded for free from the Online Store. Applications are
managed in the Main menu > Apps.
RaZberry 7 Z-Wave shield (Raspberry Pi not included)
Z
-
WAVE SHIELD
RAZBERRY 7
(ZME_RAZBERRY7)
Question and Answer IconNeed help?

Do you have a question about the Z-Wave.Me RAZBERRY 7 and is the answer not in the manual?

Overview

The Z-Wave Shield RaZberry 7 (ZME_RAZBERRY7) is a modern Z-Wave shield designed to transform a Raspberry Pi into a full-featured smart home gateway with extended radio range. It is compatible with Raspberry Pi 4 Model B, as well as previous models including A, A+, B, B+, 2B, Zero, Zero W, 3A+, 3B, and 3B+. The shield achieves its maximum potential when used with Z-Way software.

Function Description:

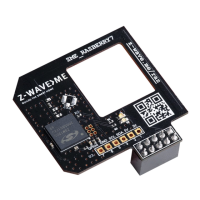
The RaZberry 7 shield acts as a Z-Wave transceiver, enabling the Raspberry Pi to communicate with Z-Wave devices. It supports inclusion and exclusion modes (indicated by a red LED) and data transmission (indicated by a green LED). The device allows for the creation of a smart home system with a user-friendly interface accessible via desktops, smartphones, or tablets. This interface includes a dashboard for favorite devices, room assignments, a full list of devices (widgets), event logs, quick automation settings (scenes, rules, schedules, alarms), and a main menu for apps and system settings.

The Z-Way software supports advanced automation through local and online apps. These apps enable users to set up "IF > THEN" rules, create scheduled scenes, configure auto-off timers, and integrate with various devices such as IP cameras, Wi-Fi plugs, EnOcean sensors, Apple HomeKit, MQTT, and IFTTT. Over 50 applications are built-in, with more than 100 available for free download from the Online Store.

Important Technical Specifications:

  • Z-Wave Transceiver: Silicon Labs ZGM130S
  • Wireless Range: Minimum 40 meters indoors in direct line of sight.
  • Dimensions/Weight: 41 x 41 x 12 mm / 16 gr.
  • LED Indication: Red for Inclusion and Exclusion Mode; Green for Send Data.
  • Interface: TTL UART (3.3 V) compatible with Raspberry Pi GPIO pins.
  • Frequency Ranges (ZME_RAZBERRY7):
    • (865...869 MHz): Europe (EU) [default], India (IN), Russia (RU), China (CN), South Africa (EU), Middle East (EU).
    • (908...917 MHz): America, excluding Brazil and Peru (US) [default], Israel (IL).
    • (919...921 MHz): Australia / New Zealand / Brazil / Peru (ANZ), Hong Kong (HK), Japan (JP), Taiwan (TW), Korea (KR).
  • Antenna: Printed board microstrip trace antenna.
    • Trace Antenna Design: Length: 33.141 mm, Width: 8.658 mm, PCB thickness: 1 mm, Copper thickness: 18 µm, Permittivity (dk): 4.6. Permitted variance for length is +/- 0.2 mm, for width is +/- 0.1 mm, for thickness is +/- 0.1 mm, and for permittivity is +/- 0.2.
  • FCC Device ID: ALIB2-ZMERAZBERRY7.
  • Power Requirements: Minimum 4 GB flash card for Raspberry Pi OS with pre-installed Z-Way.

Usage Features:

  • Installation:
    1. Install the RaZberry 7 shield onto the Raspberry Pi GPIO pins (pins 1-10).
    2. Install Z-Way software by either:
      • Downloading a flash card image based on Raspberry Pi OS with pre-installed Z-Way from https://storage.z-wave.me/z-way-server/raspberryPiOS_zway.img.zip.
      • Installing Z-Way on Raspberry Pi OS from an apt repository using wget -q -O - https://storage.z-wave.me/RaspbianInstall | sudo bash.
      • Installing Z-Way on Raspberry Pi OS from a deb package from https://storage.z-wave.me/z-way-server/.
    • It is recommended to use the latest version of Raspberry Pi OS.
  • External Antenna: An U.FL pad is available to connect an external antenna. When connecting an external antenna, the jumper R7 must be turned by 90°.
  • Initial Setup: After successful installation and ensuring Internet access, navigate to https://find.z-wave.me in the same local network. The local IP address of the Raspberry Pi will be displayed. Clicking on the IP will lead to the Z-Way Web UI initial setup screen, where the Remote ID is shown, and an administrator password needs to be set. Alternatively, within the same local network, the Z-Way Web UI can be accessed by typing http://RASPBERRY_IP:8083 in a browser. For remote access after password setup, go to https://find.z-wave.me and enter ID/login (e.g., 12345/admin) and password.
  • Privacy: Z-Way connects to find.z-wave.me by default for remote access. This feature can be disabled in the Main menu > Settings > Remote Access if not needed. All communications are encrypted and protected by certificates.
  • User Interface: The "SmartHome" interface is designed to be intuitive and adapts to different screen sizes. It provides access to:
    • Dashboard (favorite devices).
    • Rooms (device assignment).
    • Widgets (full list of devices).
    • Events (sensor/relay triggerings).
    • Quick Automation (scenes, rules, schedules, alarms).
    • Main menu (apps and system settings).
  • Device Functionality: A single device, such as a 3-in-1 Multisensor, can provide multiple functions (e.g., motion, light, and temperature sensing), each represented by separate widgets with individual settings.
  • Mobile App: A mobile app is available for download on the App Store and Google Play, offering similar functionalities to the web interface.

Maintenance Features:

  • Self-Test: Upon powering on, both LEDs should shine for approximately 2 seconds and then turn off. If they don't, the device may be defective (hardware problem if LEDs don't shine for 2 seconds, hardware problems or bad firmware if LEDs shine faintly constantly).
  • Firmware Updates: The RaZberry 7 shield is continuously improved with new features. To utilize these, firmware updates are necessary and can be performed from the Z-Way Expert UI under Network > Controller Information.
  • Frequency Change: The radio frequency of the RaZberry 7 shield can be changed at any time via the Expert UI (http://RASPBERRY_IP:8083/expert), under Network > Control, by selecting the desired frequency from the list.
  • FCC Compliance: The device complies with Part 15 of the FCC Rules. It is designed to operate without causing harmful interference and to accept any interference received. Changes or modifications not expressly approved by the responsible party could void the user's authority to operate the equipment.
  • RF Exposure: The equipment complies with FCC radiation exposure limits for an uncontrolled environment. It should be installed and operated with a minimum distance of 20 cm between the radiator and the user's body. It should not be co-located or operated in conjunction with any other antenna or transmitter.
  • Troubleshooting Interference: If the equipment causes harmful interference to radio or television reception, measures such as reorienting/relocating the receiving antenna, increasing separation between equipment and receiver, connecting to a different circuit outlet, or consulting a radio/TV technician are recommended.
  • OEM Integration: For OEM integrators, the module must be installed in host equipment such that 20 cm is maintained between the antenna and users, and the transmitter module is not co-located with any other transmitter or antenna. The module should only be used with the internal antenna(s) originally tested and certified with it. The end product must also display a label referring to the enclosed module, such as "Contains FCC ID: 2ALIB-ZMERAZBERRY7".

Z-Wave.Me RAZBERRY 7 Specifications

General IconGeneral
BrandZ-Wave.Me
ModelRAZBERRY 7
CategoryComputer Hardware
LanguageEnglish