10
GS1200
3.5”HDD
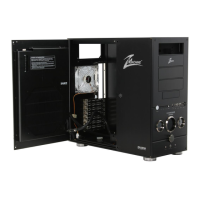
① ‘Open’ the Hot Swap Tray by pressing the Hot Swap Tray’s Hooks located on
the underside, and pushing in the direction as shown in the diagram.
② Install the HDD and check that the Hot Swap Tray’s Fixing Pins and the HDD’s
holes are properly aligned and fastened.
③ Fully insert the HDD installed Hot Swap Tray into the Hot Swap Bay.
2) HDD Installation (to HDD Tray)
3.5”HDD
3.5”HDD
3.5”HDD
 Loading...