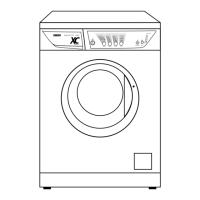
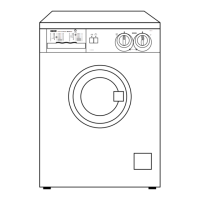
This document describes a Zanussi washing machine, models FLE 1016 W, FLE 1116 W, FLE 1216 W, and FLE 1416 W. It serves as an instruction booklet, providing essential information for safe installation, operation, and maintenance of the appliance.
Function Description
The Zanussi washing machine is designed for effective laundry treatment with low water, energy, and detergent consumption. It offers various wash programmes tailored to different fabric types and soiling levels. Key functions include:
- Washing Cycles: The machine performs a complete wash cycle, typically consisting of prewash (optional), main wash, rinses, and spin.
- Temperature Control: Users can select wash temperatures ranging from 30°C to 90°C, depending on the fabric type and programme.
- Spin Speed Selection: Adjustable spin speeds allow users to choose the intensity of water extraction, with maximum speeds varying by model (1000, 1100, 1200, or 1400 rpm) and fabric type.
- Detergent Dispensing: The machine features a dispenser drawer with compartments for prewash detergent, main wash detergent, and fabric softener.
- Safety Features: It includes a door locked light, which indicates when the door is secured during operation, and a balance control device to ensure stability during spinning.
Usage Features
The washing machine is operated via a control panel with several buttons and indicator lights:
- ON/OFF Button: Powers the machine on and off.
- MAINS-ON Light: Illuminates when the machine is switched on.
- FABRICS Button: Selects programmes based on fabric type (Cottons, Synthetics, Delicates, Wool).
- TEMPERATURE Button: Adjusts the wash temperature.
- SPIN SPEED Button: Changes the spin speed or activates the RINSE HOLD option.
- OPTIONS Button: Selects additional features like PREWASH, SUPER RINSE, and QUICK WASH.
- START/PAUSE Button: Initiates, pauses, or resumes a programme. It also controls draining and spinning after a RINSE HOLD cycle.
- SKIP/RESET Button: Clears the programme memory, selects special programmes, or advances the cycle to a specific phase (rinse & spin, spin only, drain).
- Programme Phase Indicator Lights: Display the current phase of the washing cycle (Prewash, Wash, Rinses, Rinse Hold, Spin, Drain, Clogged Filter, End).
Operating Sequence:
- Load Laundry: Open the door, place laundry in the drum, and close the door.
- Measure Detergent: Pull out the dispenser drawer and add detergent to the main wash compartment. Add prewash detergent and fabric softener if desired.
- Switch On: Press the ON/OFF button.
- Select Programme/Fabric: Use the FABRICS button to choose the appropriate programme.
- Select Temperature: Adjust the temperature with the TEMPERATURE button if needed.
- Select Spin Speed/RINSE HOLD: Choose the spin speed or RINSE HOLD option using the SPIN SPEED button.
- Select Options: Add any desired options (PREWASH, SUPER RINSE, QUICK WASH) with the OPTIONS button.
- Start Programme: Press the START/PAUSE button to begin.
During a Programme:
- Changing a Programme: Pause the machine, then make changes. Note that changing fabric type or temperature during the wash phase will restart the cycle from the beginning.
- Opening the Door: The door can be opened when the machine is paused, provided the temperature is below 40°C, water level is not high, and the drum is not turning. If these conditions are not met, switch off the machine and wait approximately 3 minutes.
- Cancelling a Programme: Pause the machine, then press the SKIP/RESET button repeatedly until all lights go out.
End of Programme:
- The machine stops automatically with an audible signal.
- If RINSE HOLD was selected, the START/PAUSE light flashes, and the programme phase indicator remains lit, indicating water needs to be drained.
- Press SKIP/RESET repeatedly to clear the programme memory.
- Switch off the machine, remove laundry, close the water supply tap, and disconnect the plug. Leave the door ajar to air the machine.
Washing Hints:
- Avoid overloading.
- Sort laundry by fabric type, colour-fastness, and soiling level.
- Empty pockets, remove hooks from curtains, and fasten zips/buttons.
- Wash new coloured items separately.
- Use appropriate detergent for automatic washing machines and correct quantities.
- For wool, use gentle detergent in small quantities.
- Pre-treat stubborn stains.
- Wash small items in a washing bag or pillow case.
- After non-colourfast washes, run a rinse and spin programme without garments to remove dye residue.
- Unplug the machine and turn off the water tap after use.
Maintenance Features
Regular maintenance ensures optimal performance and longevity of the appliance:
- Descaling: Periodically use a water softening powder to prevent lime deposits, following the manufacturer's instructions.
- After Each Wash: Leave the door open to prevent mould and stagnant smells and to preserve the door seal.
- Maintenance Wash: Regularly perform a maintenance wash (empty drum, hottest cotton programme, normal powder detergent) to remove residues.
- External Cleaning: Clean the exterior with soap and water, then dry thoroughly.
- Cleaning the Dispenser Drawer: Remove the drawer by pressing the catch, flush it under a tap, and remove accumulated powder. The top part of the additive compartment can be removed for easier cleaning.
- Cleaning the Drawer Recess: Use a small brush to clean the recess after removing the drawer.
- Cleaning the Filter: The water drain filter should be cleaned after every wash. Open the filter door, place a container underneath, unscrew and remove the filter, and clean it under running water. Ensure it is securely retightened.
- Cleaning the Water Inlet Filter: Turn off the water tap, unscrew the inlet hose, clean the filter with a hard bristle brush, and tighten the hose.
- Dangers of Freezing: If temperatures drop below 0°C, turn off the water tap, unscrew the inlet hose, unhook the drain hose, and run the draining programme to empty the machine. Reconnect hoses and ensure room temperature is above 0°C before restarting.
Installation Instructions:
- Unpacking: Remove all transit bolts and packing materials before use.
- Positioning: Install on a flat, hard floor, ensuring good air circulation and no contact with walls or furniture. For suspended wooden floors, place a waterproof wood panel underneath.
- Water Inlet: Connect the inlet hose to a cold water supply tap with a 3/4" thread. Ensure local water authority regulations are met.
- Water Drainage: Hook the drain hose into a standpipe (minimum 60cm, maximum 90cm above floor level) or a sink, using the supplied "U-Piece". Ensure an air break between the drain hose and standpipe.
- Levelling: Level the machine by adjusting the feet to prevent vibration and noise.
- Electrical Connection: The appliance must be earthed. Ensure the electricity supply voltage matches the rating plate. If replacing the plug, follow the specified wiring code (Green/Yellow for Earth, Blue for Neutral, Brown for Live). For permanent connection, install a double pole switch with a minimum 3mm gap between contacts.