This document is an instruction manual for the Zanussi ZV 50 (FB 50 R) home freezer, providing comprehensive guidance for its installation, operation, and maintenance.
Function Description
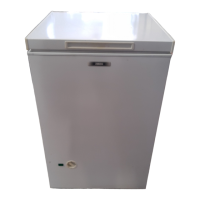
The Zanussi ZV 50 (FB 50 R) is a home freezer designed for storing frozen and deep-frozen food, freezing products in quantities specified in the user's instructions, and making ice. It is suitable for domestic use. The appliance's operation is controlled by a thermostat, which automatically regulates the internal temperature. The compressor's operation is interrupted and restarted as needed to maintain the desired temperature. The thermostat can be set to different positions, including "SUPER" for intensive freezing, "NORMAL" for regular storage, and "STOP" to switch off cooling.
Important Technical Specifications
- Model/Type: ZV 50 (FB 50 R)
- Gross capacity: 50 liters
- Net capacity: 50 liters
- Width: 525 mm
- Height: 520 mm
- Depth: 587 mm
- Energy consumption: 0.68 kWh/24h (248 kWh/year)
- Energy class: B (according to EU Standards)
- Freezing capacity: 7 kg/24h
- Rising time: 17 hours
- Rated power: 85 W
- Weight: 25 kg
- Electrical connection: 230 V AC (~) 50 Hz supply. The appliance requires a socket with a protective contact (earthed socket).
- Climate class: The appliance is designed to operate within specific ambient temperature ranges:
- SN: +10 ... +32 °C
- N: +16 ... +32 °C
- ST: +18 ... +38 °C
Operating outside these ranges can affect performance and energy consumption.
Usage Features
Putting it into Use:
After plugging in, the thermostatic control knob should be turned to the "SUPER" position for at least 4 hours to pre-cool the appliance. Afterwards, it should be reset to "NORMAL" for storing frozen and deep-frozen foods.
Controlling the Temperature:
The thermostat knob allows for temperature adjustment. Turning it clockwise increases cooling intensity. The "NORMAL" position aims for -18 °C or lower. The "STOP" position switches off the compressor. The internal temperature is influenced by the thermostat setting, ambient temperature, frequency of door openings, and the quantity of food inside. In high demand situations (e.g., heatwaves), the compressor may operate continuously without causing damage.
Freezing:
Foods should be properly prepared before freezing. For small quantities, set the thermostat to "SUPER" 4 hours before. For larger quantities, set it 24 hours before. This ensures continuous compressor operation for effective freezing. After freezing, reset the knob to "NORMAL."
Storing:
Once freezing is complete, it's practical to move frozen products to the storing compartment to free up space in the freezing compartment for new items. Intermediate freezing does not harm already stored foods.
Making Ice Cubes:
Fill the provided ice cube tray with water and place it in the frozen food compartment. Wetting the bottom of the tray can speed up the process. Ready ice cubes can be removed by running water over the tray and twisting or hitting it.
Safety Precautions:
- Keep the instruction manual with the appliance.
- The appliance is for domestic food storage only.
- Service and repairs, including power cord changes, must be done by manufacturer-qualified specialists using accessory parts supplied by them.
- Always unplug the appliance before cleaning or maintenance. If the socket is hard to reach, switch off the current.
- Do not lengthen the power cord.
- Avoid using sharp, pointed, or hard devices for defrosting or cleaning.
- Prevent liquids from reaching the temperature control.
- Avoid eating ice or ice cream immediately after removal from the freezer to prevent injury.
- Do not refreeze thawed food; use it as soon as possible.
- Store pre-packed frozen food according to manufacturer instructions.
- Do not use electric heating appliances or chemicals for faster defrosting.
- Do not place hot pots on plastic parts.
- Do not store flammable gas, liquids, carbonated drinks, bottled drinks, or bottled fruits in the freezer, as they may explode or cause damage.
Child Safety:
- Do not allow children to play with packaging (plastic foil can cause suffocation).
- Adults must handle the appliance; children should not play with it or its controls.
- When discarding the appliance, unplug it, cut the power cable, and remove the door to prevent entrapment or electric shock.
Installation Safety:
- Place the appliance against a wall to prevent touching warm parts (compressor, condenser).
- Ensure the plug is not in the socket when moving the appliance.
- Do not stand the appliance on the power cord.
- Ensure adequate air circulation to prevent overheating.
- If not placed on floor level, provide appropriate fixing (e.g., sucking disks).
Useful Information and Advice:
- After closing the freezer door, wait 2-3 minutes before reopening to allow internal pressure to equalize.
- Ensure the freezer operates at a temperature of -18 °C or lower to prevent food deterioration.
- Regularly check the appliance's operation to detect failures early.
Energy Saving Hints:
- Avoid sunny locations and proximity to heat sources.
- Ensure good ventilation for the condenser and compressor.
- Wrap products tightly to prevent frost buildup.
- Avoid contact between new products and already frozen foods.
- Minimize door open time and unnecessary openings.
- Only put warm foods into the appliance once they reach room temperature.
- Keep the condenser clean.
Maintenance Features
Defrosting:
Frost and ice buildup is a natural part of operation. Thick layers reduce cooling efficiency and increase energy consumption.
- Smaller frost and ice can be scraped off with the enclosed ice scraper after removing the freezing shelf.
- When ice coating is too thick, full defrosting is necessary.
- How to defrost:
- 4-5 hours before defrosting, turn the thermostat to "SUPER" to pre-cool stored foods.
- Break the appliance's circuit (unplug).
- Remove frozen foods and place them in a cool basket lined with paper or cloth, or in another frozen compartment.
- Leave the door open.
- Sweep melting water towards the outlet channel with a cloth or sponge. Place a high tray in front of the appliance to collect defrost water.
- To speed up defrosting, place a pot or dish of warm water on the freezing shelf.
- After defrosting, wipe all wet surfaces.
- Restore power to the appliance.
- Return the foods.
Regular Cleaning:
It is recommended to clean the freezer interior during defrosting.
- Do not use household cleaner or soap.
- After unplugging, wash the interior with lukewarm water and wipe it.
- Clean the door gasket with clean water.
- After cleaning, restore power.
- Remove dust and dirt from the back of the appliance and the condenser once or twice a year.
When the Refrigerator is Not in Use:
For long periods of disuse:
- Break the appliance's circuit.
- Remove all foods.
- Defrost and clean as described above.
- Leave the door open to prevent air buildup inside.
Troubleshooting:
The manual provides a troubleshooting chart for common issues, such as insufficient cooling, overcooling, no cooling, and noisy operation, along with possible causes and solutions. It emphasizes that compressor and circulating sounds are normal and that the appliance operates discontinuously. If advice doesn't resolve the issue, contact brand-mark service.
Installing the Appliance:
- Transportation, Unpacking: Deliver in original packaging, in a vertical position. Do not switch on for approximately 2 hours after transportation. Check for damages upon unpacking and report immediately.
- Cleaning: Remove all adhesive tape. Wash the interior with lukewarm water and mild detergent, then wipe dry.
- Placement: Ensure the appliance stands level. Avoid sunny places or proximity to radiators/cookers. If near a gas or electric cooker, leave 3 cm space (or use 0.5-1 cm non-flammable insulation). If near an oil or coal-fired stove, leave 30 cm space. The refrigerator is designed to be pushed fully to the wall, but minimal distances (e.g., 2.5 cm from side, 10 cm from top for wall-cupboard placement) should be maintained for ventilation.
Change of Door Opening Direction:
The door opening direction can be refitted from right-handed to left-handed. This involves:
- Breaking the circuit.
- Removing the top door holder covering and unscrewing the top door holder.
- Taking off the door.
- Unscrewing and removing the lower door holder.
- Fixing the lower door holder on the other side.
- Fitting the door to the lower door holding pin.
- Removing plastic coverings from door holder holes on the other side and placing them on the original side.
- Fixing the top door holder with screws, ensuring the door edge is parallel with the cupboard side.
- Replacing the top door holder covering.
- Moving the handle and plastic nails to the other side.
Professional service is recommended for this procedure if the user does not wish to perform it.