Power Supply Access and Replacement
Preparations
The exterior cover must be removed prior to proceeding. (980428-101)
Tools:
#2 Philips screw driver
980428-103 Rev. 1 Prelim. 17
Power Supply Access
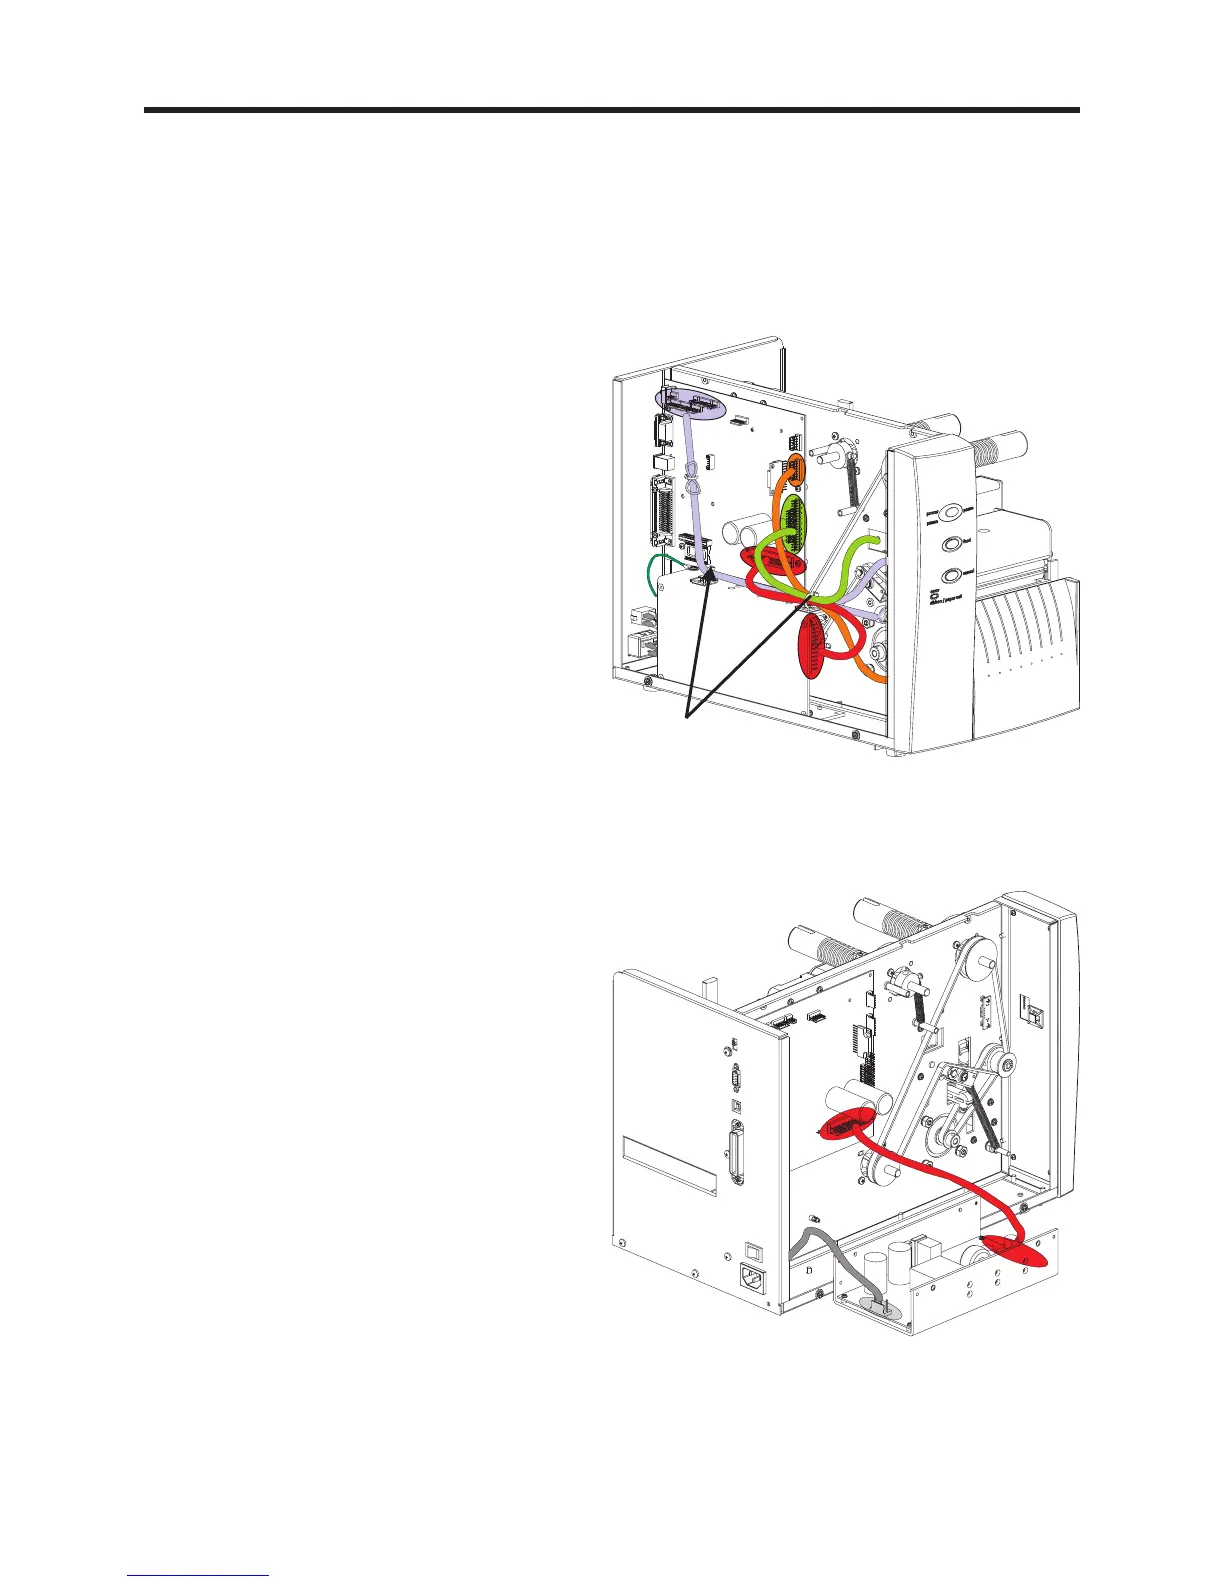
1. Cut the two (2) cable ties securing the cable
harness to the top of the power supply.
Caution - Do not cut the cables.
2. Remove the screw securing the grounding
lug and wire to the top of the power supply.
3. With the printer tilted towards the right side,
hold the power supply while removing the
two (2) screws (and washers) that secure it
to bottom panel.
3. Swing the power supply out and down next
to the printer to gain access to the AC
voltage setting jumpers, power supply
cables or make a DC voltage adjustment.
Cut Cable Ties
Caution - The connectors on the cable
harness may come loose or inadvertently
disconnected if special care is not taken.
Power Supply Removal
4. Disconnect the AC and DC power cable
from the power supply.
Installation
1. Reverse the power supply removal and
access processes.
-- If replacing the power supply, the AC
voltage should be set prior to installing the
power supply, see procedure 980428-104.
-- The DC voltage setting should be verified
prior to attaching the power supply to the
printer, see procedure 980428-105.
Important - Re-attach the ground wire to
the power supply in the following order:
1) Star Washer 2) Ground wire and lug
(from toroid) 3) Star Washer 4) Nut.
Tighten the nut to 7.5 ±2 in. Lb. torque
 Loading...
