12
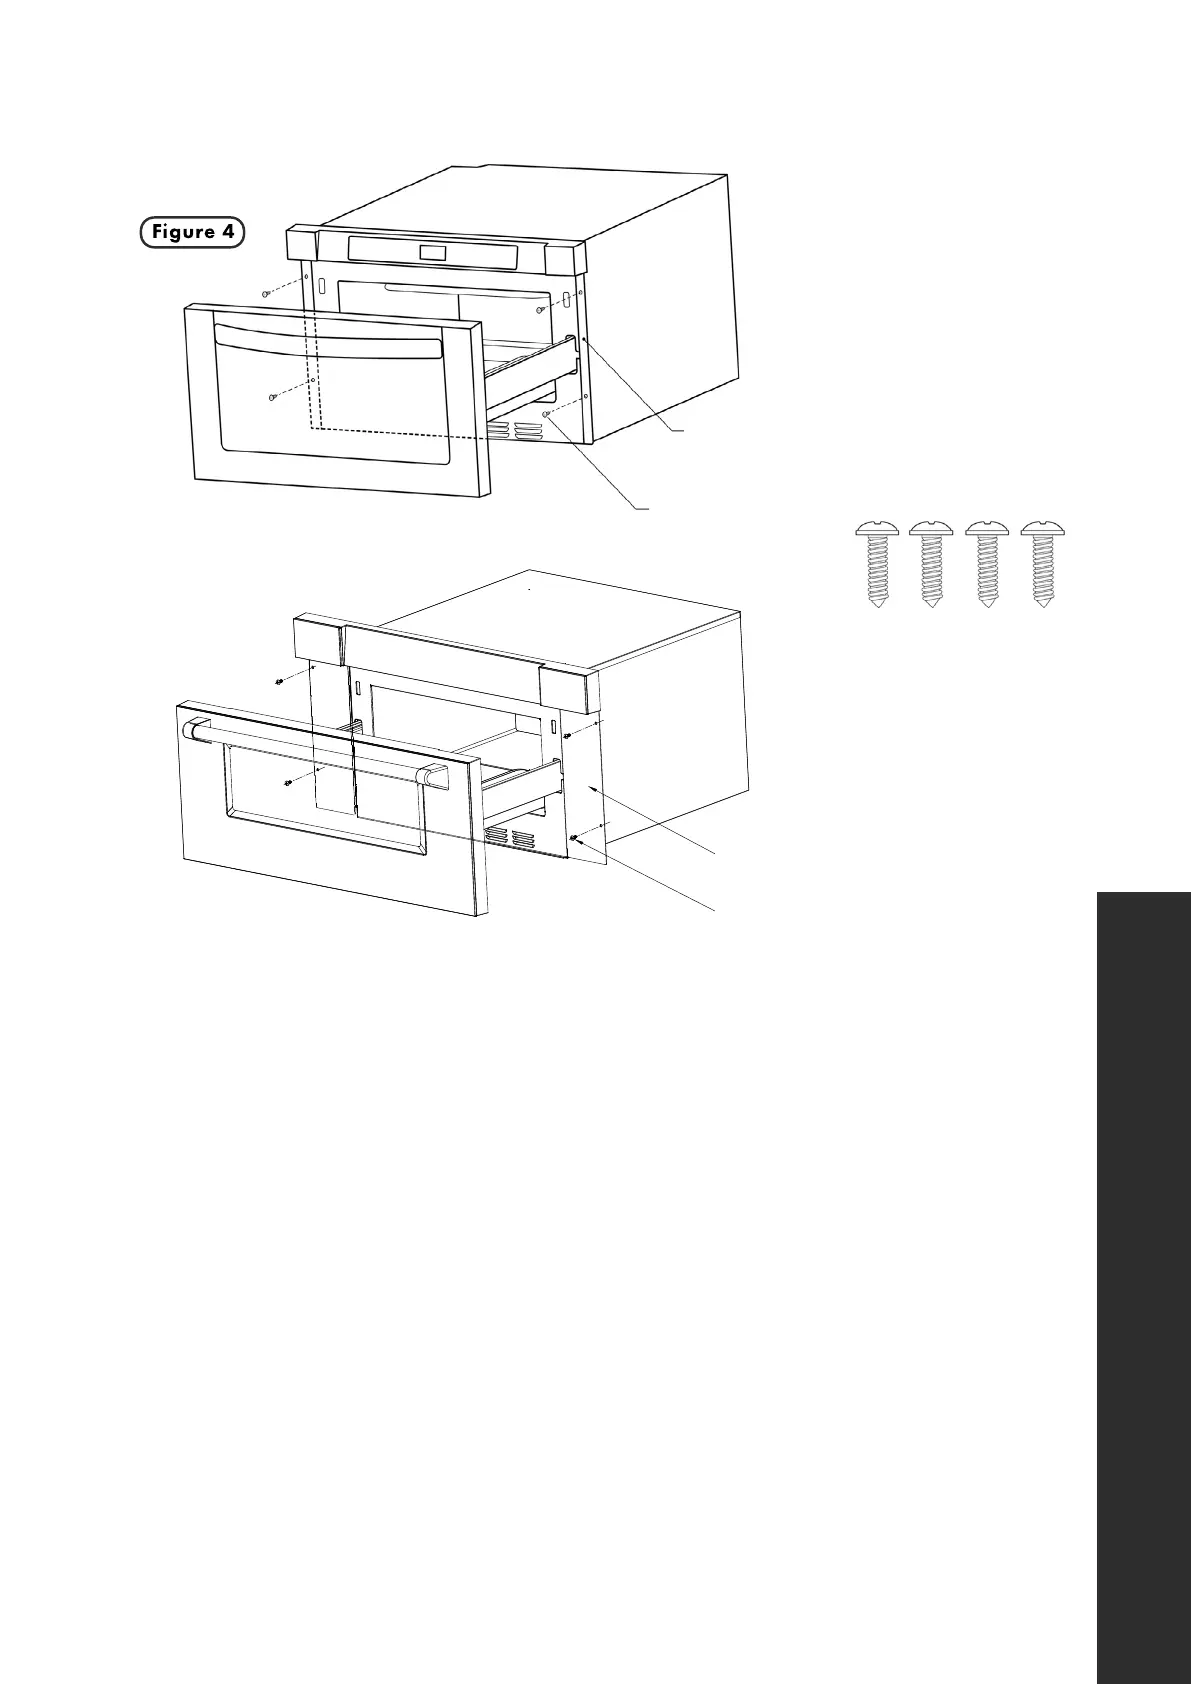
1. Place the drawer adjacent to the wall or cabinet opening.Plug the power supply cord into the electrical outlet.
2. Carefully guide the drawer into the prepared opening. Avoid pinching the cord between the oven and the wall.
3. Slide the drawer all the way until the mounting
flange is flush with the face of the cabinet.
See Figure 5.
4. Open the drawer. Using the 4 holes on
the drawer as a template , pre drill the cabinet
using a 1/16" bit. See Figure 5.
5. Secure the drawer with the 4 screws supplied.
See Figure 6.
The name plate includes model and serial number. Open the Microwave Drawer fully. The label is beyond the
back wall of the microwave cavity facing up from the flat surface.
Refer to the Operation Manual for cleaning instructions.
4 Screws
4 Sc
rews
Figure 6
MODEL AND SERIAL NUMBER LOCATION
CARE,CLEANING AND MAINTENANCE
DRAWER INSTALLATION
Figure 5
installation instructions
4
DRAWER INSTALL ATION
MODEL & SERIAL NUMBER LOCATION
CARE, CLEANING & MAINTENANCE
Figure 4
Figure 5
1. Place the drawer adjacent to the wall or cabinet opening.
Plug the power supply cord into the electrical outlet.
2. Carefully guide the drawer into the prepared opening.
Avoid pinching the cord between the oven and wall.
3. Slide the drawer all the way until the mounting flange
is flush with the face of the cabinet.
4. Open t
4. Open the drawer. Using the 4 holes on the drawer as
a template, pre-drill the cabinet using a 1/16” bit.
5. Secure the drawer with the 4 screws supplied (Figure 5).
To locate the model and serial number, open the microwave drawer fully. The label can be found beyond
the back wall of the microwave cavity, facing up from the flat surface.
Refer to the Operation Manual for cleaning and care instructions.
INSTALLATION
DRAWER INSTALLATION
1. Place the drawer adjacent to the wall or cabinet opening. Plug the power supply
cord into the electrical outlet.
2. Carefully guide the drawer into the prepared opening. Avoid pinching the cord
between the oven and wall.
3. Slide the drawer all the way until the mounting flange is flush with the face of the
cabinet.
4. Open the drawer. Using the four holes on the drawer as a template, pre-drill the
cabinet using a 1/16” bit.
5. Secure the drawer with the four screws supplied.
24” Microwaves
(MWD-1 & MWD-1-BS)
30” Microwaves
Drawer Installation
Mounting Screws
Mounting Flange
Mounting Flange
Mounting Screws
 Loading...