Do you have a question about the ZMODO H9104V and is the answer not in the manual?
Discusses the advantages of using the DVR for surveillance and monitoring tasks.
Details the technical parameters and features of the DVR, including video compression and frame rates.
Lists all the items included in the DVR package for user verification.
Outlines additional items that can be purchased separately to enhance DVR functionality.
Provides a brief overview of the 9104V DVR, highlighting its capabilities and target audience.
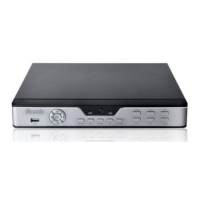
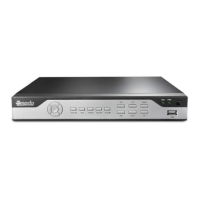
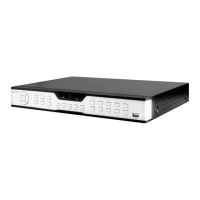
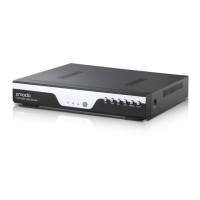
Describes the layout and functions of buttons and ports on the front of the DVR unit.
Explains how to navigate through the DVR's menus and options using the front panel buttons.
Details the various input and output ports located on the back of the DVR.
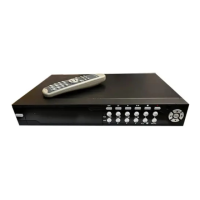
Lists the functions assigned to each button on the DVR's remote control for convenient operation.
Provides step-by-step instructions for installing a SATA hard drive into the DVR for video storage.
Guides users through the process of connecting different types of cameras to the DVR's video input ports.
Explains how to properly connect the power supply to the DVR and cameras.
Details how to connect the DVR to a TV or computer monitor for viewing video feeds.
Describes how to connect a USB drive for backing up recorded video files.
Guides on connecting a USB mouse for easier navigation of the DVR interface.
Provides instructions for connecting the DVR to a network for remote access.
Explains the initial startup process when the DVR is first powered on.
Describes what the user sees on the screen after the DVR has started, including live video feeds.
Guides on configuring the DVR's date and time for accurate recording timestamps.
Outlines the primary categories and sub-menus available within the DVR's main interface.
Explains the common buttons found across DVR menus and their functions, like Default, Apply, and Exit.
Describes how to access a shortcut menu for frequently used functions via a right-click.
A table summarizing the main menu options and their corresponding functions.
Allows assigning custom names (nicknames) to individual camera channels for easier identification.
Controls the placement of the channel title within the live camera view.
Enables adjustment of video properties like Hue, Brightness, Contrast, and Saturation for each camera.
Option to show or hide the live video feed for each specific camera channel.
Configures the display of current date/time on live view and during recording.
Sets up automatic scrolling through camera channels at defined intervals for continuous monitoring.
Allows enabling or disabling recording for individual camera channels.
Choose the encoding rate for recorded video, affecting file size and clarity.
Enables or disables audio recording for specific channels connected to the audio input.
Sets the maximum duration for individual video files, impacting search and storage.
Configures how the DVR records, such as continuous, schedule, or motion detection.
Allows defining specific times and days for recording to occur for each channel.
Configures how the DVR connects to the network, choosing between Static, DHCP, or PPPoE.
Sets the port for the Netviewer software connection, typically 9000.
Defines the port for accessing the DVR via Internet Explorer, usually port 80.
Assigns a local IP address to the DVR for network communication.
Sets the subnet mask for the DVR's local area network interface.
Specifies the router's local address for network traffic routing.
Sets the Domain Name Server address, typically the router's local address.
Provides methods to verify that the DVR can be accessed from a local computer or network.
Instructions for testing local connectivity using the Netviewer (D9 Client) software.
Steps for testing local access via a web browser, involving ActiveX control configuration.
Guides on setting up Dynamic DNS for remote access using a hostname instead of a static IP address.
Explains how to search for recorded video files based on date and time.
Describes how to interpret the visual indicators (colors) on the calendar to identify recorded events.
Details the methods for selecting and playing back recorded video files.
Explains the functions available in the file list for sorting, navigating, and backing up recordings.
Provides instructions on how to copy recorded files to a USB backup device.
Covers status checks, formatting, and overwrite settings for the DVR's hard drive.
Details how to configure alarm notifications like buzzer, HDD space, and video loss alerts.
Sets durations for external alarms and the DVR's buzzer.
Guides on configuring the DVR to send email alerts for alarm conditions, including SMTP settings.
Sets up communication protocols, baud rate, data bits, stop bits, and parity for PTZ cameras.
Sets a username for mobile phone access to the DVR.
Sets a password for mobile phone access to the DVR.
Defines the port number for mobile phone communication with the DVR.
Provides steps for downloading and configuring the mobile viewing software on various devices.
Configures motion detection for individual channels, including status and sensitivity.
Allows defining specific zones within the camera view for motion detection.
Configures the system's date, time, time zone, and daylight saving time.
Manages administrator and user passwords for DVR access and identification.
Configures display settings like VGA resolution and video system (NTSC/PAL).
Sets the display language for all menus and text on the DVR interface.
Displays the DVR's unique network hardware identifier, which cannot be changed.
Configures automatic reboot schedules and other system maintenance tasks.
Provides guidance on updating the DVR's firmware, requiring technical support.
Resets all DVR settings to their factory defaults.
Explains how to perform a safe reset of the DVR system.
Configures PTZ camera parameters like protocol, baud rate, data bits, stop bits, and parity.
Details the controls for manually operating PTZ cameras, including speed, zoom, focus, and iris.
Allows programming PTZ cameras to execute defined surveillance routines and set points.
Explains how to use specific commands like GOTO, SET, and CLEAN for PTZ camera positioning.
Guides on initiating and terminating the programmed PTZ camera surveillance routines.
Outlines the terms and duration of the product warranty provided by the manufacturer.
Information regarding the policy for trading in or upgrading existing hardware.
Discusses procedures and considerations for upgrading the DVR's firmware.
| Video Inputs | 4 channels |
|---|---|
| Video Output | HDMI, VGA |
| Recording Resolution | 1080p |
| Compression Format | H.264 |
| Power Supply | DC 12V |
| Hard Drive Support | 1 SATA HDD |
| Remote Access | Yes |
| Motion Detection | Yes |
| Remote Viewing | Yes |
| Storage Capacity | Up to 6TB HDD |
| Network Interface | RJ45 |
| USB | 2 x USB 2.0 |
| Operating Temperature | -10°C to 55°C |