Zurn Industries, LLC | Specication Drainage Operation
1801 Pittsburgh Avenue, Erie, PA 16502, Ph. 855.663.9876
In Canada | Zurn Industries Limited
7900 Goreway Drive, Unit 10, Brampton, Ontario L6T 5W6, Ph. 877.892.5216
www.zurn.com
WARNING: Cancer and Reproductive Harm - www.P65Warnings.ca.gov
ADVERTENCIA: Cáncer y daño reproductivo - www.P65Warnings.ca.gov
AVERTISSEMENT: Cancer et eets néfastes sur la reproduction - www.P65Warnings.ca.gov
Rev. -
Date: 4/03/2020
C.N. No. 142533
Prod. | Dwg. No. C66 Page 2 OF 3
Z1231EZ
WALL-HUNG LAVATORY ADJUSTABLE CARRIER INSTALLATION INSTRUCTIONS
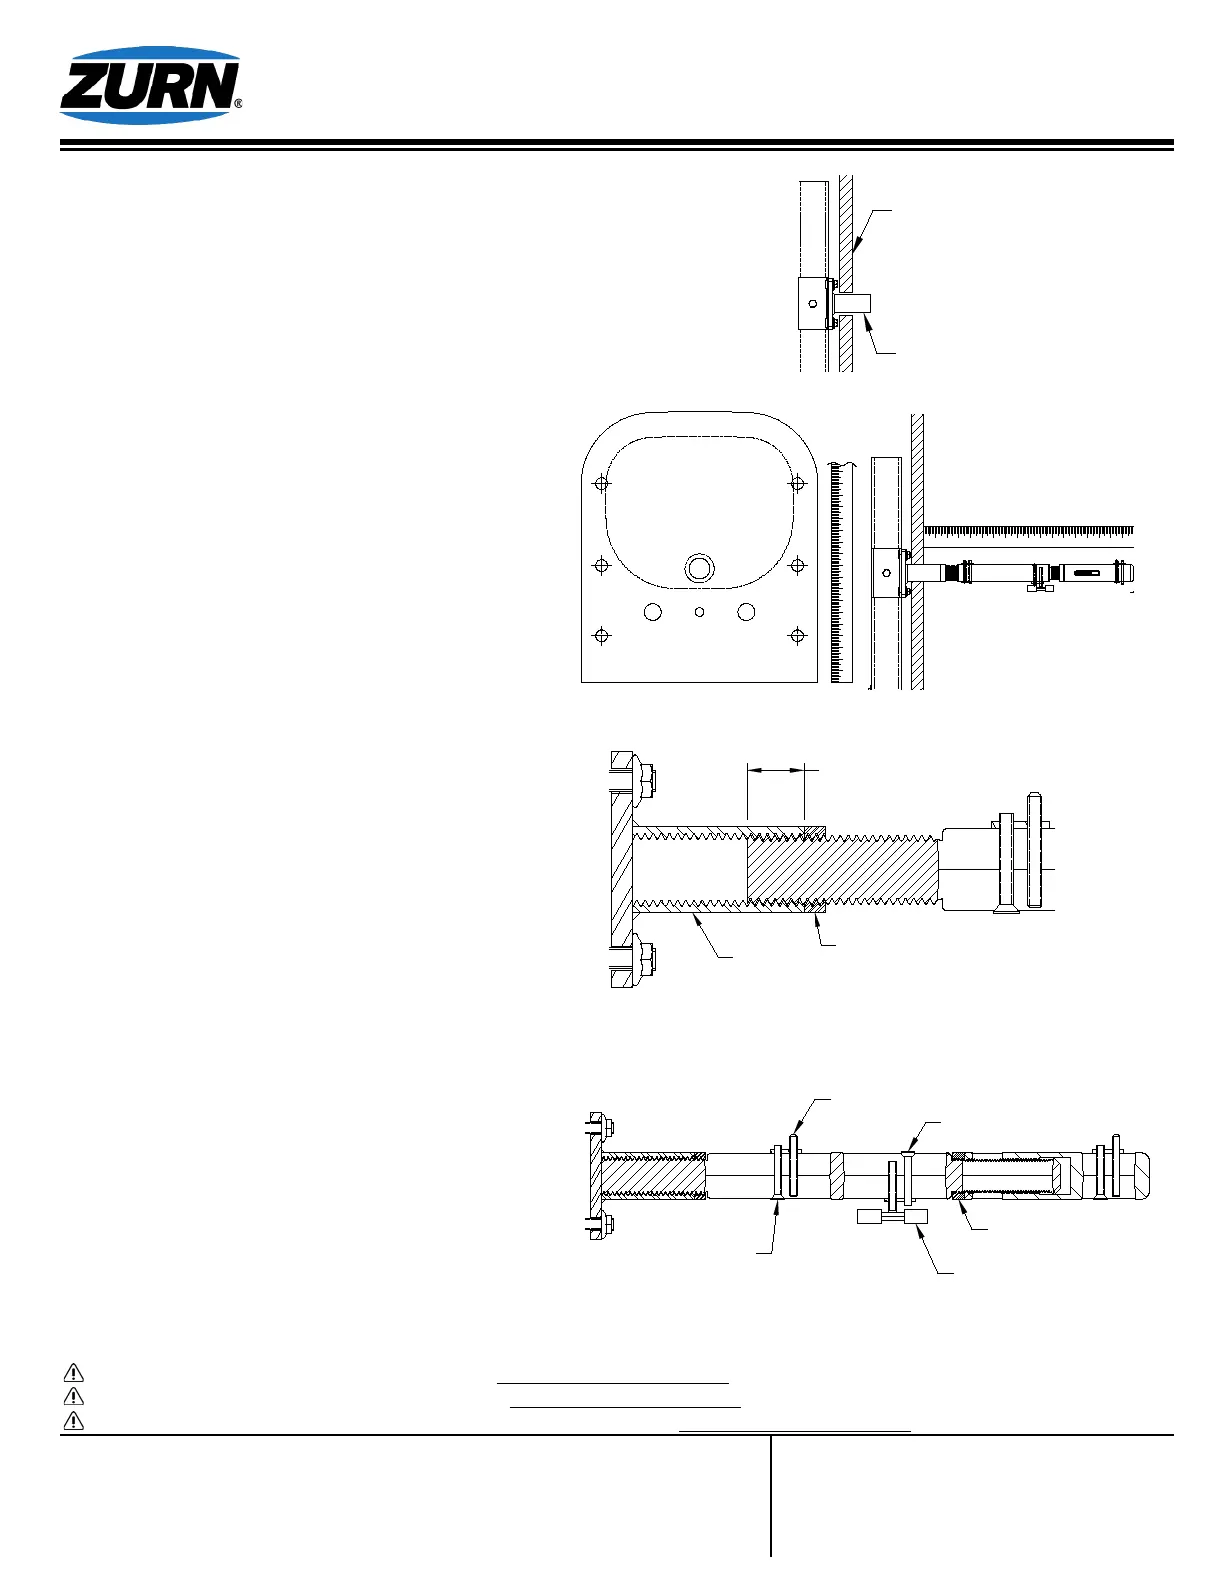
6. Install drywall accordingly so that the sleeves
protrude through the opening in the wall. See Fig. 6
7. Position arms inside of header plate mounting
sleeves in accordance to the dimensions provided
by the lavatory manufacturer.
8. Secure arms by tightening the locknut against
the sleeve until snug. Ensure a minimum thread
engagement of 1 inch. See Fig. 8
9. Obtain locations of leveling screws and lock-down,
provided by the lavatory manufacturer, and adjust
the leveling screws and lock-down hardware as
needed. Loosen the clamping screws to adjust the
washers for leveling screws and lock-down to desired
locations then tighten. Adjust arm extension as
required and tighten locknut against extension until
snug. Ensure a minimum thread engagement of 1
inch. See Fig. 9
Note: Arm Extension will not always need to be
utilized. Usage will depend on lavatory used.
Fig. 6
Fig. 7
Fig. 8
Leveling Screw
Lock-down
Clamping Screw
Clamping Screw
Locknut
Fig. 9
1
2 3
4 5
6
7
8 9 10
11
12 13
14 15
16
17
18
1
2 3
4 5
6
7
8
9 10
11
12 13
14 15
16
17
Sleeve
Thread engagement
Locknut
 Loading...