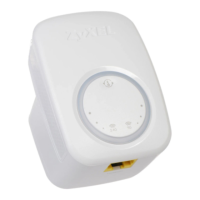
WX3100-2
N
e
e
d
W
i
F
i
h
e
r
e
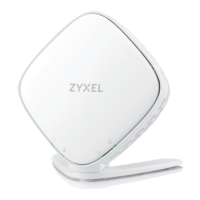
WX3100-1
3
WX3100-2
Power
2
Utilisez le câble Ethernet fourni pour connecter le premier port LAN du WX3100 (WX3100-1)
au port LAN du Non-MPro Mesh Router. Attendez que les voyants LED POWER et LINK
soient allumés en vert fixe.
Placez le deuxième WX3100 (WX3100-2) à l'endroit où vous souhaitez étendre votre réseau
WiFi.
Attendez que les voyants LED POWER et LINK du WX3100-2 soient allumés en verts (de
préférence) ou orange fixe pour indiquer que l'appairage automatique est terminé.
Rapprochez le WX3100-2 du WX3100-1 si le voyant LINK est rouge.
Scannez le code QR à la dernière page pour installer l'application MPro Mesh pour gérer
votre WX3100-1.
Utilizzare il cavo Ethernet incluso per collegare la prima porta LAN WX3100 (WX3100-1) alla
Non-MPro Mesh Router porta LAN. Attendere che i LED POWER e LINK siano fissi sul verde.
Posizionare il secondo WX3100 (WX3100-2) dove si desidera estendere la propria rete WiFi.
Attendere fino a quando i LED POWER e LINK su WX3100-2 non diventano verdi fissi
(preferito) o ambra per indicare che l'associazione automatica è stata completata.
Avvicinare il WX3100-2 al WX3100-1 se il LED LINK è rosso.
Scansiona il codice QR dell'ultima pagina per installare l'app MPro Mesh per gestire il tuo
WX3100-1.
Gebruik de bijgesloten Ethernetkabel om de eerste WX3100 (WX3100-1) LAN-poort aan te
sluiten op de LAN-poort van de Non-MPro Mesh Router. Wacht tot de POWER en LINK LEDs
constant groen zijn.
Plaats de tweede WX3100 (WX3100-2) op de plek waar u uw WiFi-netwerk wilt uitbreiden.
Wacht tot de POWER en LINK LEDs op de WX3100-2 groen (bij voorkeur)) of amber worden
om aan te geven dat het automatisch koppelen klaar is. Verplaatst de WX3100-2 tot
dichter bij de WX3100-1 als de LINK LED rood is.
Scan de QR-code op de laatste pagina om de MPro Mesh App te installeren om jouw
WX3100-1 te beheren.
Liitä ensimmäisen WX3100-laitteen (WX3100-1) LAN-portti Non-MPro Mesh Router
LAN-porttiin laitteen mukana toimitetulla Ethernet-kaapelilla. Odota, kunnes POWER- ja
LINK-merkkivalot palavat vihreinä.
Aseta toinen WX3100-laite (WX3100-2) paikkaan, johon haluat laajentaa langatonta
verkkoa.
Odota, kunnes POWER- ja LINK-merkkivalot palavat vihreinä (ensisijainen) tai oransseina
WX3100-2-laitteessa laiteparin automaattisen muodostamisen merkiksi. Siirrä WX3100-2
lähemmäs WX3100-1-laitetta, jos LINK-merkkivalo palaa punaisena.
Voit asentaa MPro Mesh -hallintasovelluksen WX3100-1-laitteelle skannaamalla viimeisellä
sivulla olevan QR-koodin.
Använd den medföljande Ethernet-kabeln för att ansluta den första WX3100 (WX3100-1)
LAN-poten till Non-MPro Mesh Router LAN-port. Vänta tills lysdioderna POWER och LINK
lyser med fast grönt sken.
Placera den andra WX3100 (WX3100-2) där du vill utöka ditt WiFi-nätverk.
Vänta till lysdioderna POWER och LINK LEDs på WX3100-2 lyser med fast grönt (föredrag-
et) eller gult sken för att indikera att den automatiska parkopplingen är klar. Flytta
WX3100-2 närmare WX3100-1 om lysdioden LINK lyser med rött sken.
Skanna QR-koden på den sista sidan för att installera MPro Mesh App för att hantera din
WX3100-1.
Pomocí přiloženého ethernetového kabelu připojte první LAN port WX3100 (WX3100-1) k
LAN portu síťového routeru, který nepodporuje MPro Mesh. Počkejte, až budou LED diody
POWER a LINK svítit zeleně.
Umístěte druhý WX3100 (WX3100-2) tam, kde chcete rozšířit svou WiFi síť.
Počkejte, až budou LED diody POWER a LINK na WX3100-2 svítit zeleně (preferováno) nebo
oranžově označující, že je automatické párování dokončeno. Přesuňte WX3100-2 blíže k
WX3100-1, pokud LED LINK svítí červeně.
Naskenujte QR kód na poslední stránce a nainstalujte si aplikaci MPro Mesh, pro správu
vašeho WX3100-1.
Pomocou priloženého ethernetového kábla pripojte prvý LAN port WX3100 (WX3100-1) k
LAN portu sieťového routera, ktorý nepodporuje MPro Mesh. Počkajte, kým budú LED diódy
POWER a LINK svietiť zeleno.
Umiestnite druhý WX3100 (WX3100-2) tam, kde chcete rozšíriť svoju WiFi sieť.
Počkajte, kým budú LED diódy POWER a LINK na WX3100-2 svietiť zeleno (preferované)
alebo oranžovo označujúce, že je automatické párovanie dokončené. Presuňte WX3100-2
bližšie k WX3100-1, ak
LED LINK svieti na červeno. Naskenujte QR kód na poslednej stránke a nainštalujte si
aplikáciu MPro Mesh, pre správu vášho WX3100-1.
FR
2
3
IT
NL
1
2
3
1
2
3
1
FI
2
3
1
4
4
4
4
SK
2
3
1
4
CZ
2
3
1
4
SE
2
3
1
4
On - The WiFi connection to the WX3100-1 is good.Green
On - The signal is too strong. Suggest moving the WX3100-2 away
from the WX3100-1.
Amber
On - The signal is too weak. Move the WX3100-2 closer to the WX3100-1.Red
On - The Ethernet cable is connected to the WX3100-2 LAN port.Green
Link
On - Power is on or the MPro Mesh configuration process is done.
Blinking - The WX3100-2 is starting up or under the MPro Mesh
configuration process.
Green
On - The WX3100-2 detects a system error.
Blinking (Fast) - The WX3100-2 is upgrading firmware.
Blinking (Slow) - The Easy Mesh process has failed.
With Wireless Connection
With Wired Connection
Red
Power
WiFi
On - 2.4G/5G WiFi is ready.
Blinking - The WX3100-2 is transmitting/receiving WiFi data.
Green
Off - 2.4G/5G WiFi is disabled.
Blinking - The WPS is in process.
Off - The WPS process is done.
Amber
WPS
3/3
Managing Your WX3100 Using the MPro Mesh App
Download the MPro Mesh app to manage your WX3100.
Note: To manage your Mesh network, connect the MPro Mesh app to the Controller (WX3100-1 in
Scenario 1 or MPro Mesh Router in Scenario 2).
Scan this QR code to see a list of Zyxel
devices that support MPro Mesh.
Scan this QR code to see steps for setting
up your WX3100 with the MPro Mesh app.
 Loading...