www.123filter.com | (678) 261-7611 sales@ispringfilter.com Page 4
Installation Tips
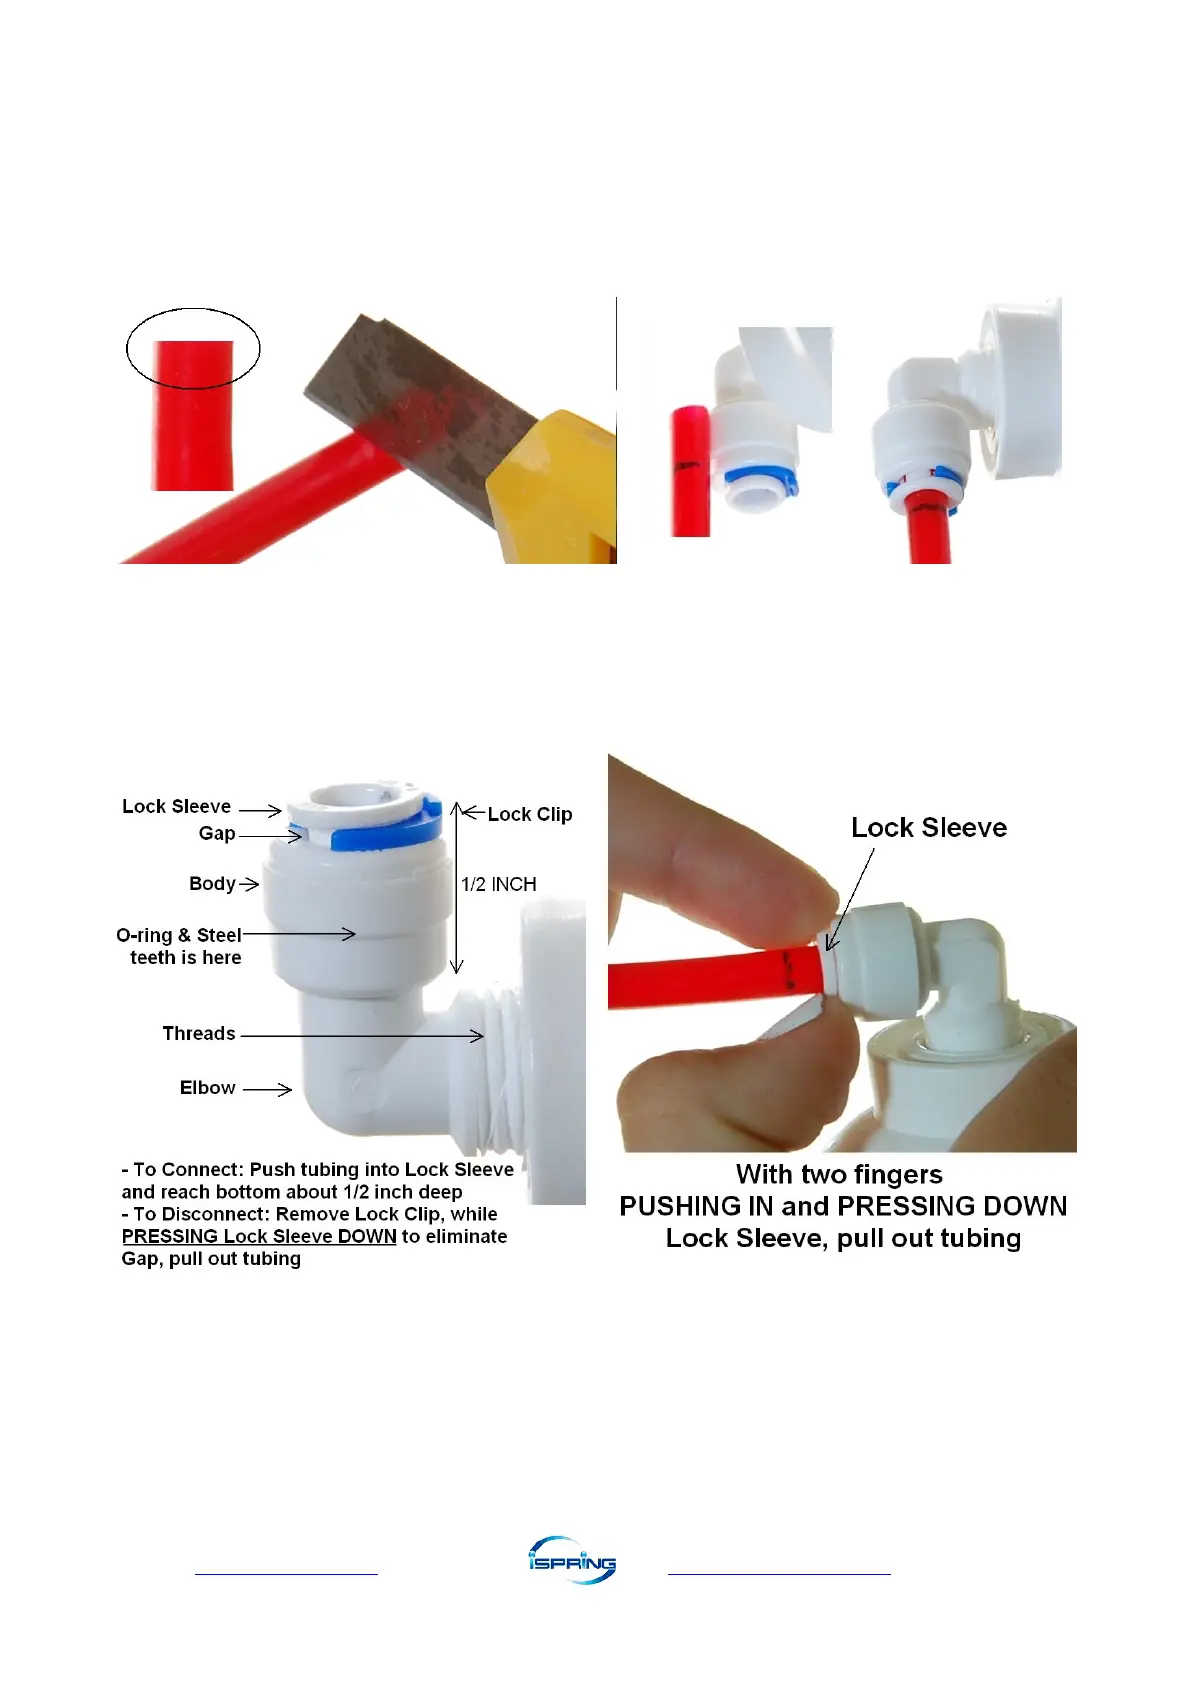
How to use Quick-Connect fitting
Figure 1
To connect:
1. See Figure 1. Check and cut the tubing end squarely and cleanly with utility knife or scissors.
2. Make a mark at the end of tubing. The lengh is about ½ inch, the depth of the fitting body.
3. Fully insert the tubing until the mark is about to disappear. This ensures that it is sealed by the
O-ring near the bottom.
Figure 2
Figure 3
To disconnect:
1. See Figure 2 and 3. Remove the blue Lock Clip.
2. With two fingers PUSHING IN and PRESSING DOWN the Lock Sleeve to eliminate the
Gap that the blue Lock Clip occupied, pull the tubing out. (Pressing down the Lock Sleeve
releases the spring-loaded steel teeth that grab the tubing inside the fitting body).
 Loading...