EasyManua.ls Logo

1byone O00QH-0509 User Manual

1byone O00QH-0509
4 pages
To Next Page IconTo Next Page
Page #1 background imageLoading...
Page #1 background image
1
Summary
Strong anti-interference performance
The full range of fine temperature compensation
CE, FCC and ROHS compliant
Specication
Power Supply (Receiver): DC 6 V or 1.5 V C Battery x 3
Power Supply (PIR Transmitter): DC 4.5 V (1.5 V AAA Battery x 3 )
Working Current (Receiver Alarming): <180mA
Working Current (Receiver Chiming): <200mA
Working Current (PIR Transmitter): <15mA
Quiescent Current (Receiver): <400uA
Quiescent Current(PIR Transmitter): <50uA
Sensing Angle: 45°
Sensing Distance: 5–8 m
Ring Volume: 100dB ( within 0.5 m)
Reception Sensitivity: - 85dBm
Accessories List
1 x PIR Transmitter 1 x Receiver 1 x Instruction Manual
3 x Wall Plugs 3 x Screws
Names for Parts
(1) LED Indicator (2) Speaker (3) DC 6V Input Jack
(4) Switch for Chime, Low, Alarm (5) On/Off Switch (6) Sound-and-Flash Switch Button
(7) Auto-learning Code Button (8) PIR (9) LED Indicator
Driveway Alert Alarm Instruction Manual
SKU: O00QH-0509
(1)
(2)
CHIME
LOW
ALARM
(3)
(4)
OFF
ON
(5)
(6)
(7)
(8)
(9)
Question and Answer IconNeed help?

Do you have a question about the 1byone O00QH-0509 and is the answer not in the manual?

1byone O00QH-0509 Specifications

General IconGeneral
Brand1byone
ModelO00QH-0509
CategorySecurity System
LanguageEnglish

Summary

Names for Parts

LED Indicator (Receiver)

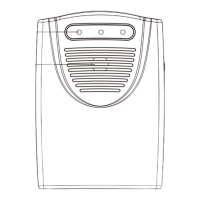
Indicator light on the receiver unit.

Speaker (Receiver)

Audio output for the receiver unit.

DC 6V Input Jack

Power input port for the receiver.

Chime/Low/Alarm Switch

Switch to select receiver sound mode.

On/Off Switch (Receiver)

Power switch for the receiver unit.

Sound and Flash Switch Button

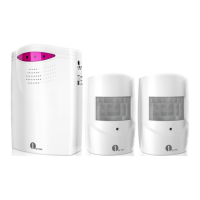
Button to control sound and LED flash.

Auto-learning Code Button

Button for transmitter pairing.

PIR Transmitter Unit

The motion detection sensor unit.

LED Indicator (PIR Transmitter)

Indicator light on the PIR transmitter.

Battery Installation

Receiver Battery Installation

Instructions for inserting batteries into the receiver.

PIR Transmitter Battery Installation

Instructions for inserting batteries into the PIR transmitter.

Mounting Instructions

Wall Mount (PIR Transmitter Unit)

Guide for mounting the PIR transmitter to a wall.

Wall Mount (Receiver Unit)

Guide for mounting the receiver unit to a wall.

Installation and Functions

PIR Transmitter Installation Location

Recommendations for placing the PIR transmitter for optimal detection.

Functions Overview

Explanation of the device's operational functions and settings.

Related product manuals