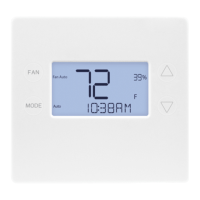
Z-WAVE PLUS V2 THERMOSTAT QUICK START GUIDE
2GIG-STZ-1
Copyright © 2020 Nortek Security & Control
Congratulations on your purchase of the 2GIG Thermostat. Its easy to install.
Lets get started.
1. Remove Existing Thermostat
TURN OFF POWER and remove the existing thermostat to expose the wiring terminals.
TAKE A PICTURE of the old thermostat wiring. This will allow reinstallation of the old thermostat if
necessary and help with troubleshooting.
C
RG
W
Y
C
R
G
W
Y
LABEL THE WIRES TO MATCH
THE OLD THERMOSTAT TERMINAL
MARKINGS. LABELS NOT INCLUDED.Existing Thermostat Terminals
TAKE A PICTURE!
2. Preparation for Installing Thermostat
Open the back panel as shown. Feed the wires from the wall through the access hole. Mount the back
panel to wall with anchors and Phillips screws (provided).
Back Panel
Body (with PCB)
Use thumbs to grip and pull
to separate Back Panel
Y2 Y1 G RC RH C AUX/E O/B HUM– HUM+
Y2 Y1 G RC RH C W1 W2 W3 HUM– HUM+
Anchors (2)
Provided
Phillips Screws (2) Provided
Feed wires through access
4. Mounting the Thermostat to Wall
Mount the thermostat body/front panel onto the wall mounted base by pressing in place until it snaps
all around the edges.
Body/Front Panel
Back Panel
(Mounted to Wall)
Terminal Block
Snap Together
Front Panel
Back
Panel
HUM- HUM+W3W2W1CRHRCGY1Y2
HUM- HUM+O/BAUX/ECRHRCGY1Y2
WCR
GY
Standard
Reference
Standard
Terminals
(Labeled Wires)
3. Connect the Wires
Connect the wires to proper terminals based on your system setup (see instruction manual for details).
5. Install Batteries
If the thermostat is going to be battery operated, open front panel and install four (4) AA batteries into
the battery compartment.
NOTE: Please do not install batteries if powering through C wire.
Back Panel/Body
(Attached to Wall)
Front Panel
Z-Wave QR Code
Battery
Compartment
Front Panel
Back
Panel
Snap Together
Use Fingernails
at Indents on
top of the Case
Back Panel/
Body on Wall
Front Panel to Battery
Compartment

 Loading...